User access and customisation
User access
The Software Solutions Maintenance team will set up your access to Dynamics 365 and assign your user role(s) on the relevant application.
If you have any queries on your specific application or your access to the menu options, please contact help@it.ox.ac.uk.
Customisation
Select the 'Settings' icon near the top-right corner of the page to customise your Dynamics application and to view your user information.
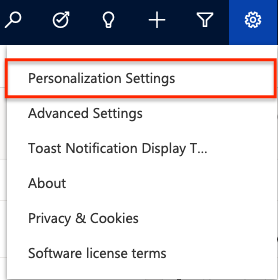
This shows the options that are available for customisation or information.
Select Personalization Settings to set your own personal options.
Set Personal Options
This enables the default display settings to be changed for your user role and your email templates to be managed.
General Tab
Select the 'General' tab to change how your views are displayed.
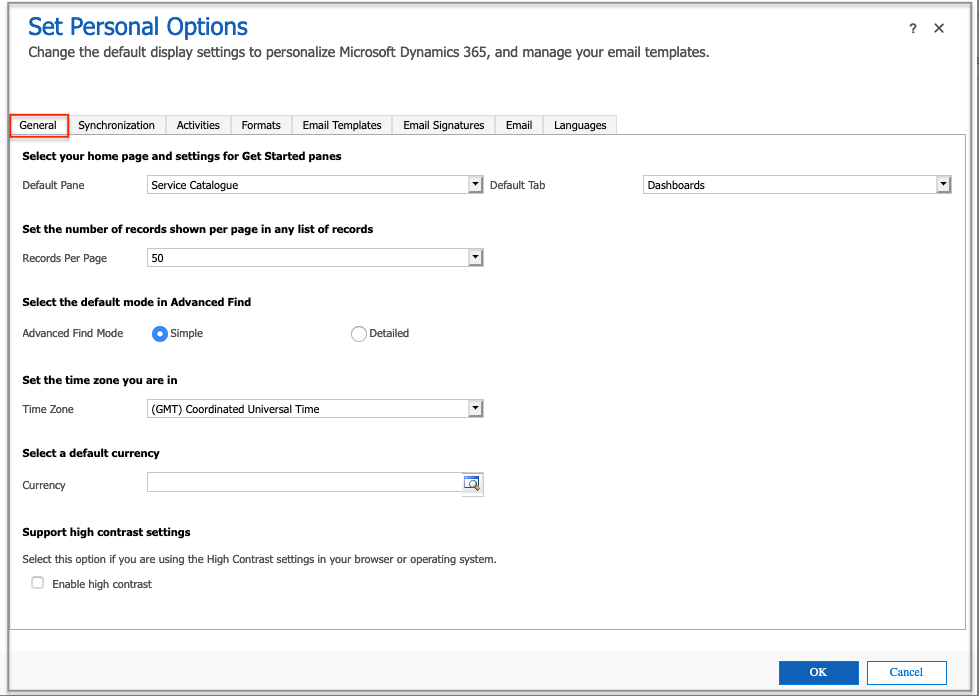
The links below will take you to the relevant information:
> Set records to be listed per page
Set your Home page
When you first login to your application, the Home page may be set up to display the Dashboards for your application.

You can change this to display any of the other views you have access to as your Home page.

Alternatively, if there is a Workplace or another pane in your application, you can select one of the views from there as your Home page.

Click 'OK' to save the changes.
Set records to be listed per page

List views are usually set up to display 50 records per page by default.

This can be changed to list either 25, 50, 75, 100 or 250 records per page.
Click 'OK' to save the changes.
Select Other Settings
These other settings should not normally need to be changed.
- Set Advanced Find Mode
- Set Time Zone
- Set default currency
- Set high contrast settings
- Set default country/region code
View your user information.
This link at the bottom of the Set Personal Options page will open a new window to display your account and user information.
The Related Teams option will list the team(s) that you are assigned to.
Email Templates tab
Select the Email Templates tab to view and modify your own/all existing templates and to create new ones.
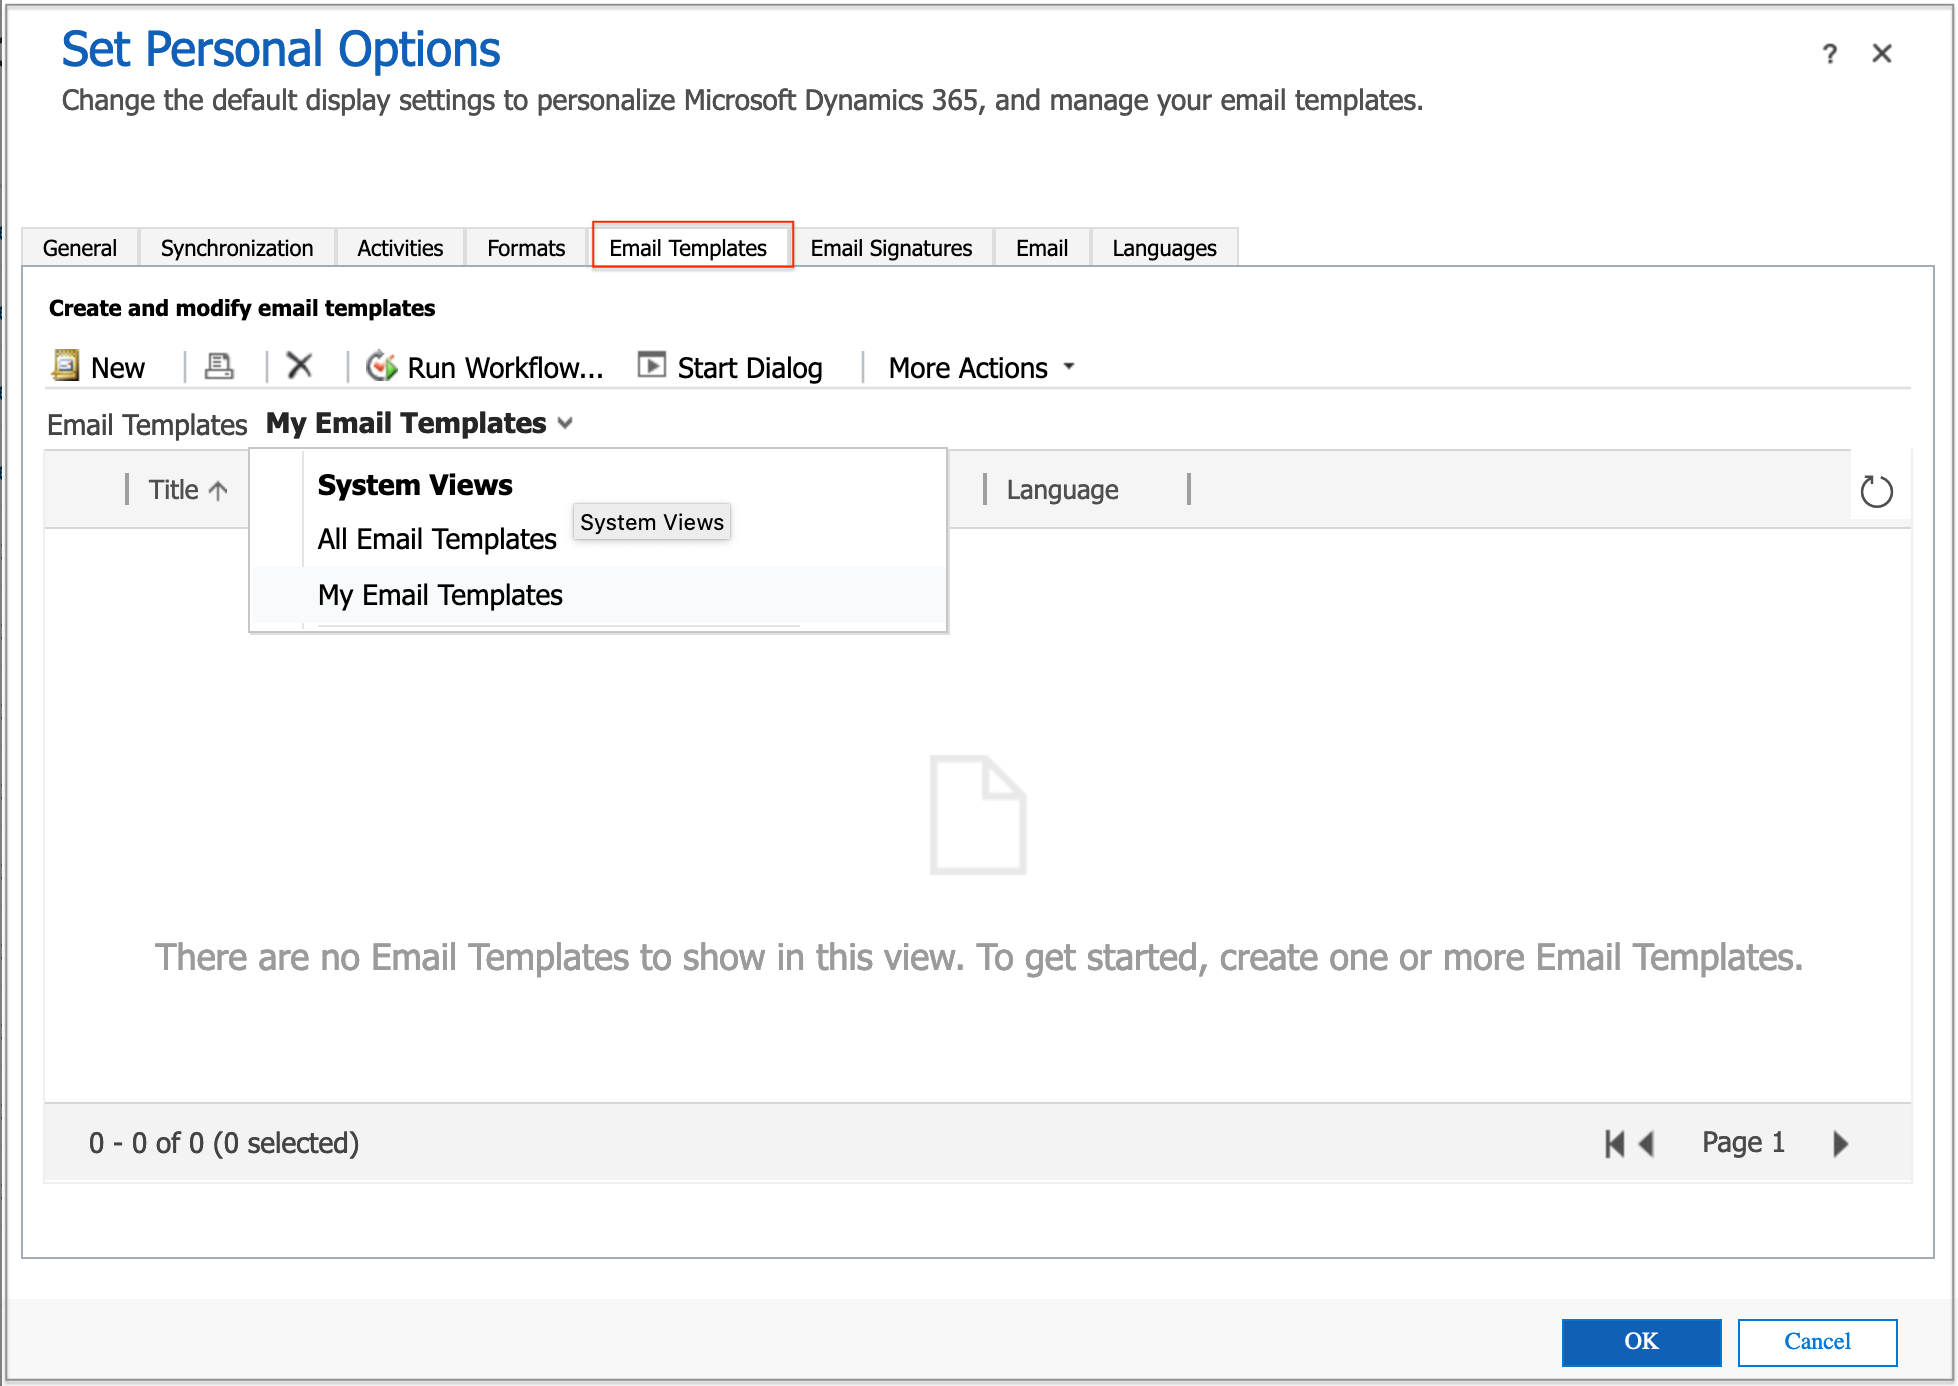
To create a new template, Click on 'New' and select a template type to use.
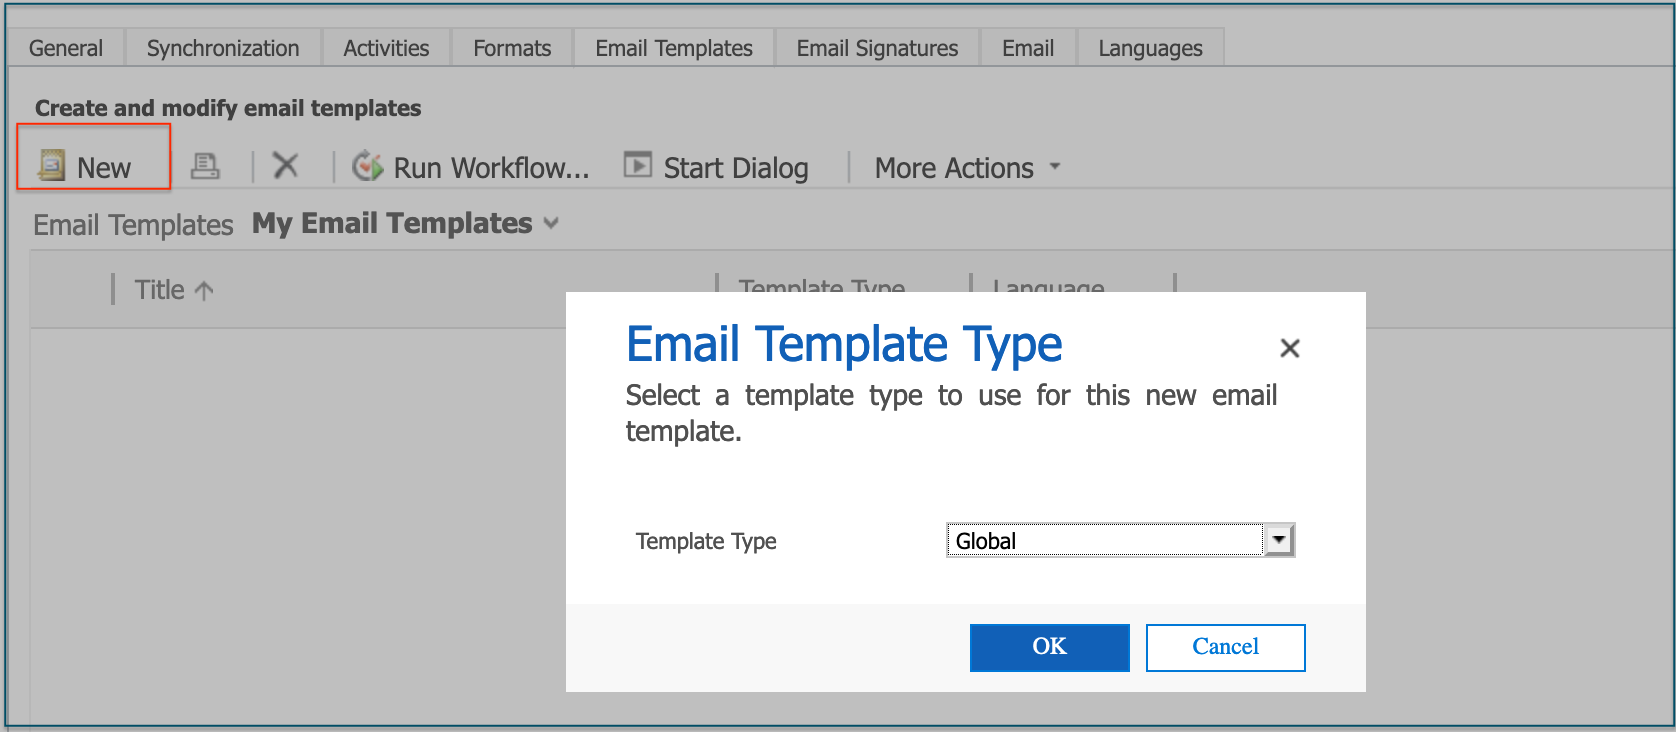
A blank email template will be displayed for you to fill in the default information.
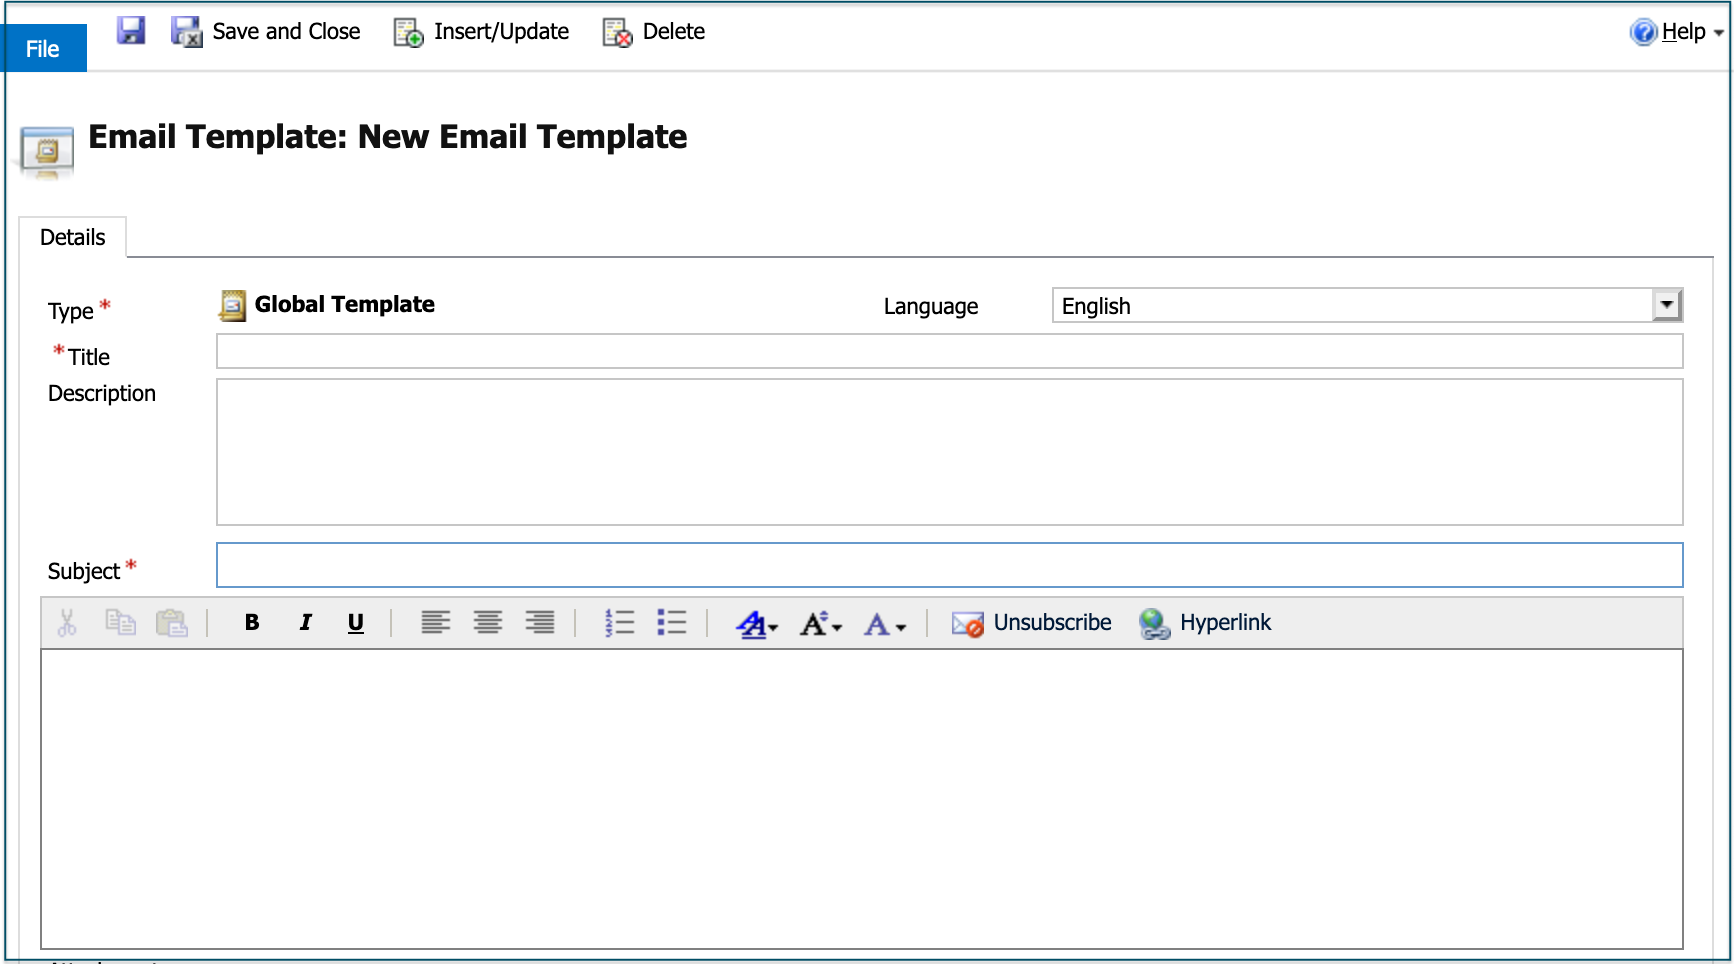
After filling in the details, press 'Save' or 'Save and Close'. The template is saved as your personal template by default.
Refresh the 'My Email Templates' list to display the newly created template.
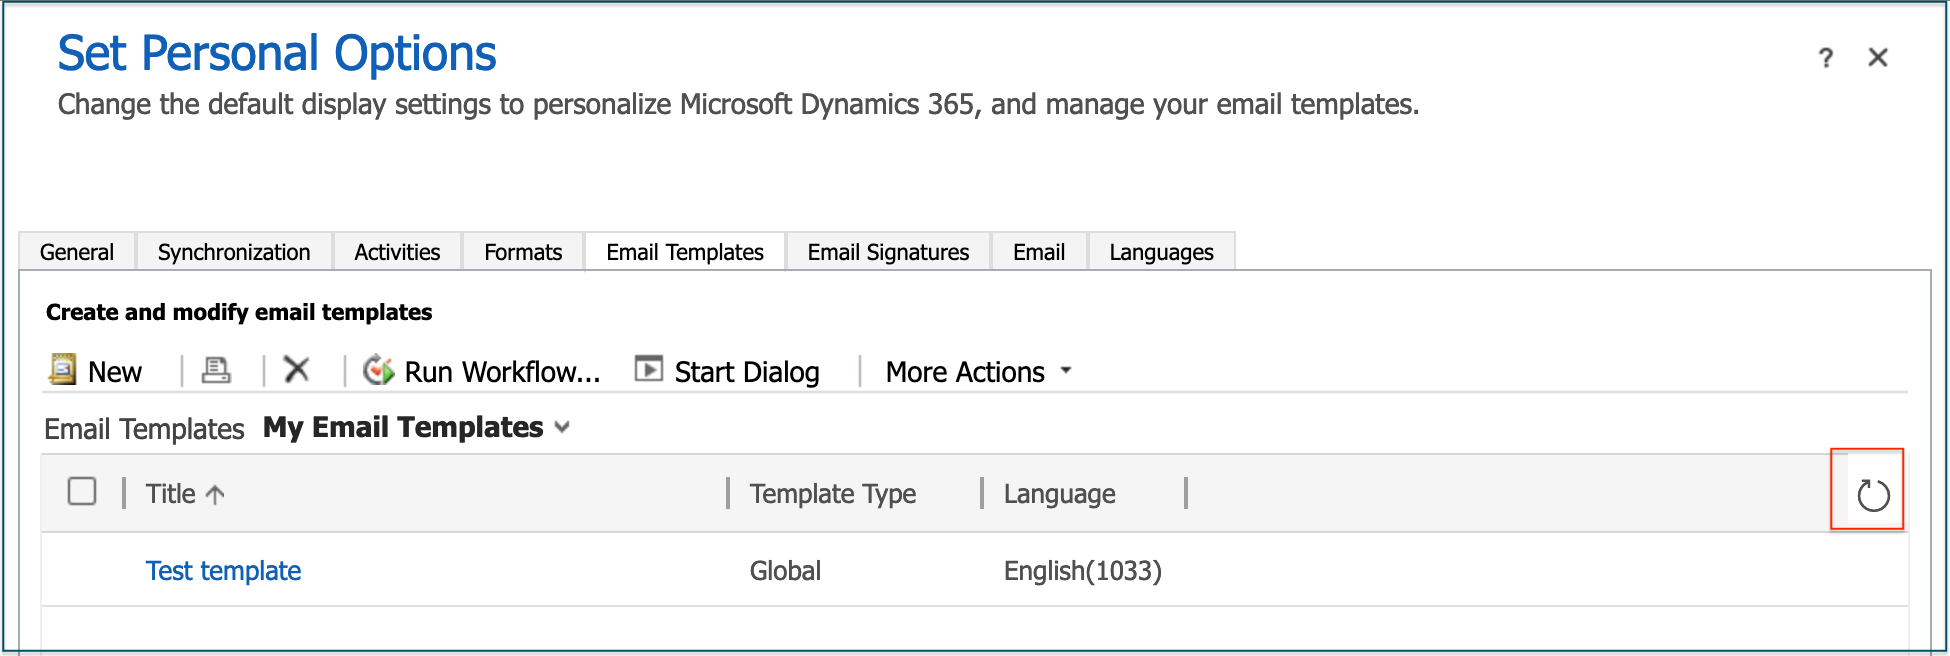
If you have sufficient permission to share a personal template, open it from the 'My Email Templates' list, then click on the Actions dropdown and select 'Make Template Available to Organization'.

The template will then appear on the list of 'All Email Templates', as viewable by your Organization.
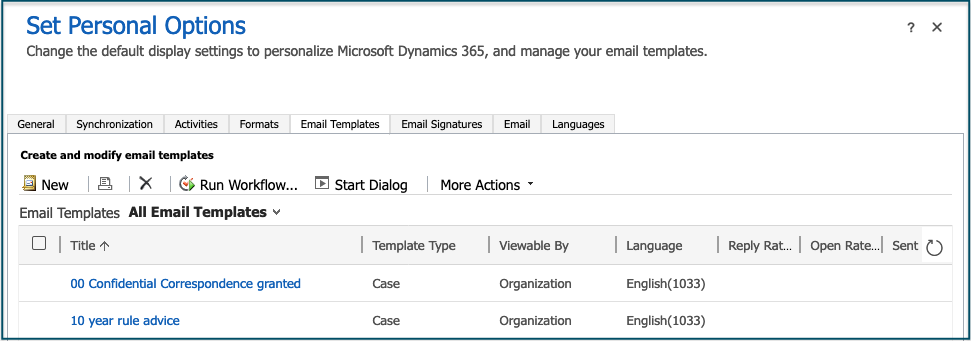
Tip. Prefixing template titles with a number, as shown above, helps to group templates into different categories, making them easier to search for when inserting templates into emails.
Email Signatures tab
Select the 'Email Signatures' tab to create a new signature and to view and modify existing ones.
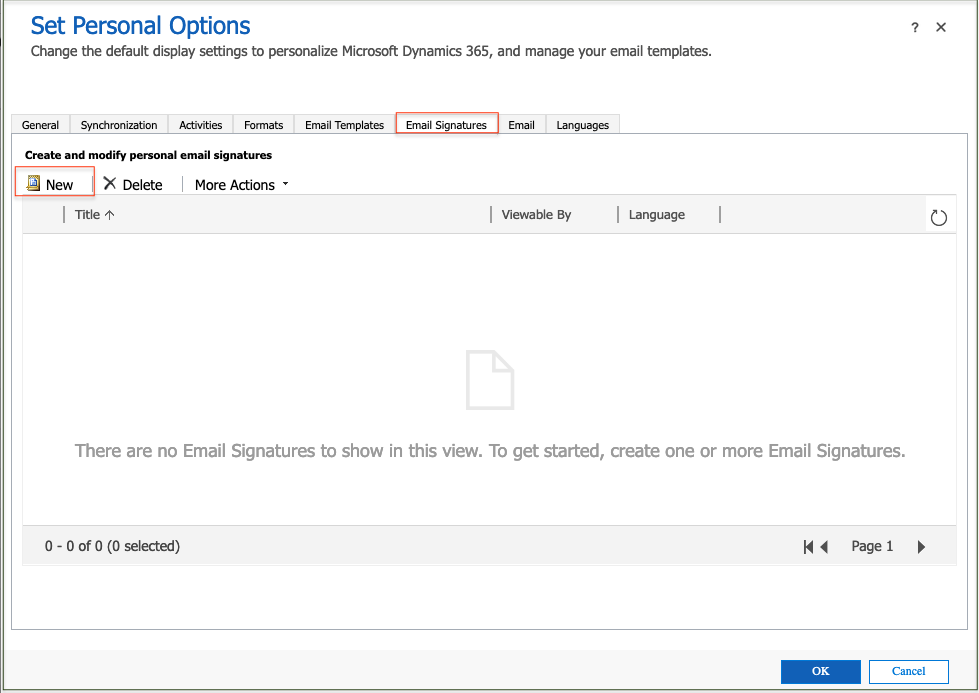
To create a new signature, Click on 'New'. A form will be displayed for you to fill in the details.
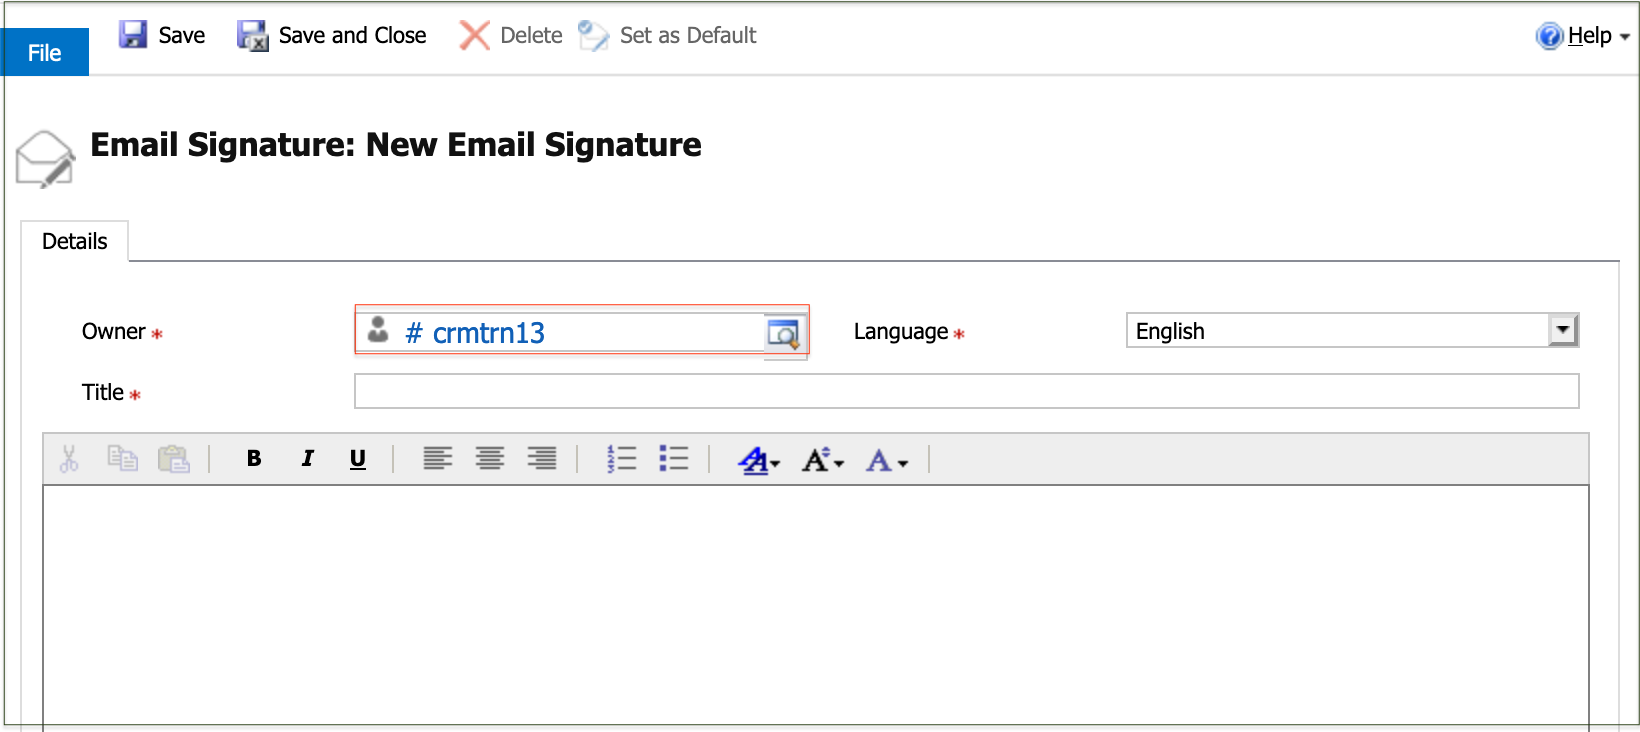
The Owner will default to the individual who creates the signature.
Enter a Title and the details as required.


Tip. If the required font is not available on the Signature form, you can copy & paste the signature from the email editor form into the signature form and it will retain the formatting.
Team Signatures
It will require extra permission to create Team signatures that are visible to team members - please email help@it.ox.ac.uk if this is required.
Other Personal Options tabs
The settings on these tabs should not be changed:
- Synchronization
- Activities
- Formats
- Languages
Other Settings options
These settings should not be changed:
- Advanced Settings
- Toast Notification Display Times


