Searching, Sorting and Filtering
Dynamics Searching, Sorting and Filtering will help to find, scan and limit the records in a list. Some or all of these can be applied simultaneously to either quickly find or analyse the data.
The links below take you to the information you need to use Searching, Sorting and Filtering in Dynamics:
> Sorting columns on a list page
> Filtering columns on a list page
> Advanced filters on a list page
> Searching for users and teams
Searching on a list page
At the top right corner of each list page, there is a Quick Find Search box that provides a quick and easy way to reduce the records in a list and display only those records that contain data of interest. It is used to search for text within the view, usually on the primary field in the entity, but some views may be customised to search across multiple columns.
The search text can contain letters, numbers and some symbols such as "&" and "/", and is case insensitive.
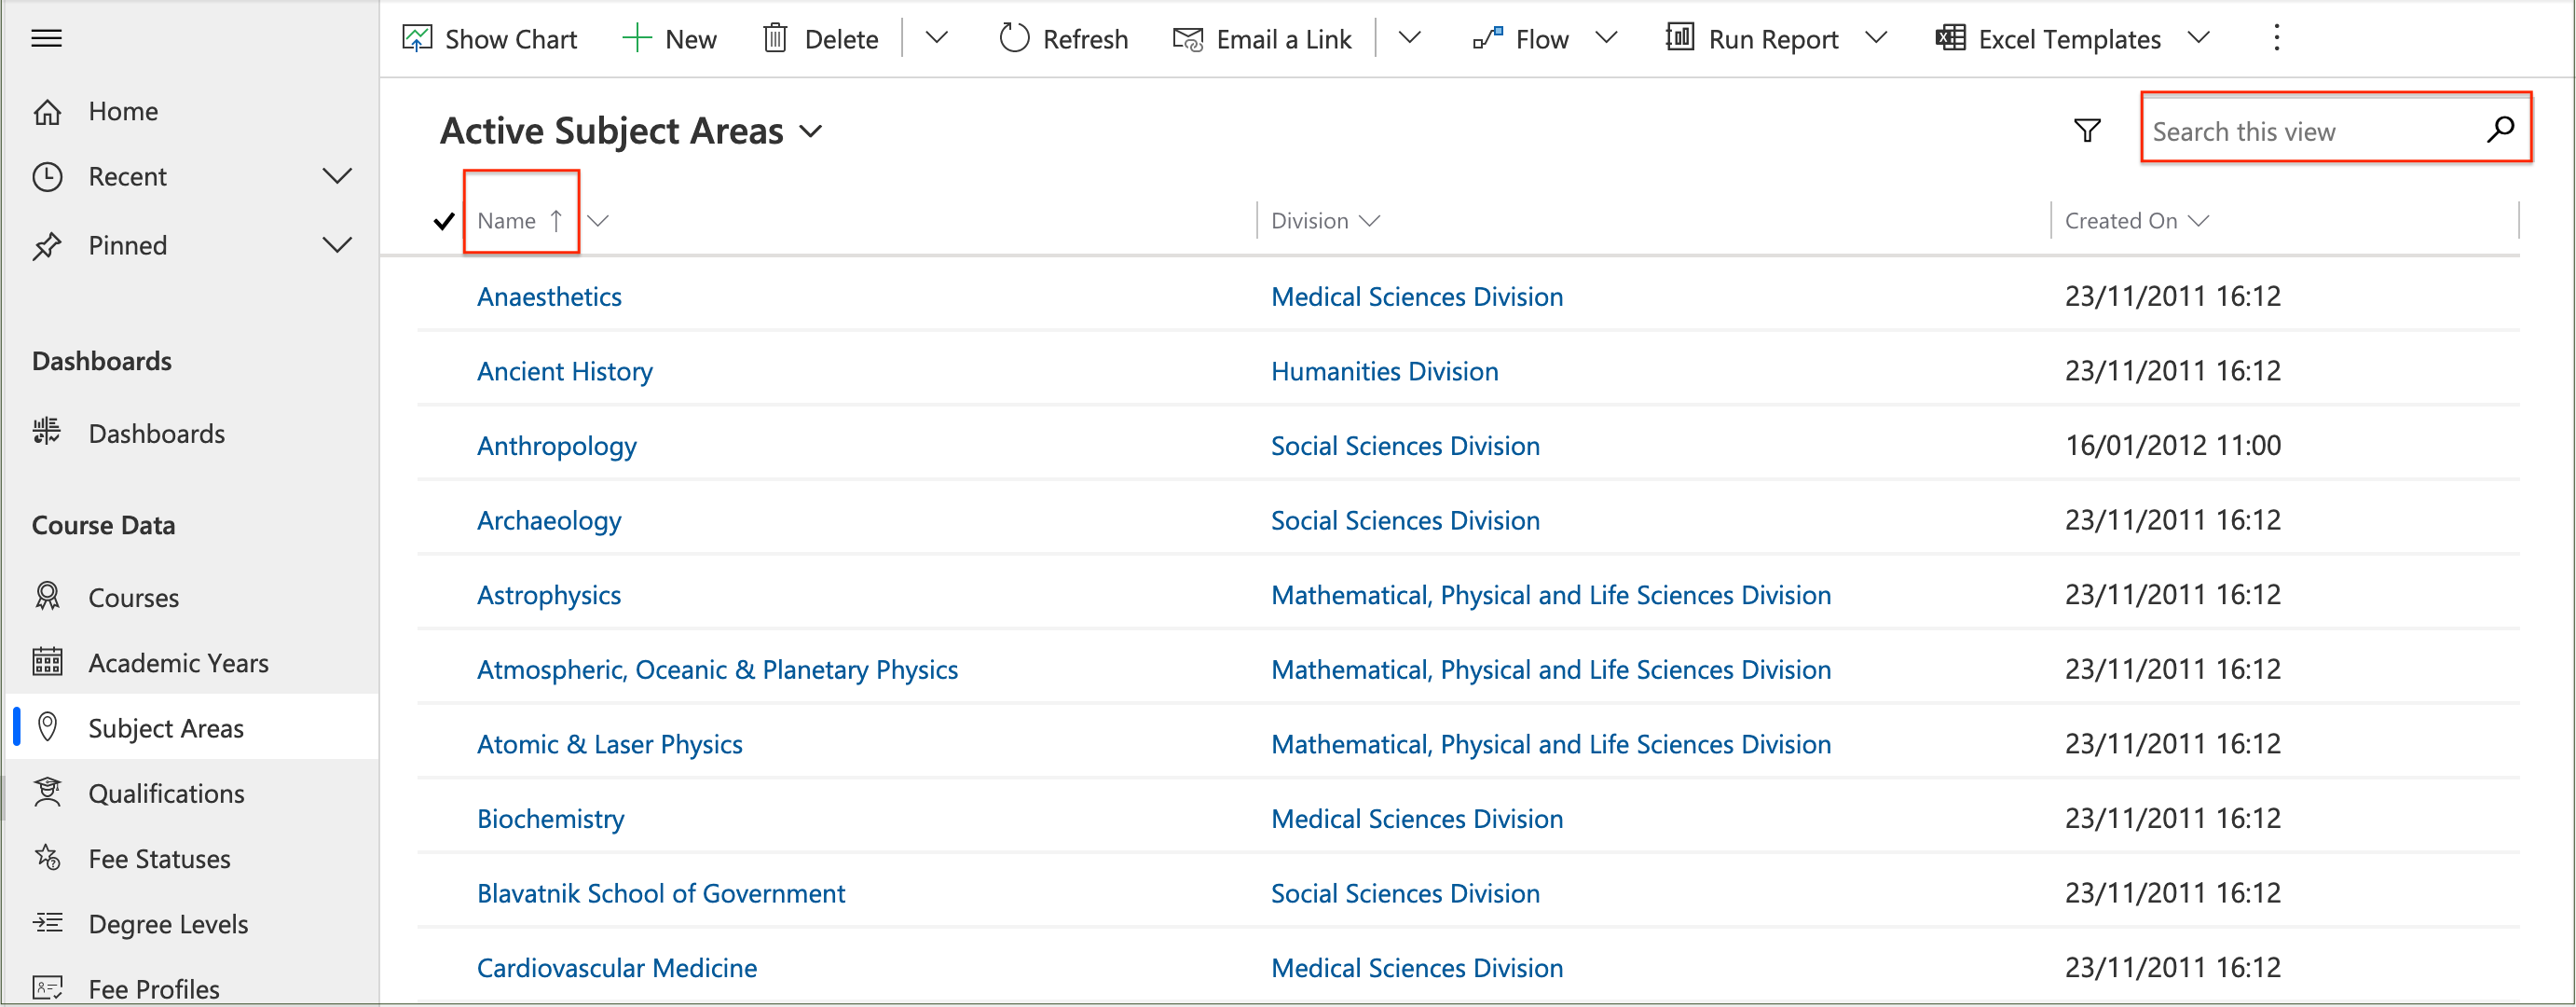
Entering some text and clicking the Search icon will display all rows where the search column begins with that text.

Entering a wildcard (* character) followed by some text and clicking the Search icon will display all rows where the search column contains that text.

To clear the search, click on 'X' in the search box.
Note. The 'f5' shortcut will also clear any search criteria on the page.
The Quick Find searches within the current view and filter criteria only, not within the entire entity.
Sorting columns on a list page
Sorting a list makes it easier to get a quick overview of the data. Sorting can be performed on any column in the list, in ascending or descending order.
Clicking on a column heading for a text column displays two sort options: 'Sort A to Z' and 'Sort Z to A'.

Selecting an option redisplays the sorted list, with a directional arrow shown next to the column heading to indicate the sort order i.e. 'up' for ascending or 'down' for descending.

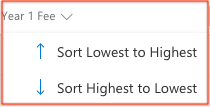
Clicking on a column heading for a numeric column displays two sort options: 'Sort Lowest to Highest' and 'Sort Highest to Lowest'.
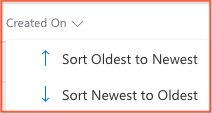
Clicking on a column heading for a numeric column displays two sort options: 'Sort Oldest to Newest' and 'Sort Newest to Oldest'.
Note. Blank values are displayed at the top of a list in ascending order.
A list can be sorted on a single column only at any one time.
The 'f5' shortcut will clear any sort criteria on the page.
Sorting columns will only temporarily change a view, but the changes will not be permanently saved unless a new Personal View is created.
Filtering columns on a list page
Filtering provides a more advanced and versatile way of controlling which records display in a list. Filters can be applied to one or more columns on the list simultaneously.
Clicking on a column heading will display a 'Filter by' option below the sort options for that column.

Clicking on 'Filter by' displays boxes to select an Operator and enter a Value.
The list of available operators will vary according to the data type of the column.
Values are not required for 'Contains data' or 'Does not contain data'.
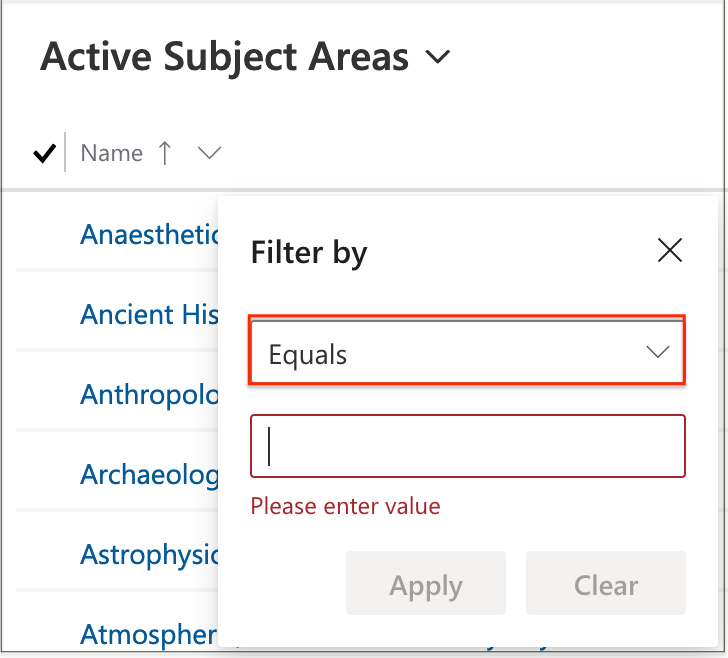
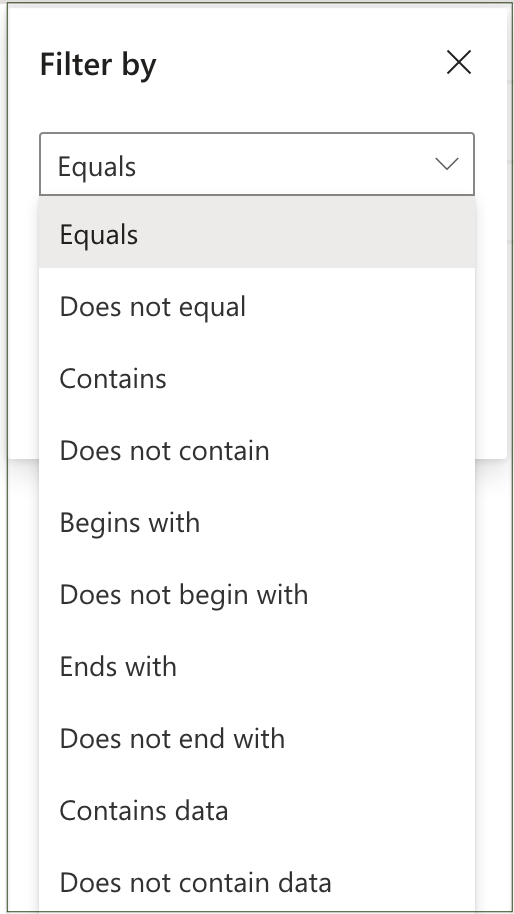
These operators can be selected for text fields.
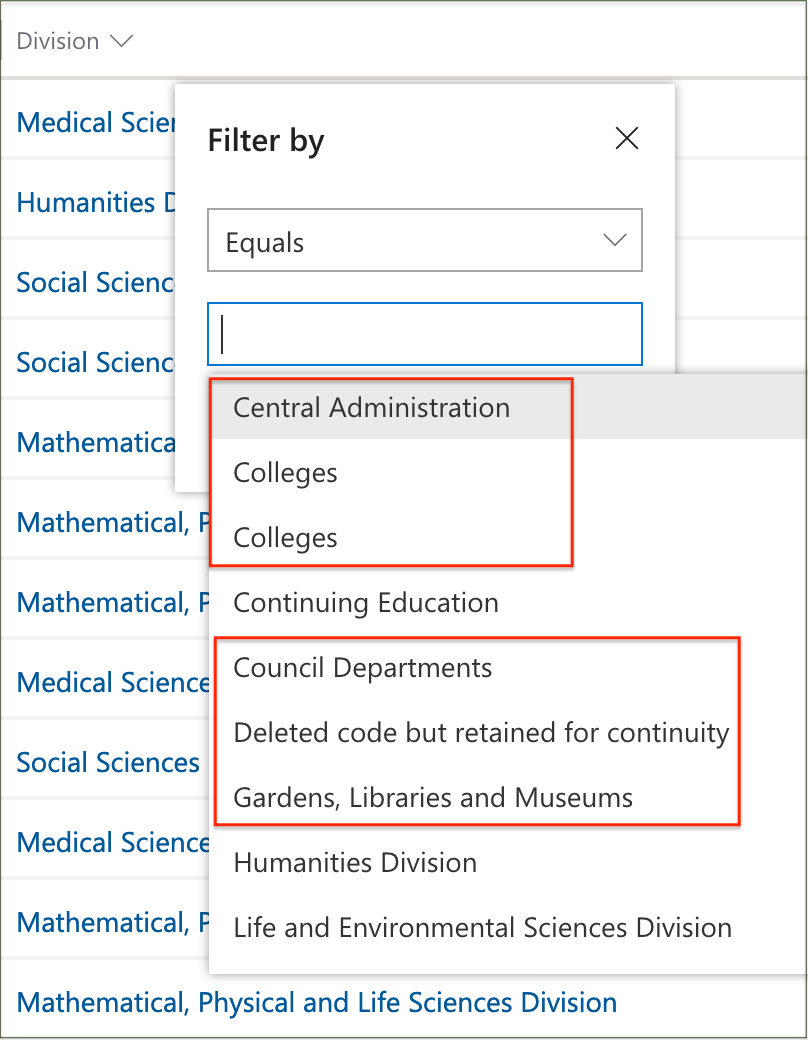
When filtering on an option set with Operator 'Equals', clicking in the Value box displays a list of the options for multi-selection.
Note. The list will contain all possible values for that entity and may include inactive items as well as values that are not present on the current view. For example:
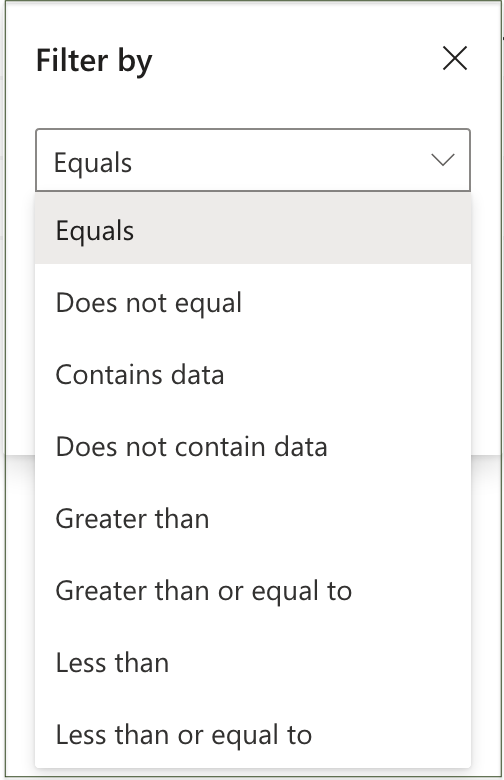
These operators can be selected for numeric fields.
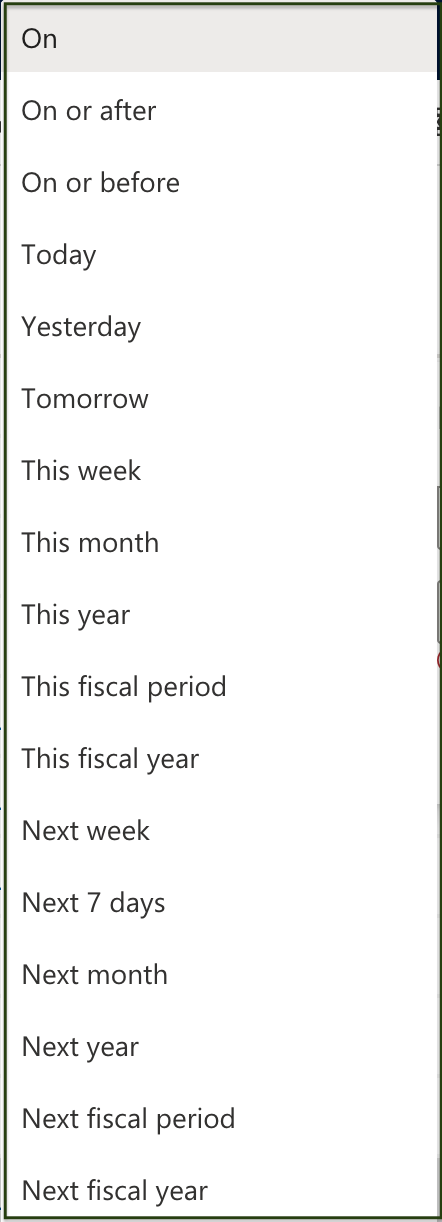
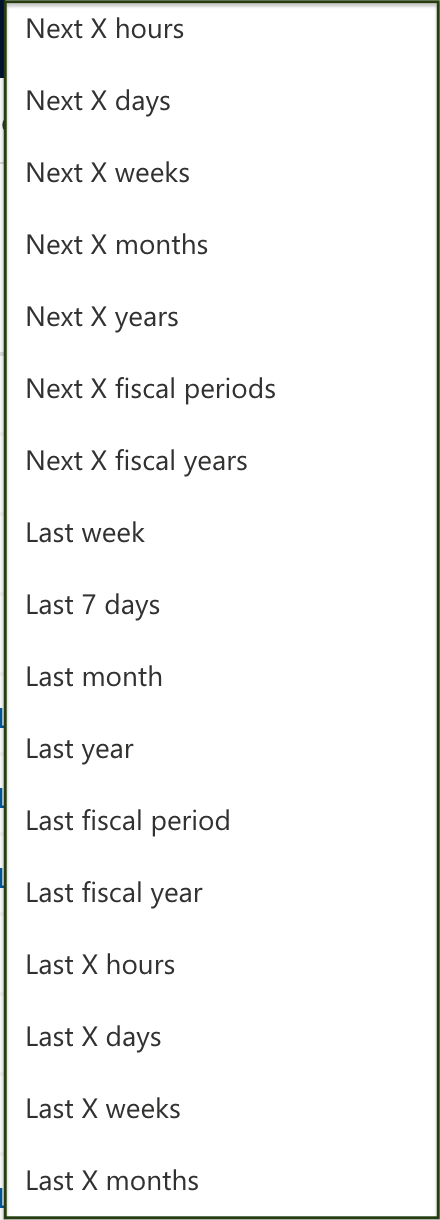
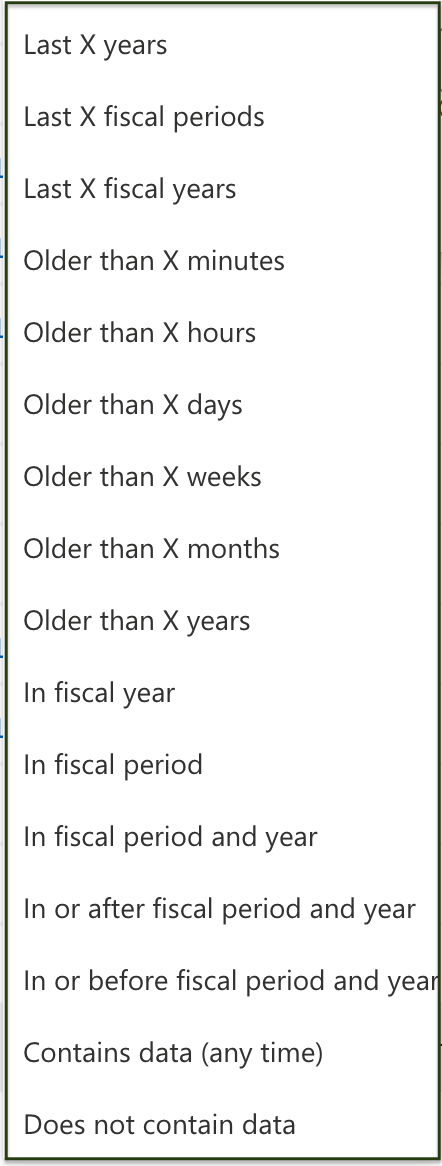
These operators can be selected for date fields.
Values are not required for some of the operators, e.g. Today, This year etc.
To clear the filter, click on the column heading again and then 'Clear filter'.

Note. The 'f5' shortcut will clear all the filters on the page.
Filtering columns will only temporarily change filters on a view, but the changes will not be permanently saved unless a new Personal View is created.
Advanced filters on a list page
If more complex filters are required to customise a view, then select the Advanced Filters icon at the top of the list, next to the Search box.
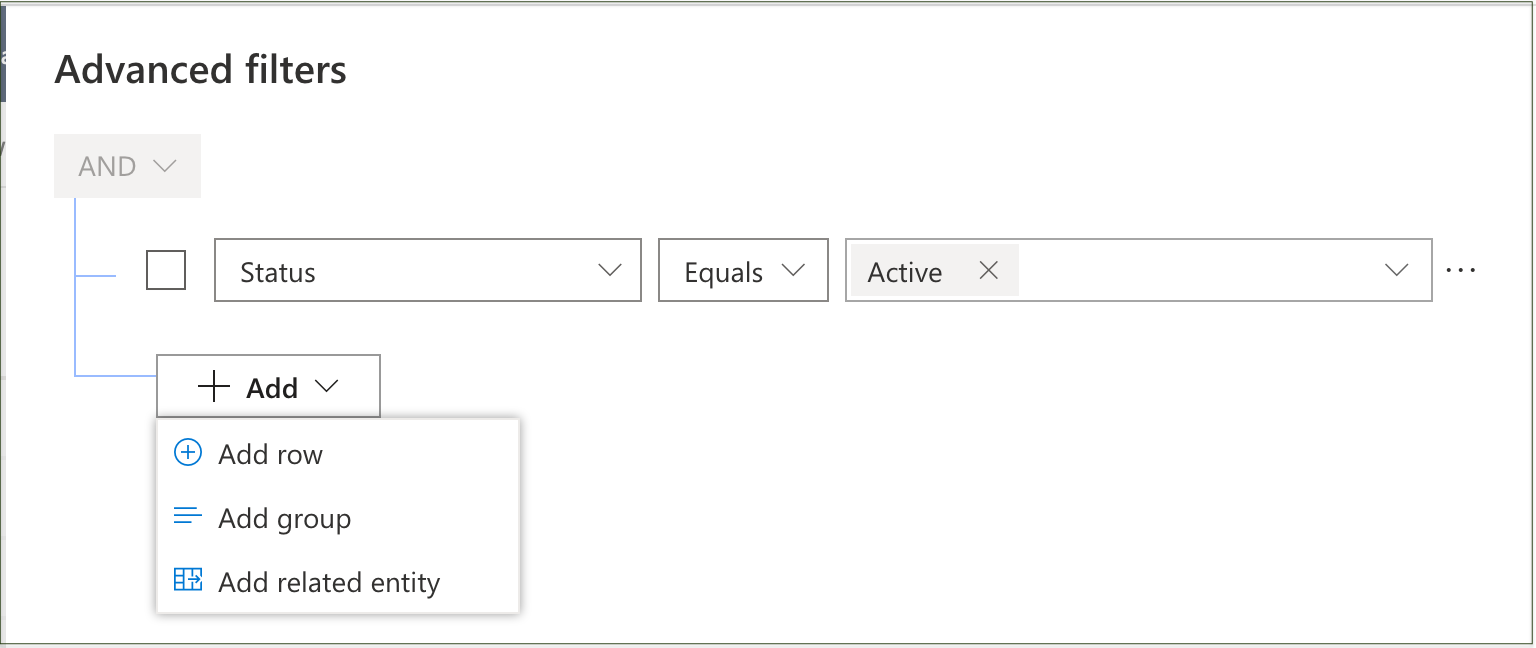
The Advanced filters panel displays the current filter and enables additional filters to be added.
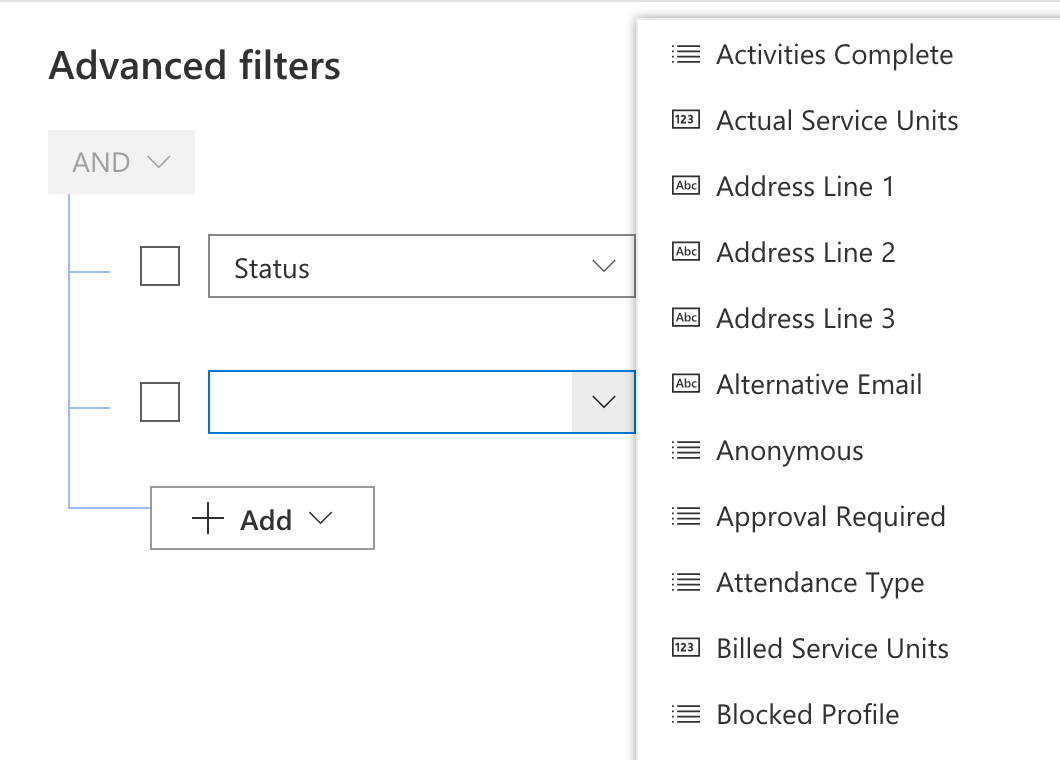
Selecting 'Add row' enables another field from the same entity to be selected as a filter clause.
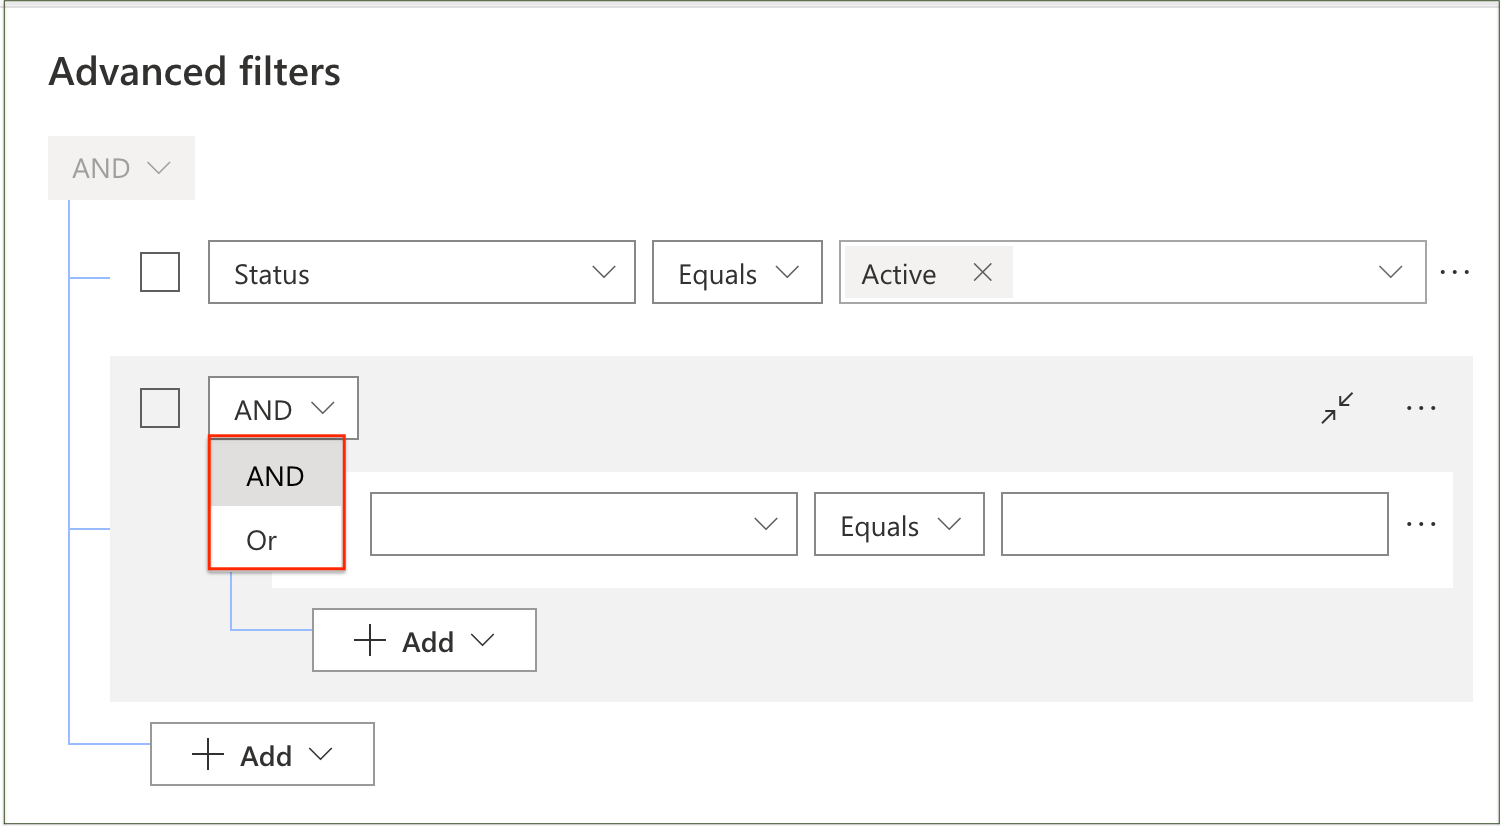
Selecting 'Add group' enables groups of multiple filter clauses to be added.
Selecting 'Add related entity' enables another field from a related entity to be selected as a filter clause.
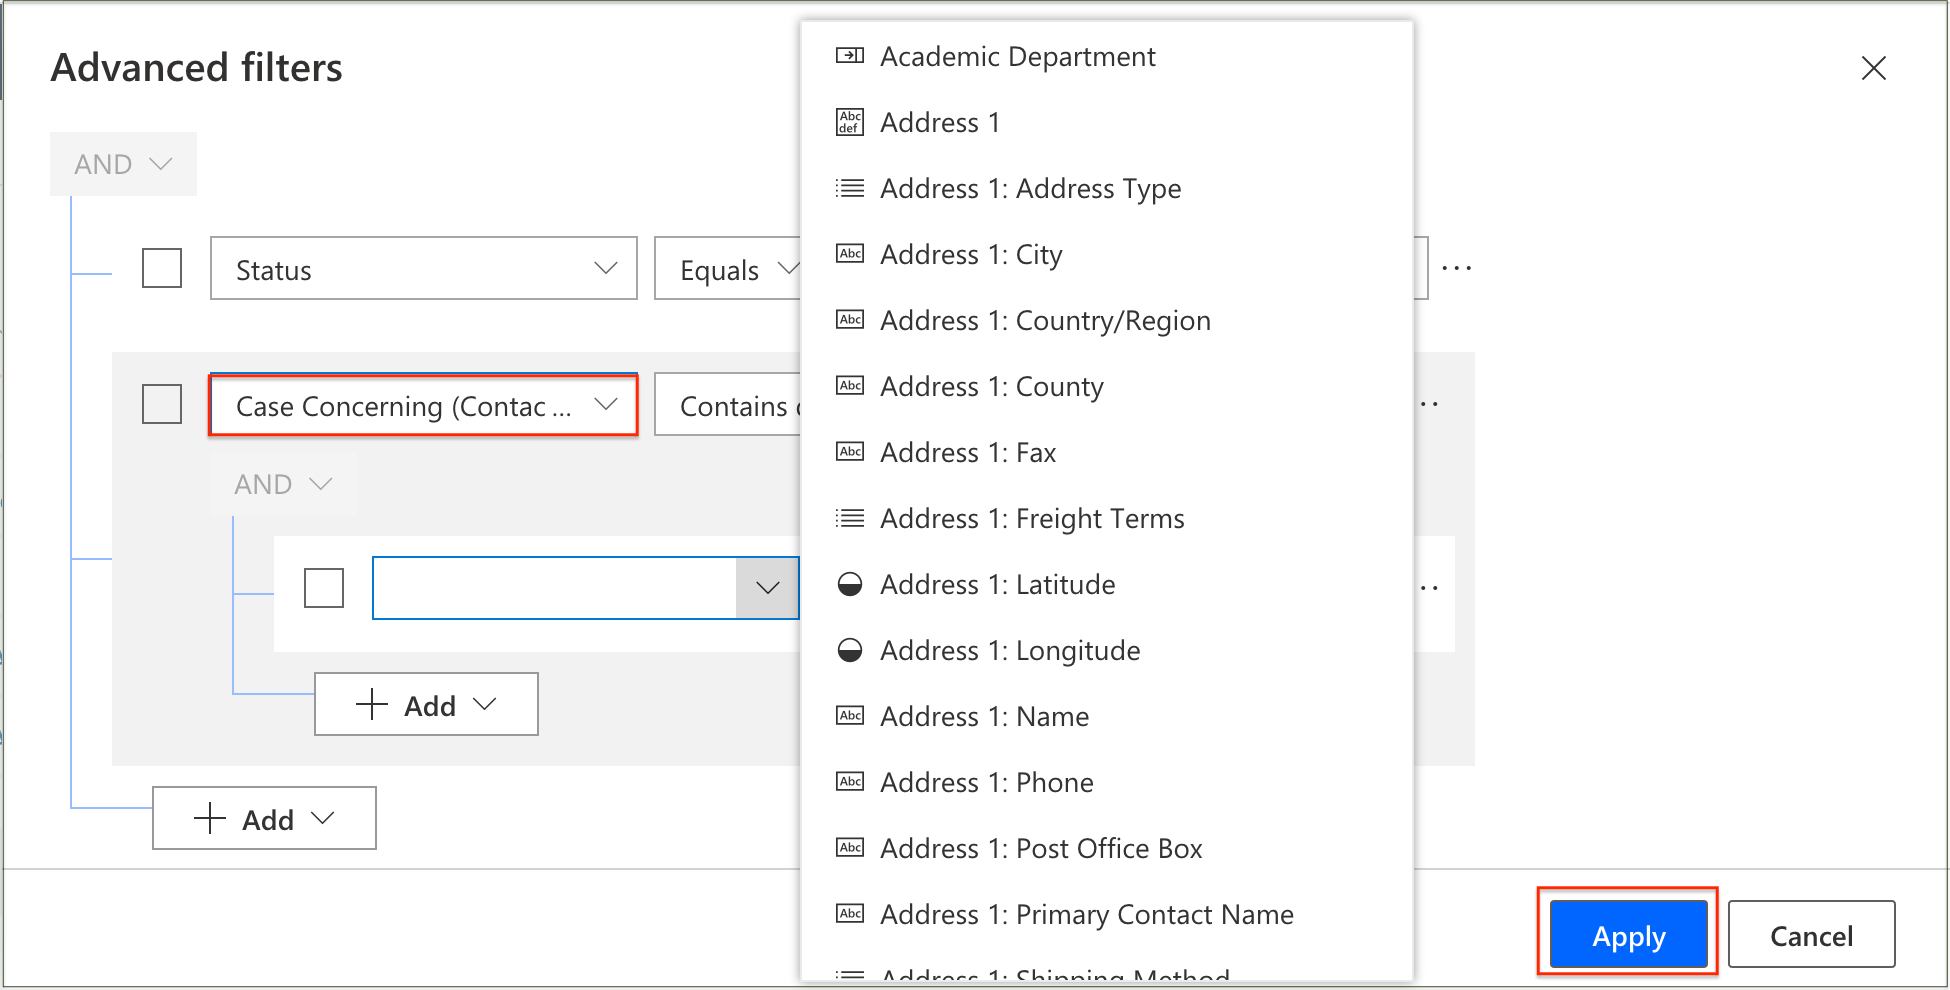
Click 'Apply' when all the required filters have been selected to re-display the view containing the filtered rows.
To remove an individual filter clause from the Advanced filters, click on 'More commands' and then 'Delete'.

To clear all the Advanced filters, click on the 'Clear filter' icon.

Note. The 'f5' shortcut will also clear the Advanced filters on the page.
The Advanced Filters will only temporarily change filters on a view, but the changes will not be permanently saved unless a new Personal View is created.
Searching on a lookup view
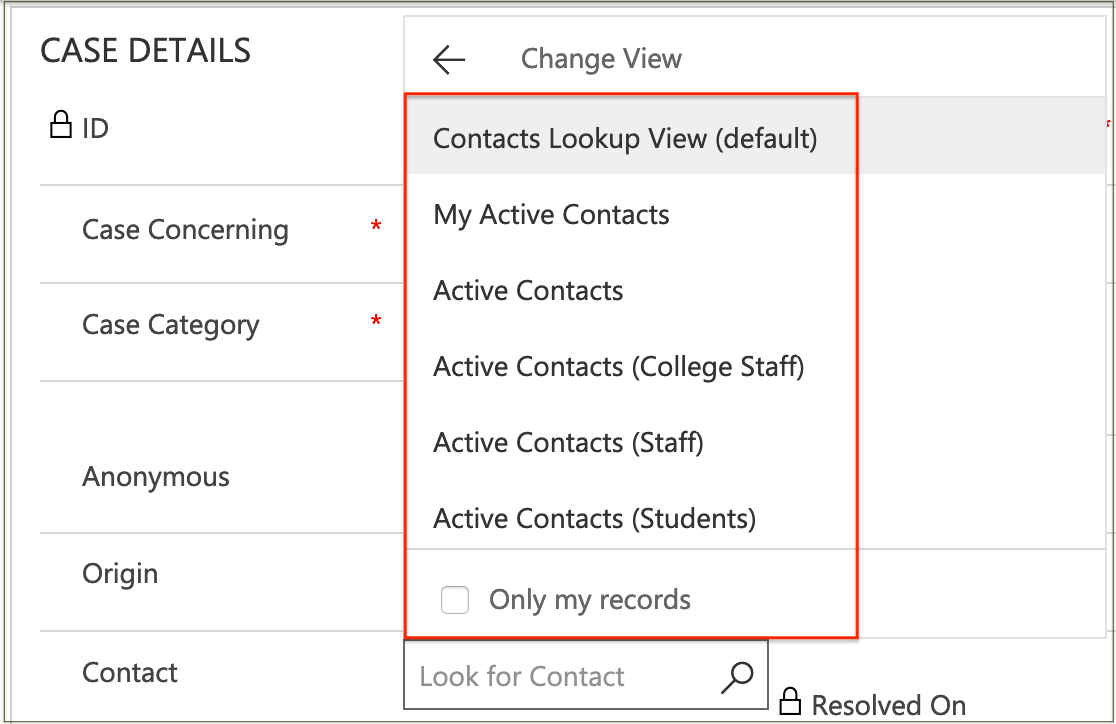
When searching for a value through a lookup view, the values will be displayed from the default view for that lookup, together with an option to search on a different view.
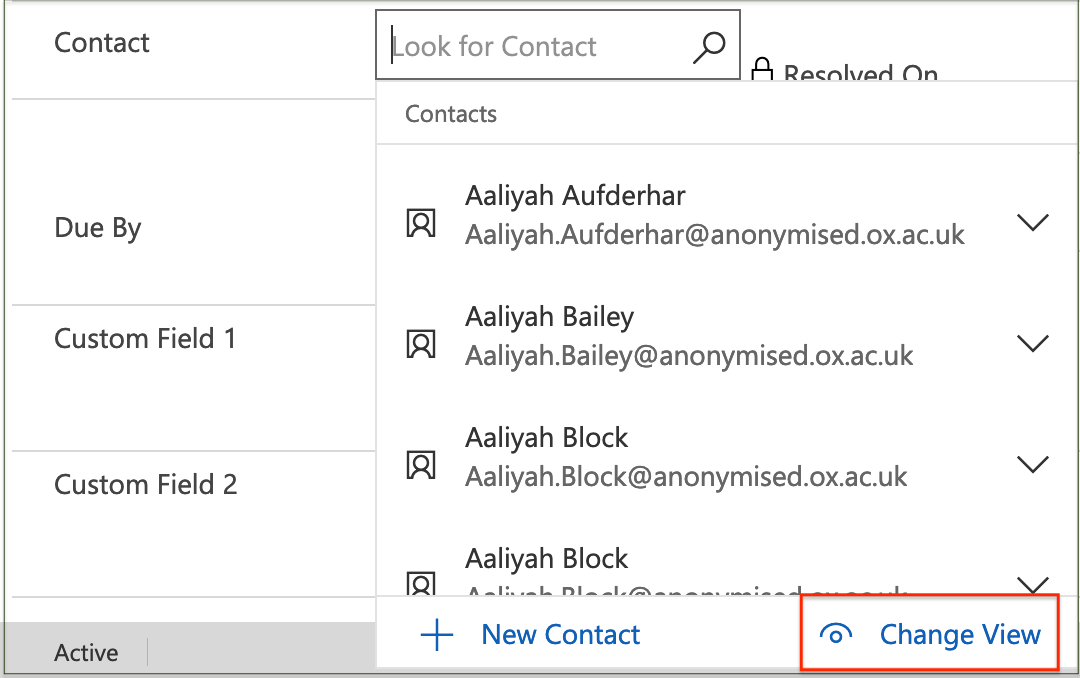
Selecting 'Change View' will display a list of alternative views that can be selected in order to display only those values that contain data of interest.
Searching for users and teams
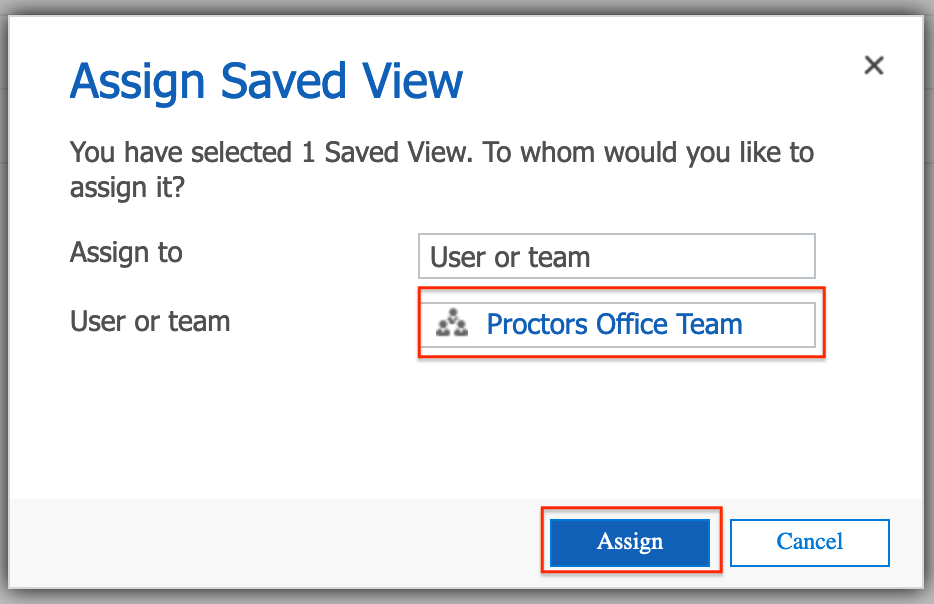
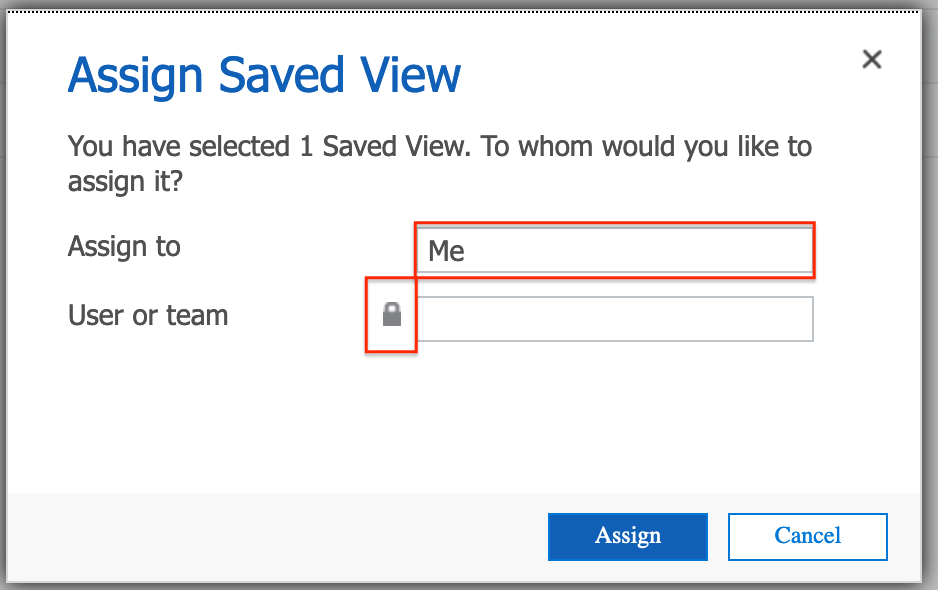
When assigning a View or a Workflow to another user or team, the 'Assign to' box defaults to 'Me' and the 'User or team' search box is locked.
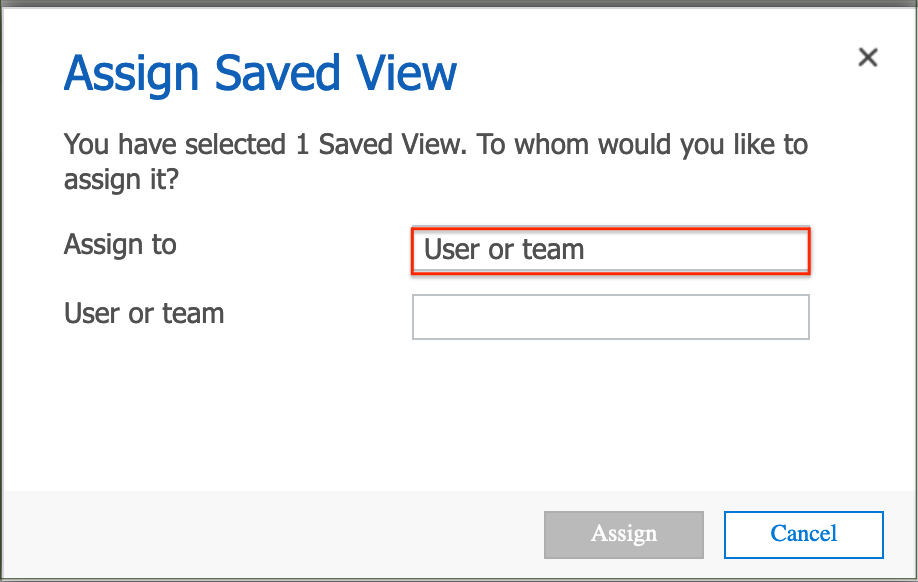
Clicking inside the 'Assign to' box changes it to 'User or team' and unlocks the search box.
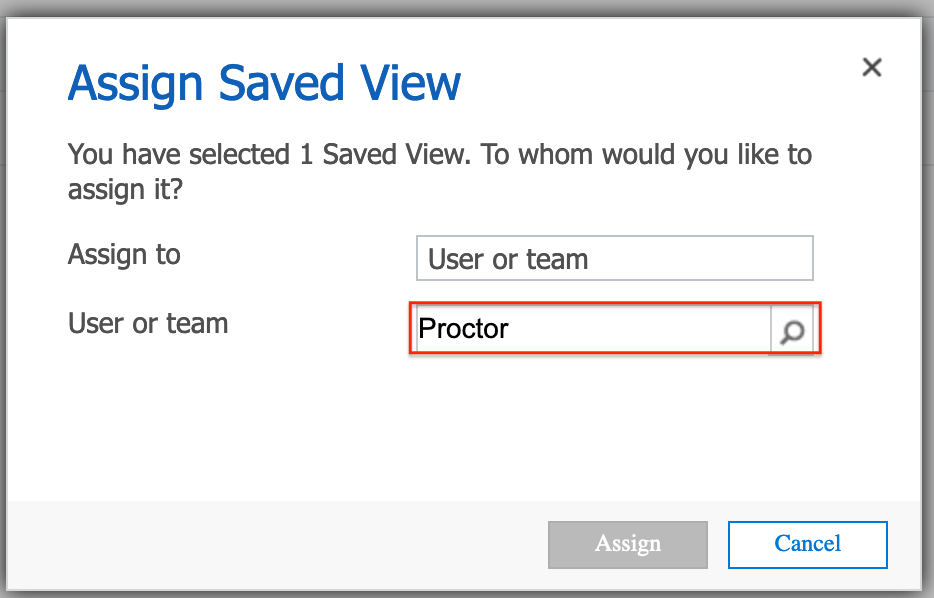
Enter some text into the 'User or team' box and click on the search icon.
Note. A wildcard can be used in the search text (e.g. *Office)
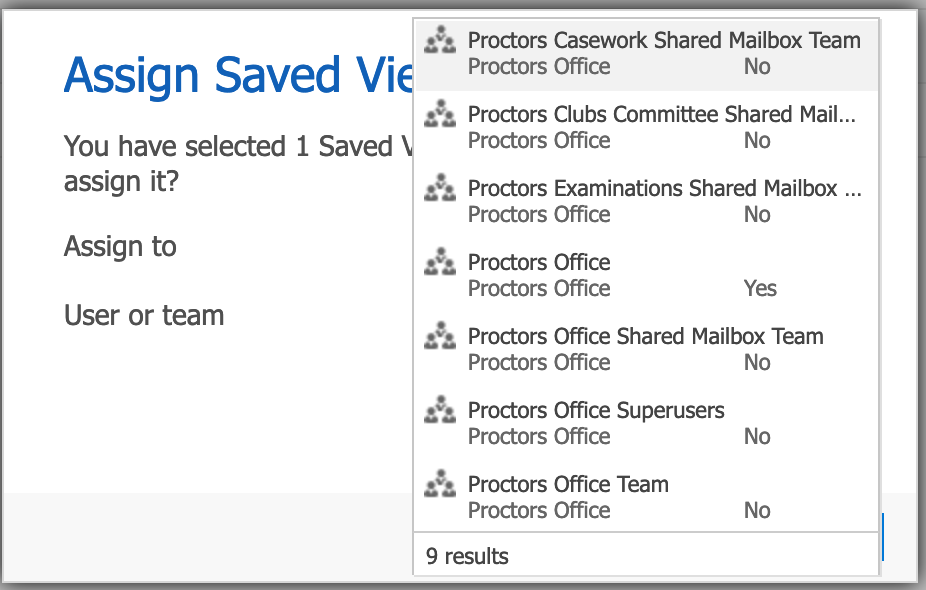
A list of users and teams that match the search text are displayed.
Select one of the results and click 'Assign'
