Creating, sharing and editing views
View Definition
A view is a grid with records listed under column headings, where each column represents a field in an entity. Users can select different views to look at a subset of records of the same entity that fit into pre-specified filter conditions. The view is a saved query that defines:
- The columns to be displayed
- The width of each column
- The default filters applied to restrict which records appear in the list
- The default sort criteria
There are two types of views:
- System views - these views can only be created by System Administrators and are visible to all users with permission to access the entity.
- Personal views - these views can only be seen by the users that create them, and by the users these views are shared with.
Each user can set their own default view for an entity, and also pin any views so that they can be found quickly.
The links below take you to the information you need to set up and use Views:
> Customising an existing view
> Creating a view in advanced find
> Reviewing the results of a configured view
> Displaying a list of saved views
> Activating/Deactivating a view
Creating Personal Views
There are two methods of creating a new Personal view:
- Customising an existing System or Personal view and saving it
- Using Advanced Find to create a more complex view
Customising an existing view
When an existing view is displayed, it can be filtered and/or sorted to tailor the view to the user's exact requirements.
In this example, the System View 'My Active Cases' is to be filtered on Priority = '1. High'.
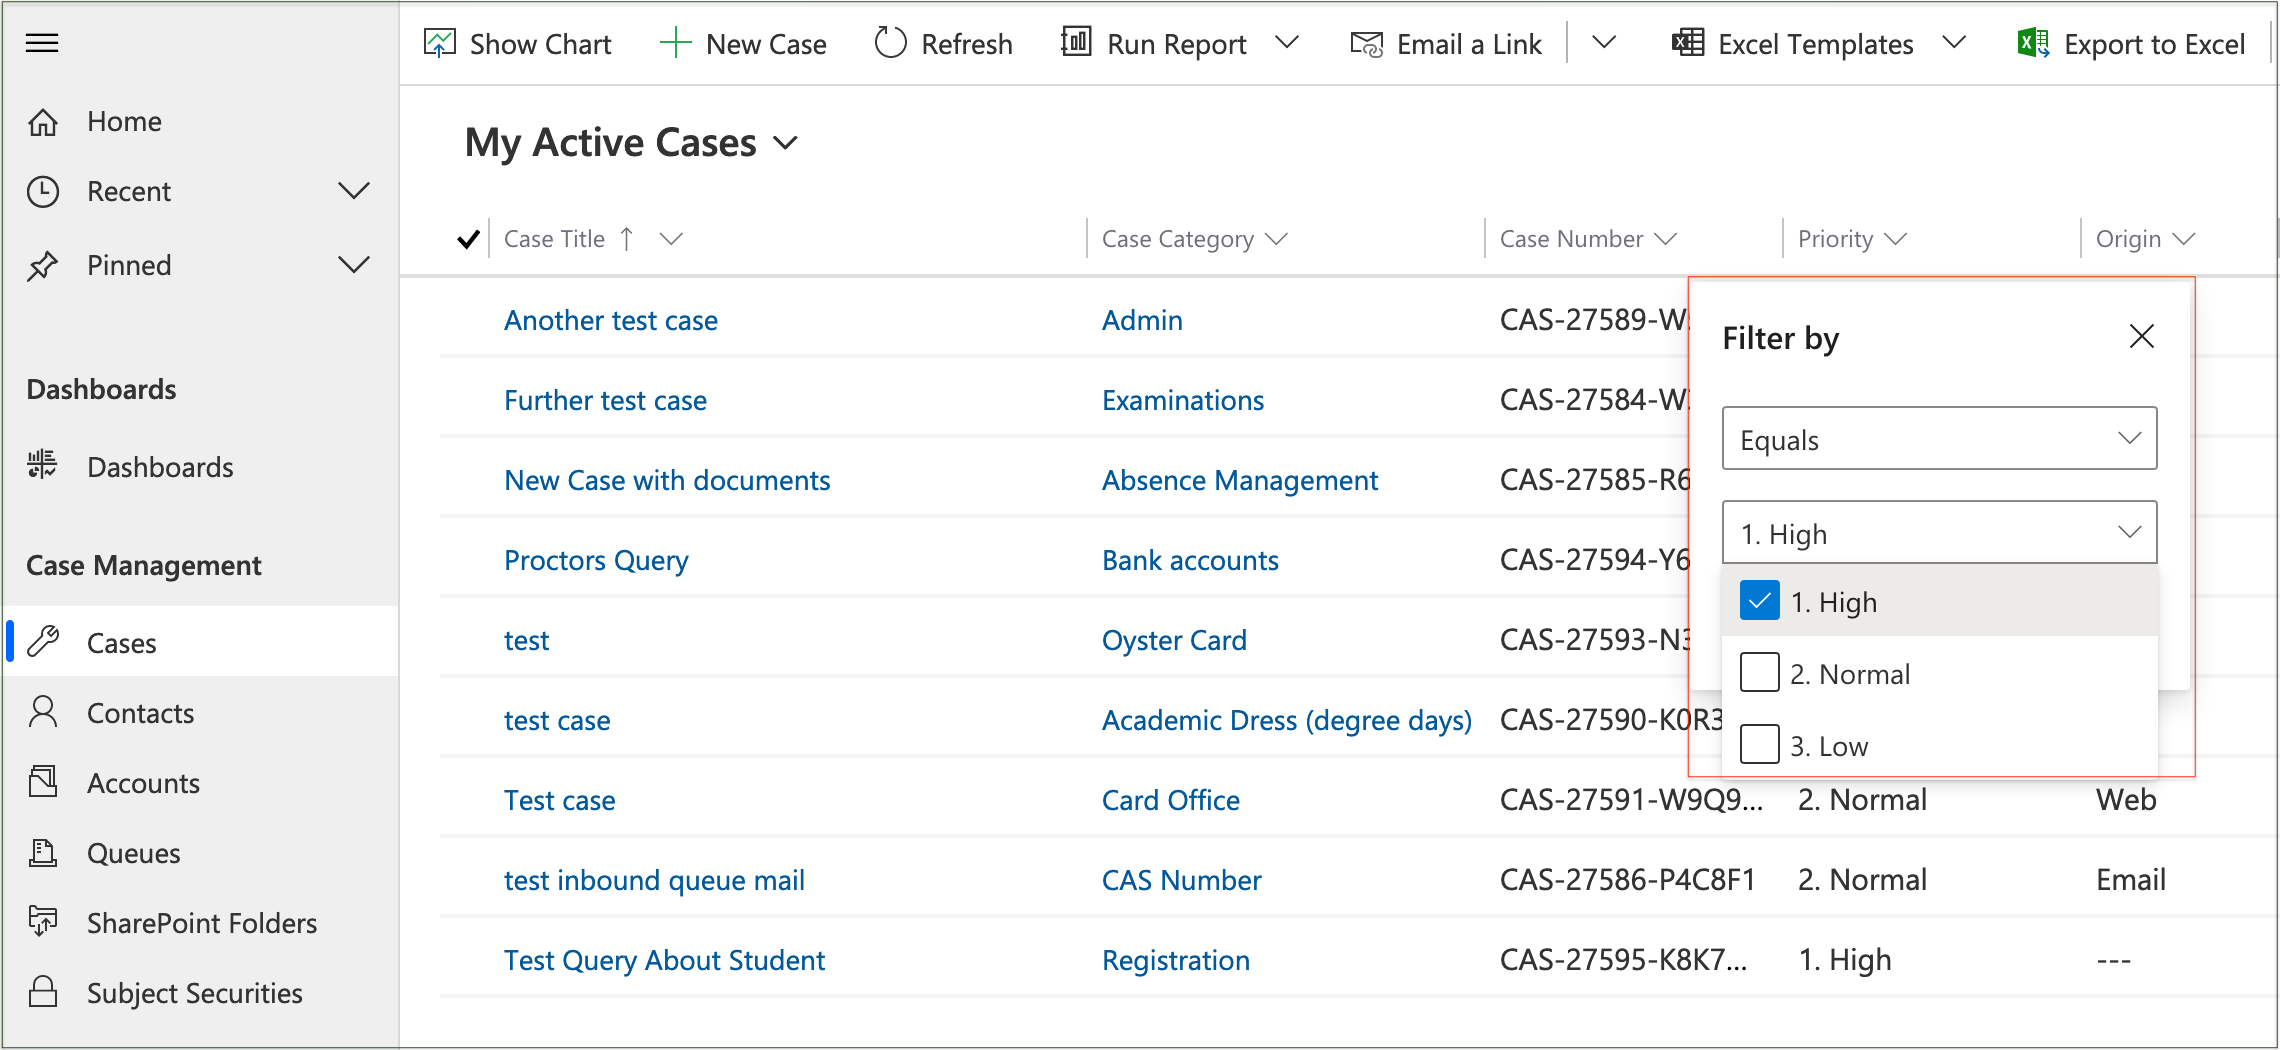
This reduces the list to display only Priority '1. High' cases.
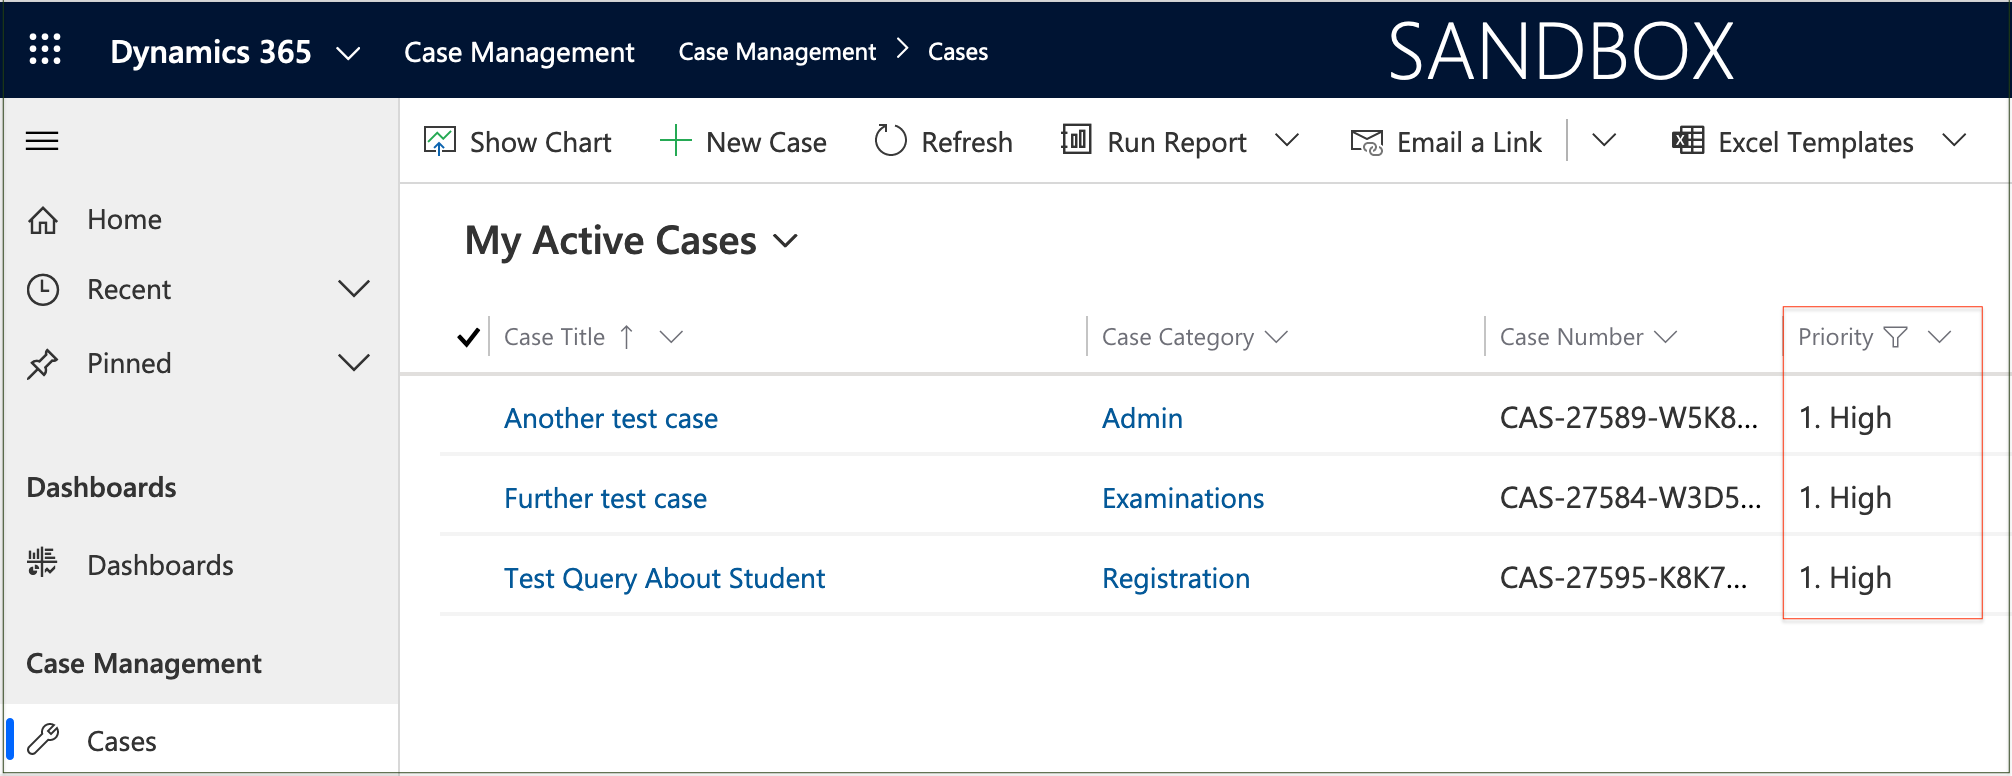
Further filters or sorting can be applied to other columns if needed.
When the customisation is complete, clicking on the 'More Commands' button (3 vertical dots) at the end of the top ribbon displays a 'Create view' option.
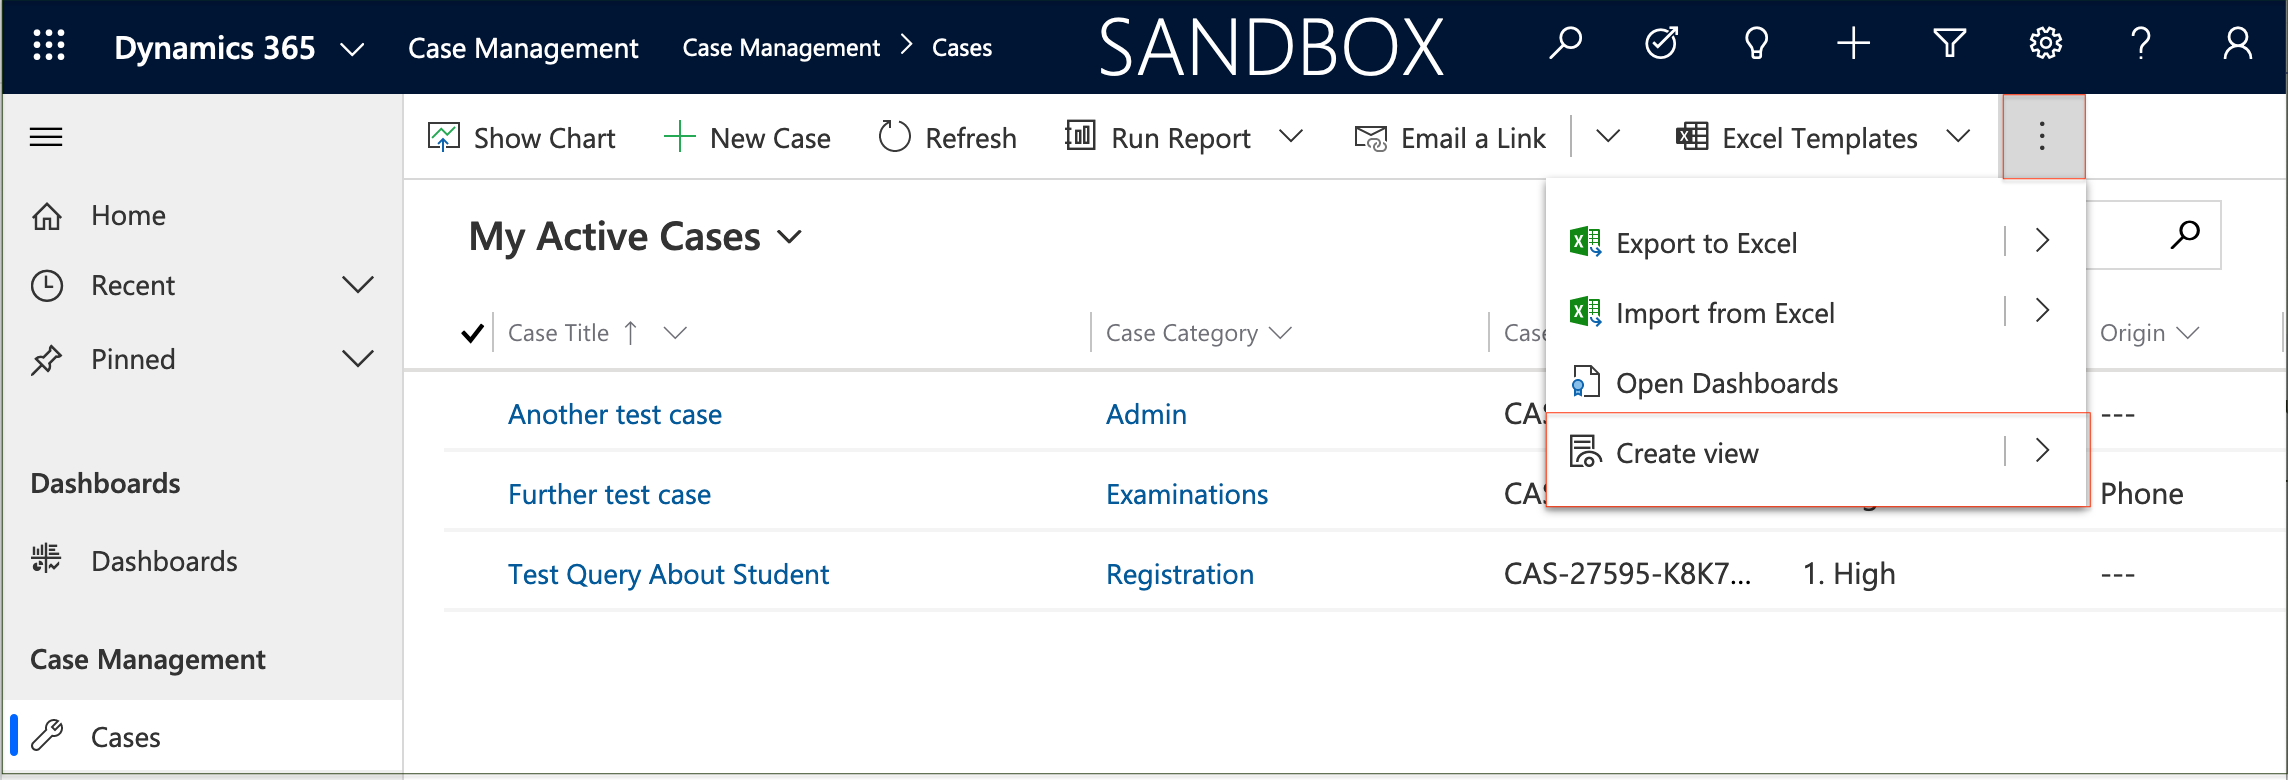
Clicking on the ">" to the right of 'Create view' displays another option to 'Save filters as new view'.
Note: Clicking on the 'Create view' option itself, opens the Advanced Find editor instead.

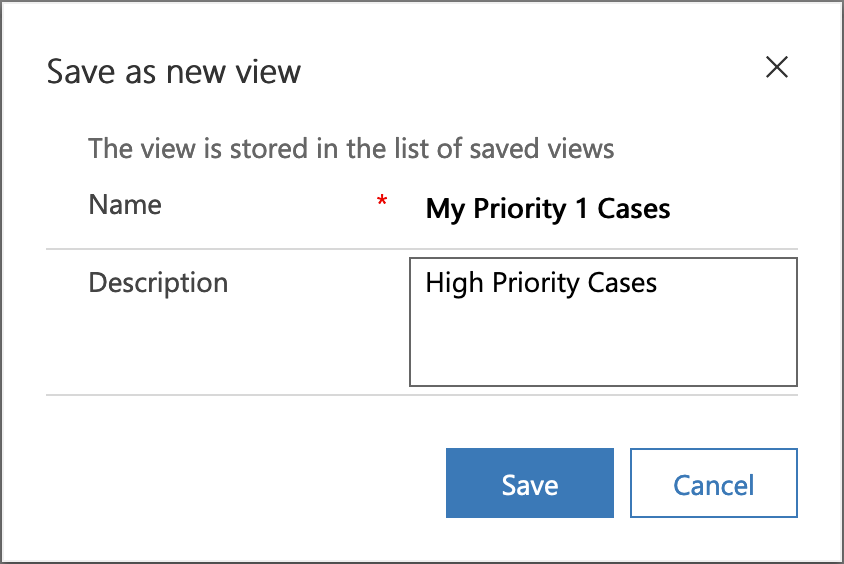
Clicking on the 'Save filters as new view' option displays a popup window with the name defaulted to the original view.
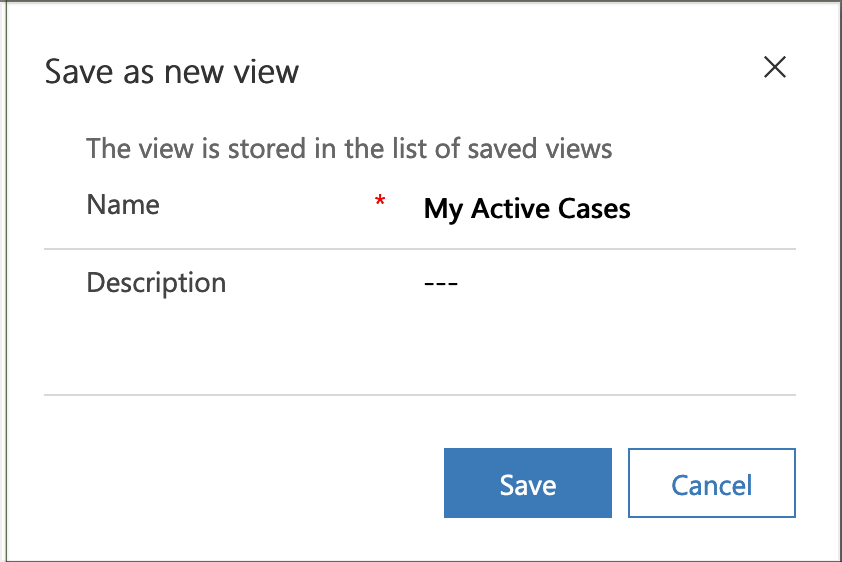
Give the view a unique name, add a description and 'Save' it.
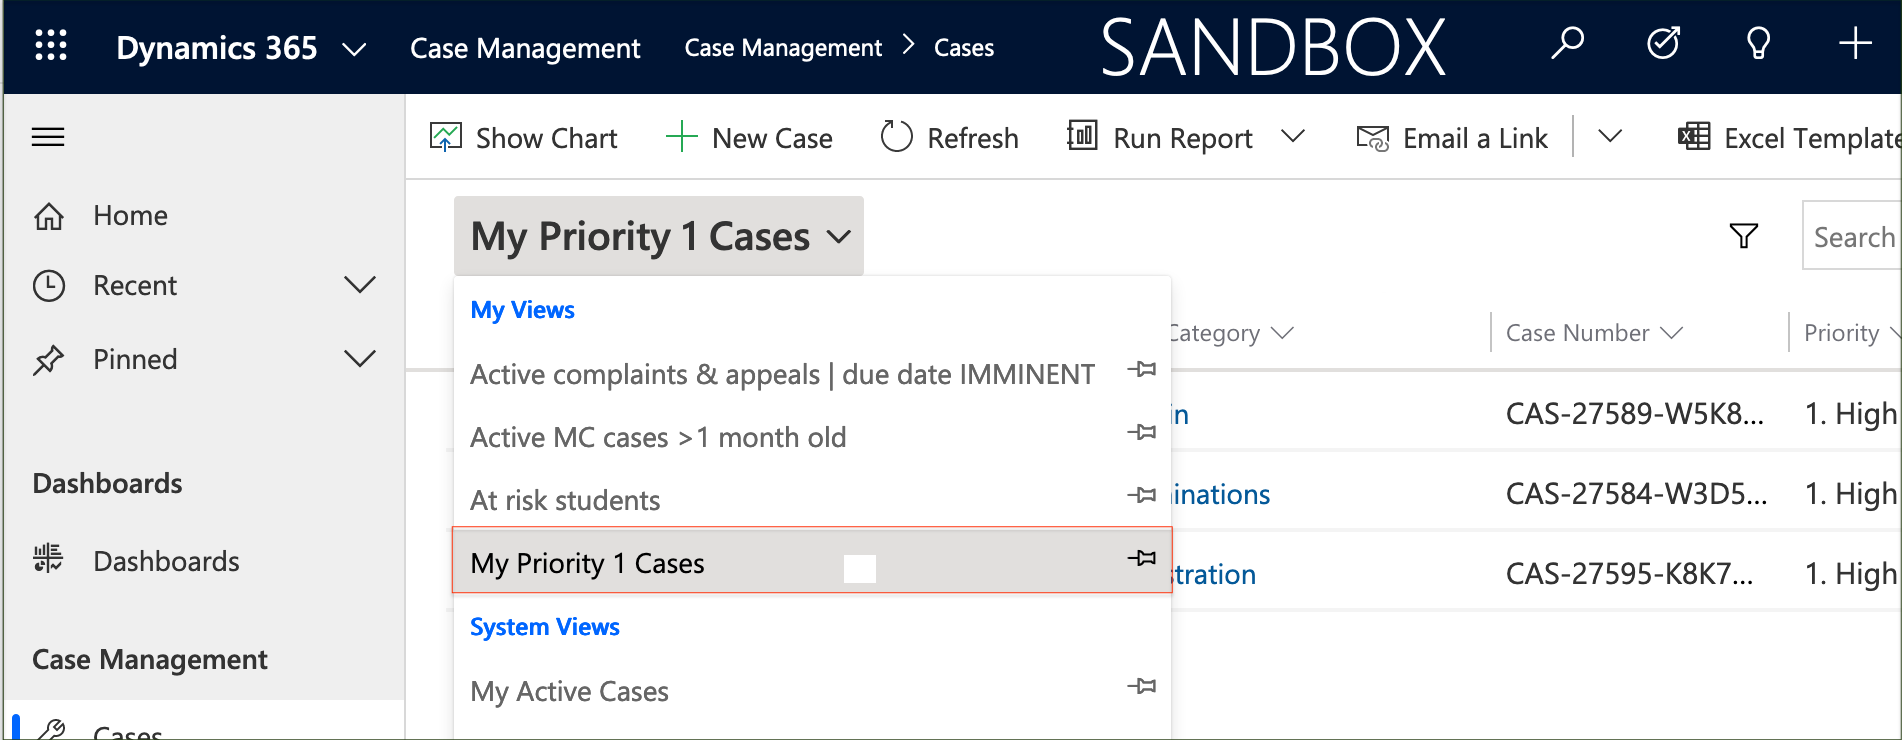
A new Personal view is created and added to the user's 'My Views' list and the original view is unchanged.
Advanced filters
If more complex filters are required to customise a view, then select the Advanced Filters icon at the top of the list, next to the Search box.
This enables additional filters to be added and grouped before saving the filters as a new view.
Note. See Advanced filters on a list page for further details
Advanced Find
The Advanced Find option can be used to create and manage advanced search queries using the following functionality:
- Defining complex filters
- Configuring columns
- Adding related filters and fields
- Listing views by type
- Editing and Deleting views
- Activating and Deactivating views
- Sharing views with other users and teams
- Assigning views to another user/team
- Copying views
Using advanced find
Select the 'Advanced Find' icon that is displayed as a Filter icon on the top tool bar of every view.
Clicking the Filter icon opens the 'Advanced Find' form in a new window.

If the form has been opened from a saved view, then the Entity and Saved View will be defaulted as shown.
Creating a view in advanced find
If a different Entity is required, select the level of data required from the 'Look for:' drop down list.
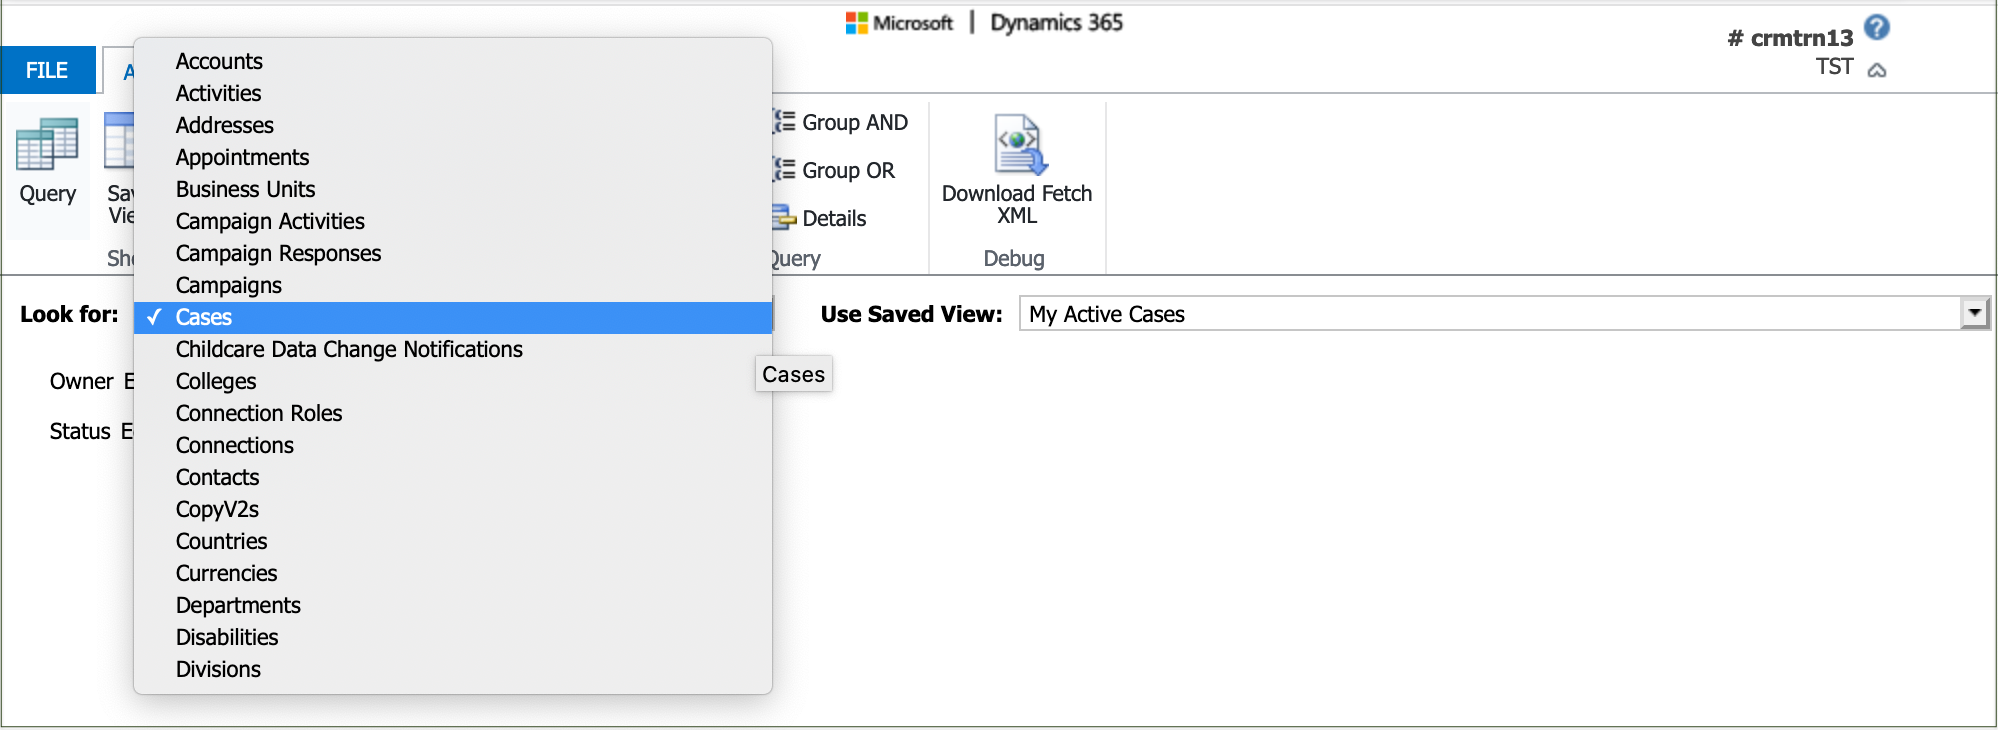
A new view can either be created from scratch or by using an existing System or Personal view as a starting point.
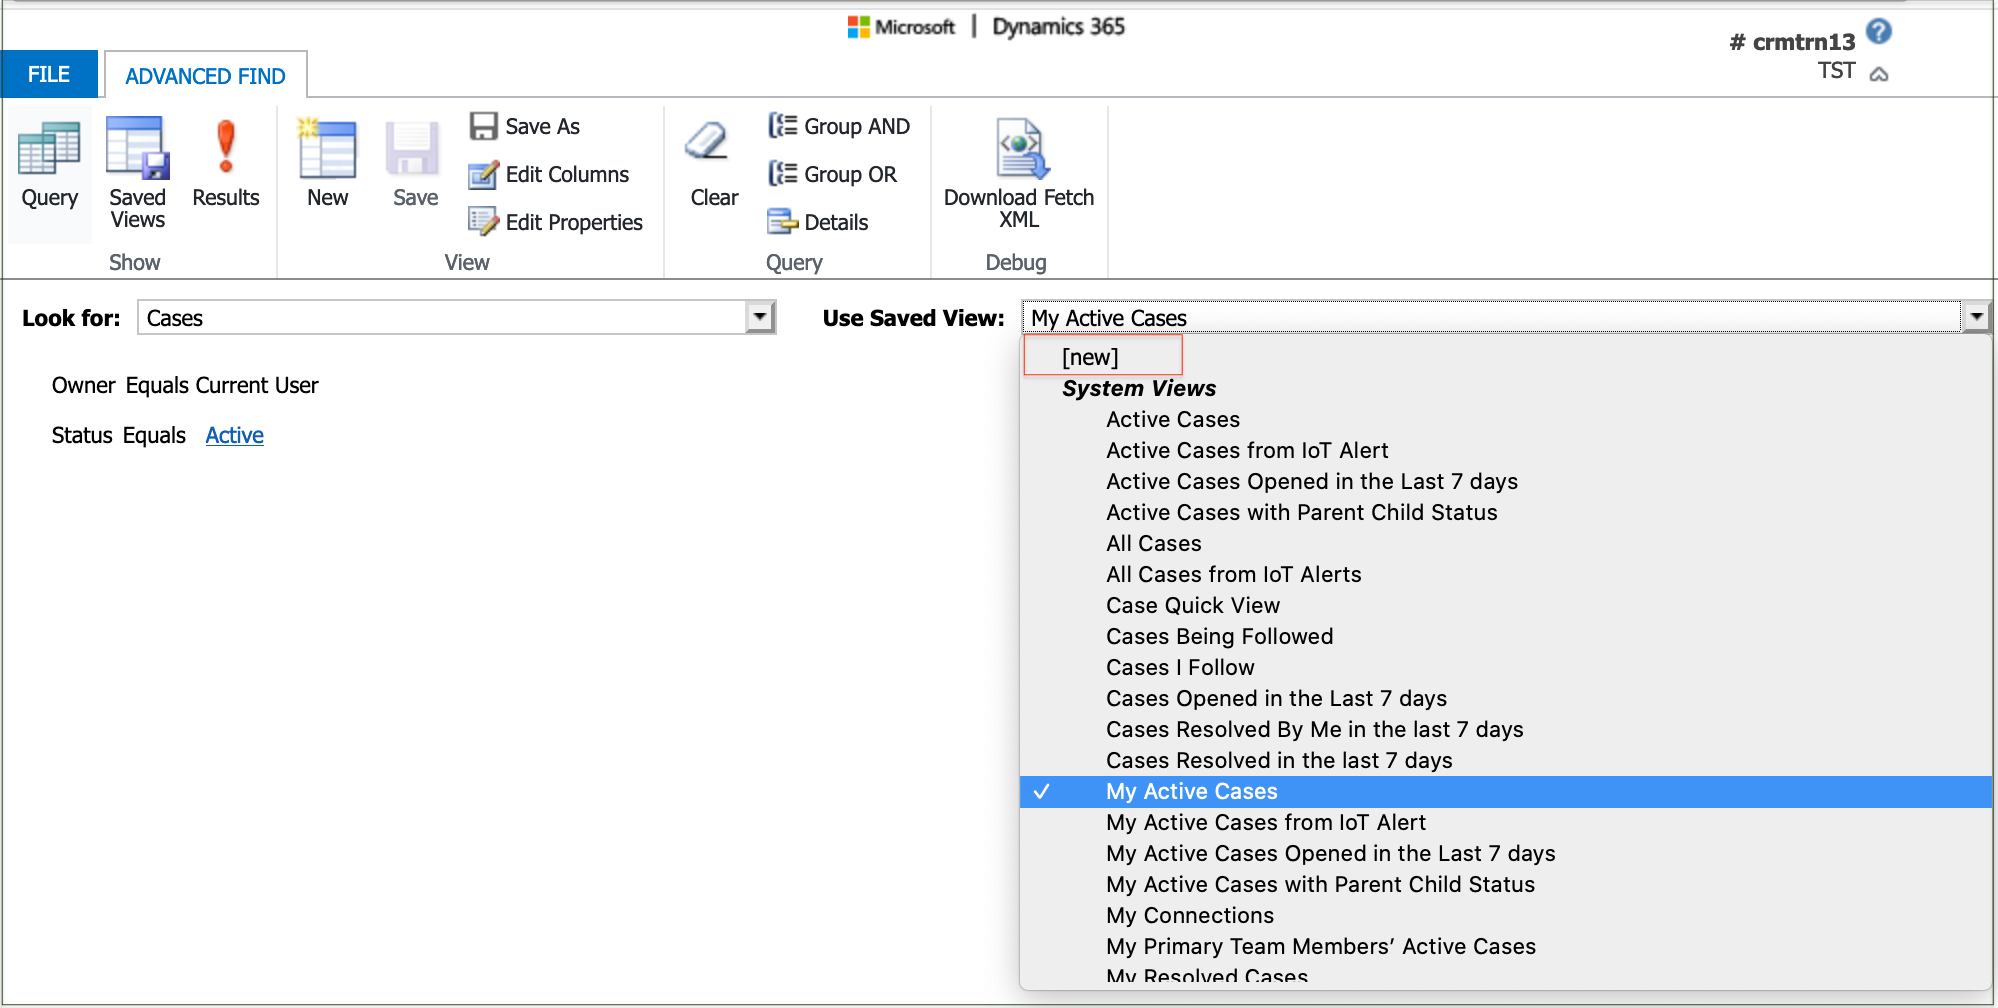
To create a new view from scratch:
- Select [new] from the 'Use Saved View:' drop down list then click on 'Save' in the View section of the icon bar.
To create a new view from an existing one:
- Select the required starting view from the 'Use Saved View:' drop down list then click on 'Save As' in the View section of the icon bar.
Warning: If using an existing Personal view as a starting point, clicking 'Save' rather than 'Save As' will apply any changes to the original view instead of creating a new view.
Enter a name and description in the dialogue box and 'Save'.
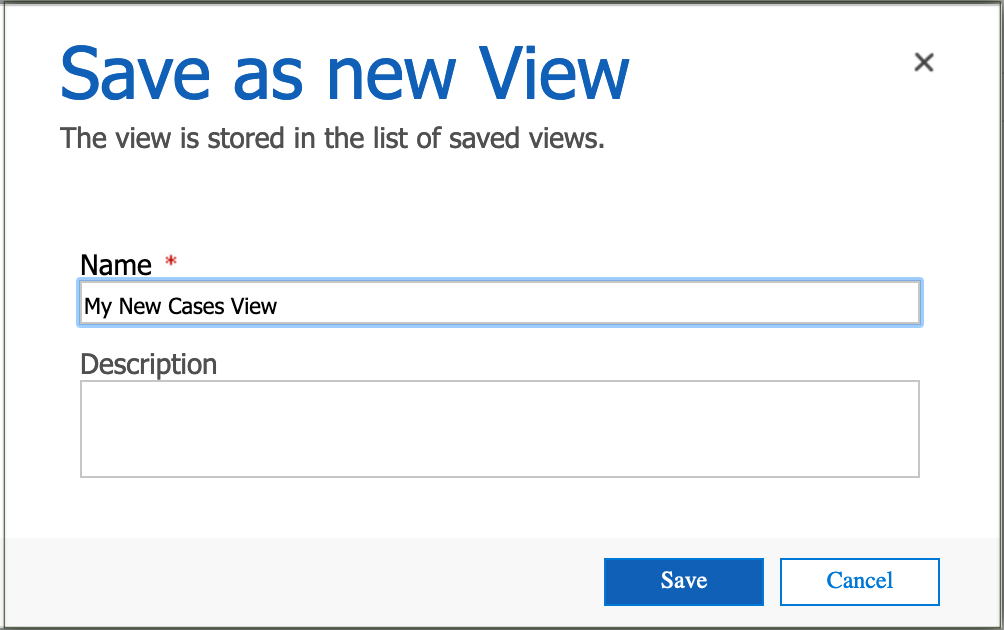
Defining query filters
Any existing filters copied from a saved view are displayed on the form.
If not already highlighted, click on 'Details' in the Query section of the icon bar to activate the filter area of the form for editing.

To add a new filter clause, click on the 'Select' dropdown and choose the field to be added (the list may be extensive).
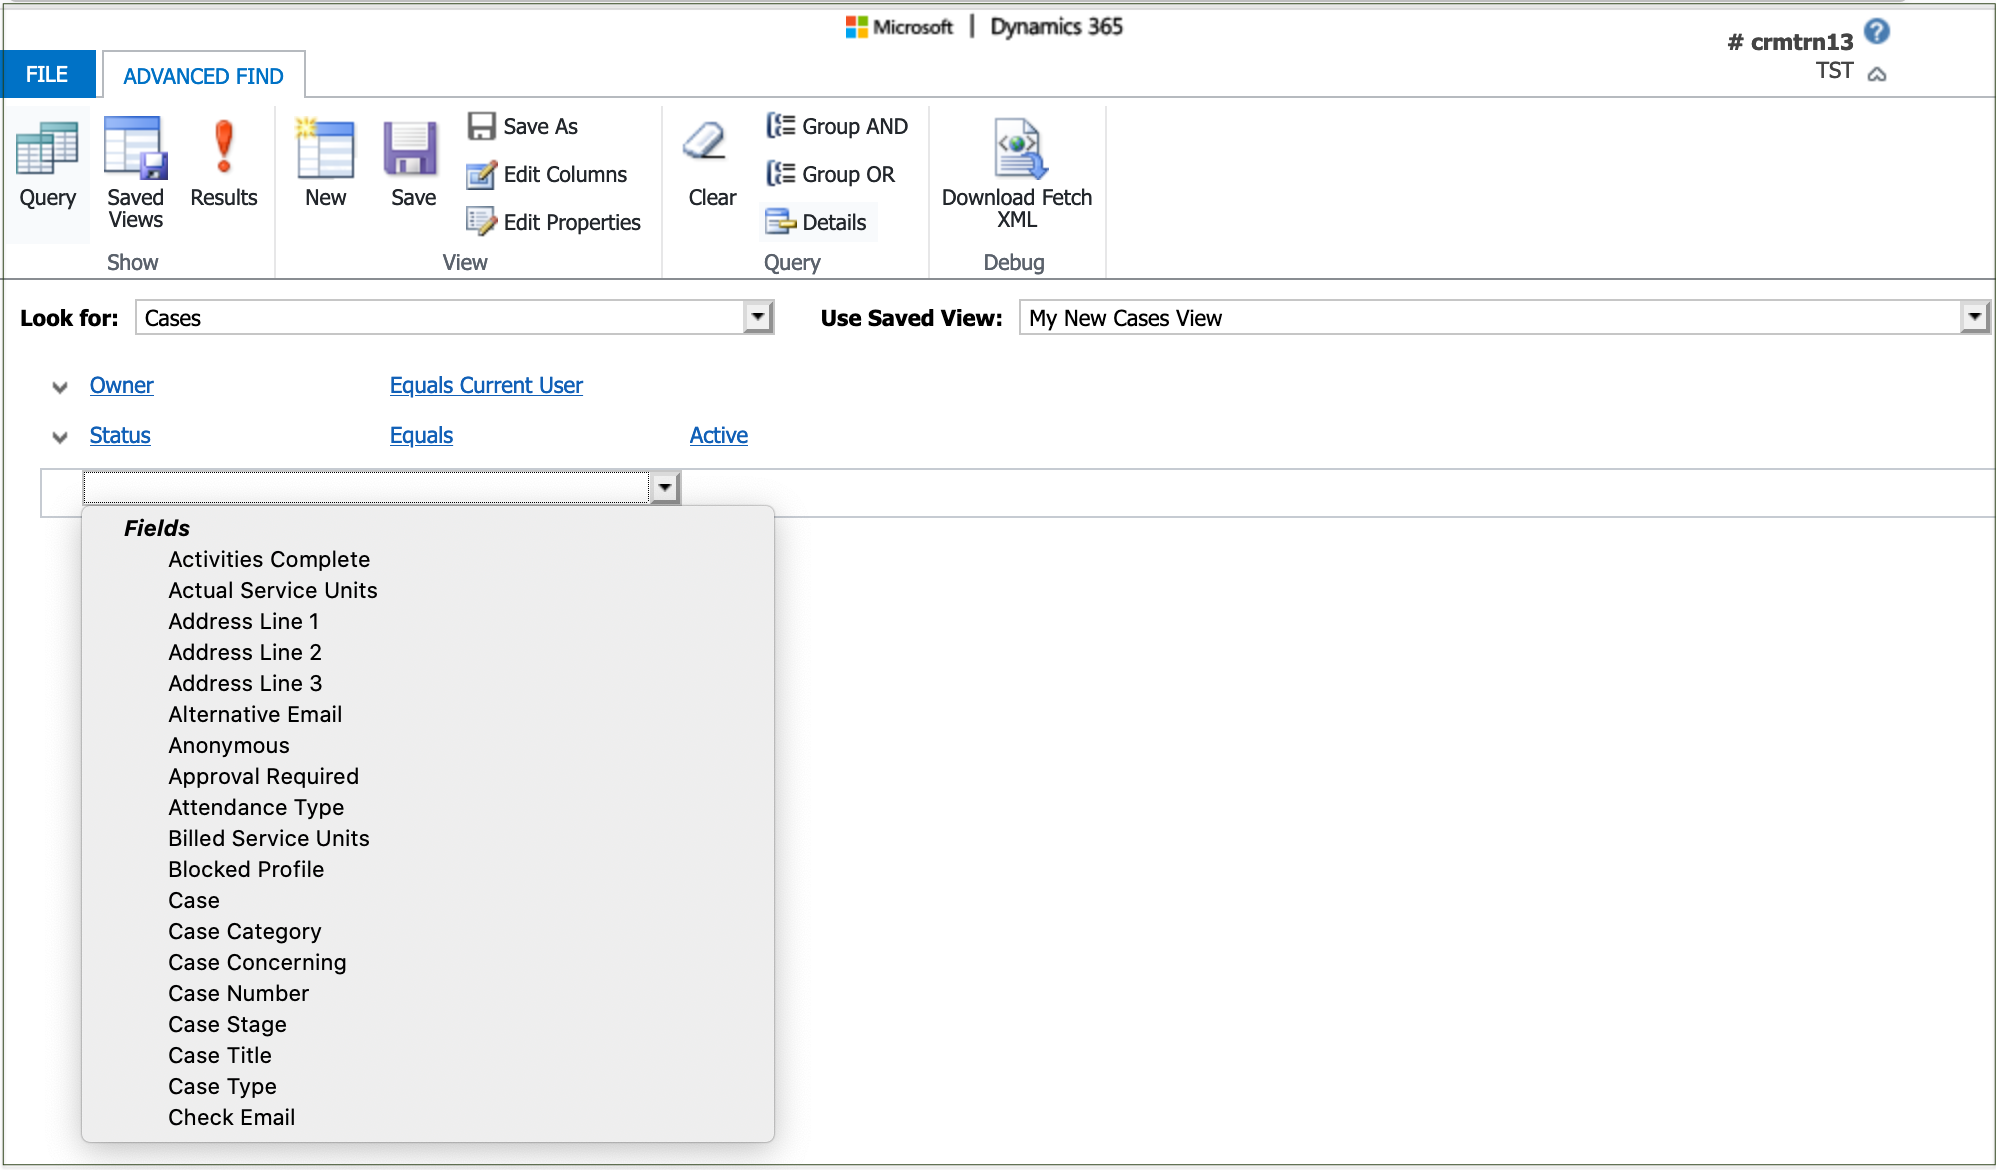
Note: When creating a new view from scratch, a filter of 'Status Equals Active' should normally be added so that the view excludes Inactive records.]
To update a new/existing filter clause, change the filter operand and enter/search for a filter value as required.
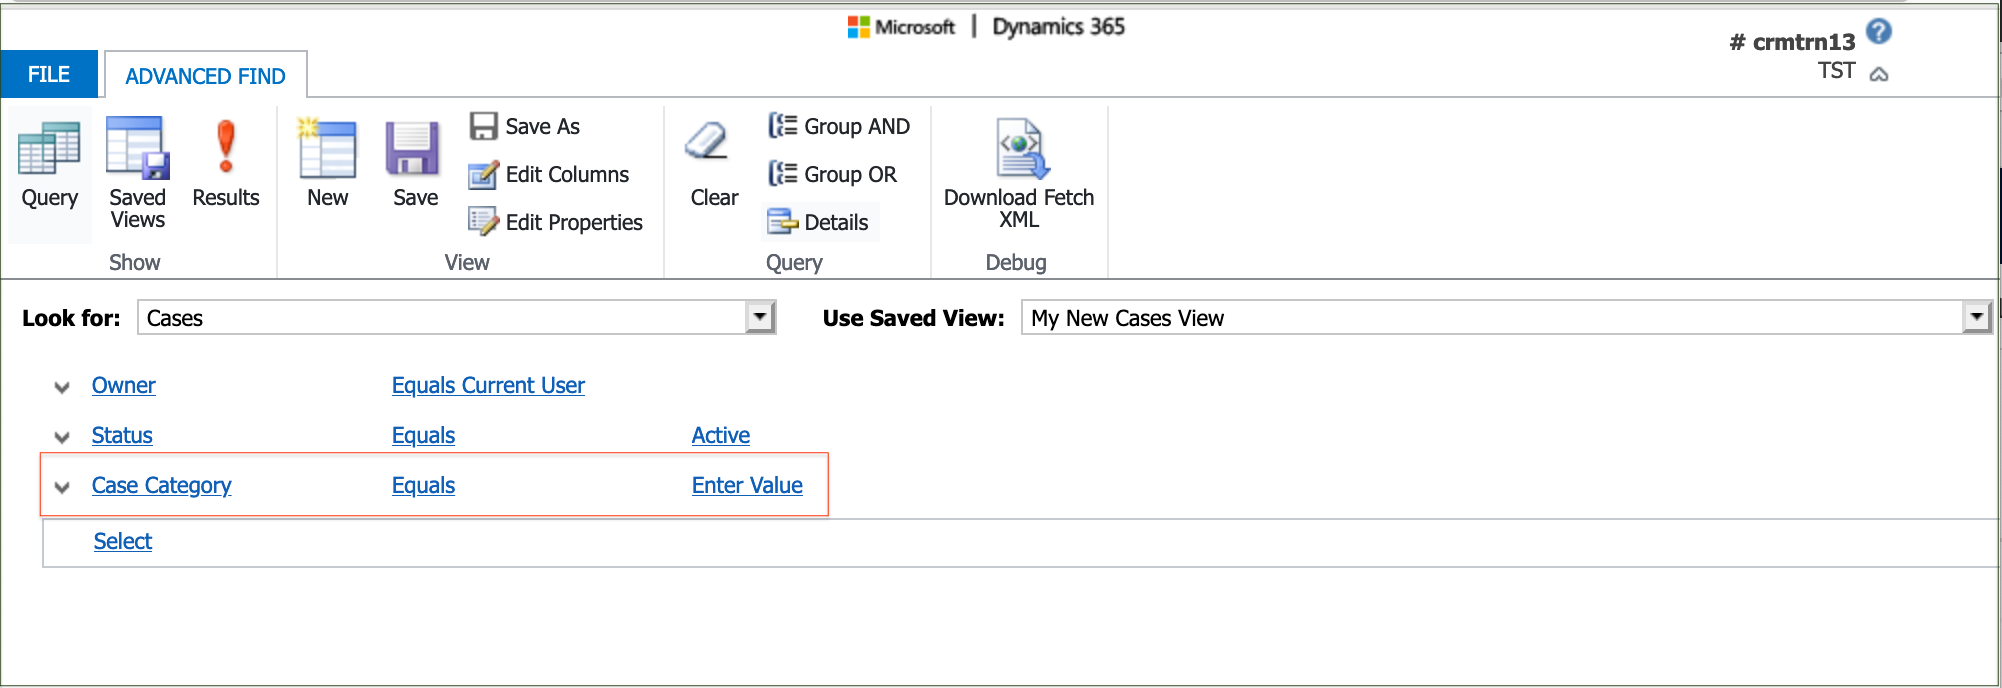
To delete a new/existing filter clause, click on the down arrow by the field name and 'Delete'.
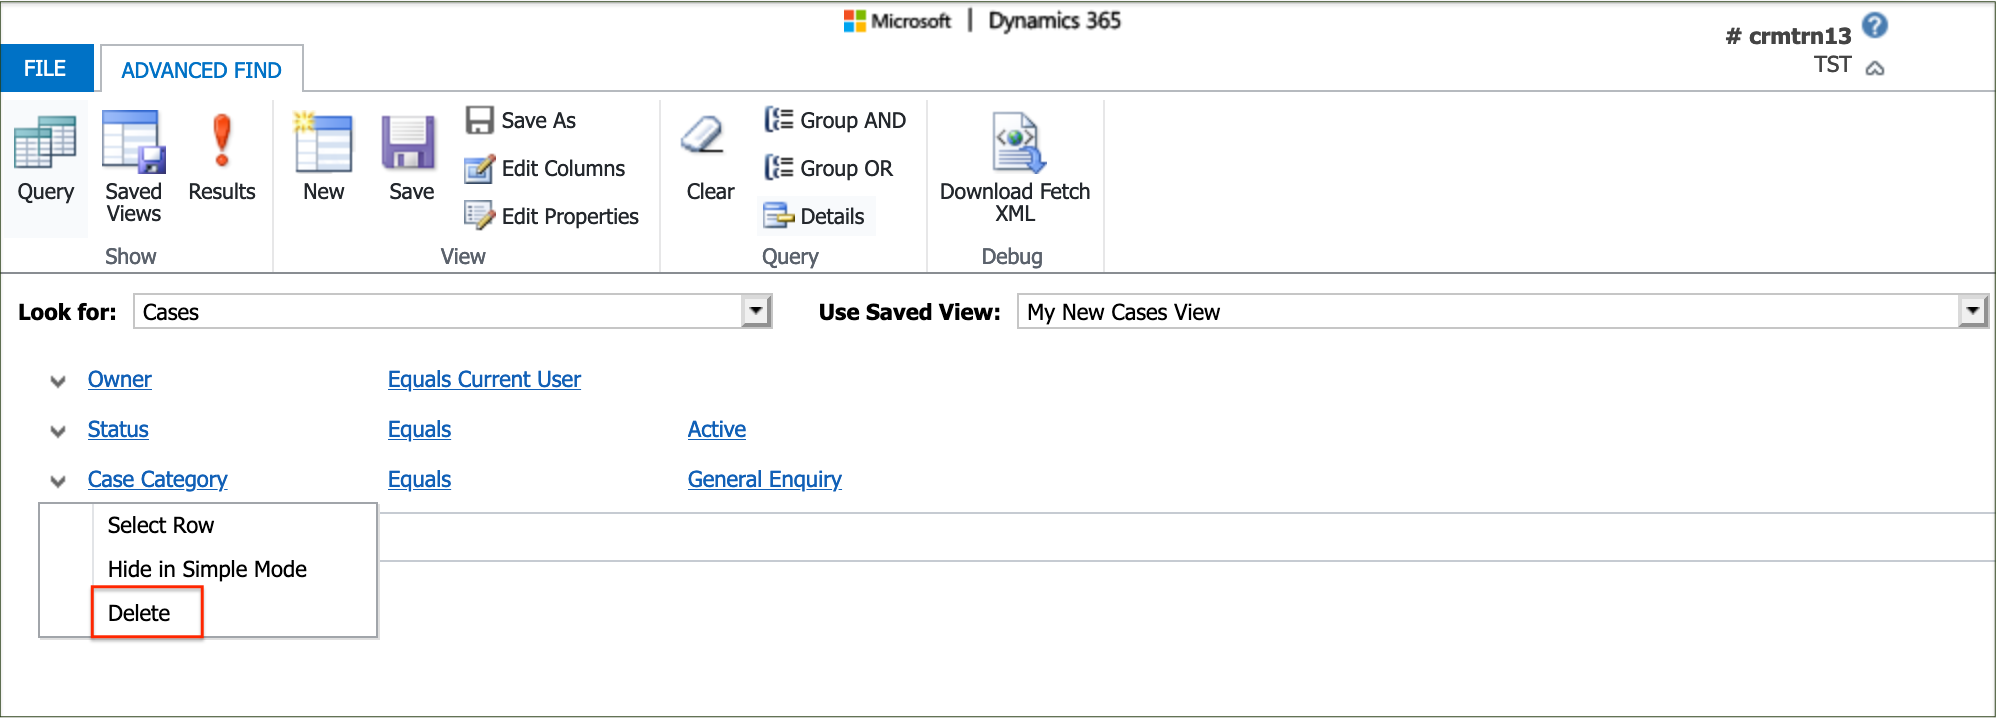
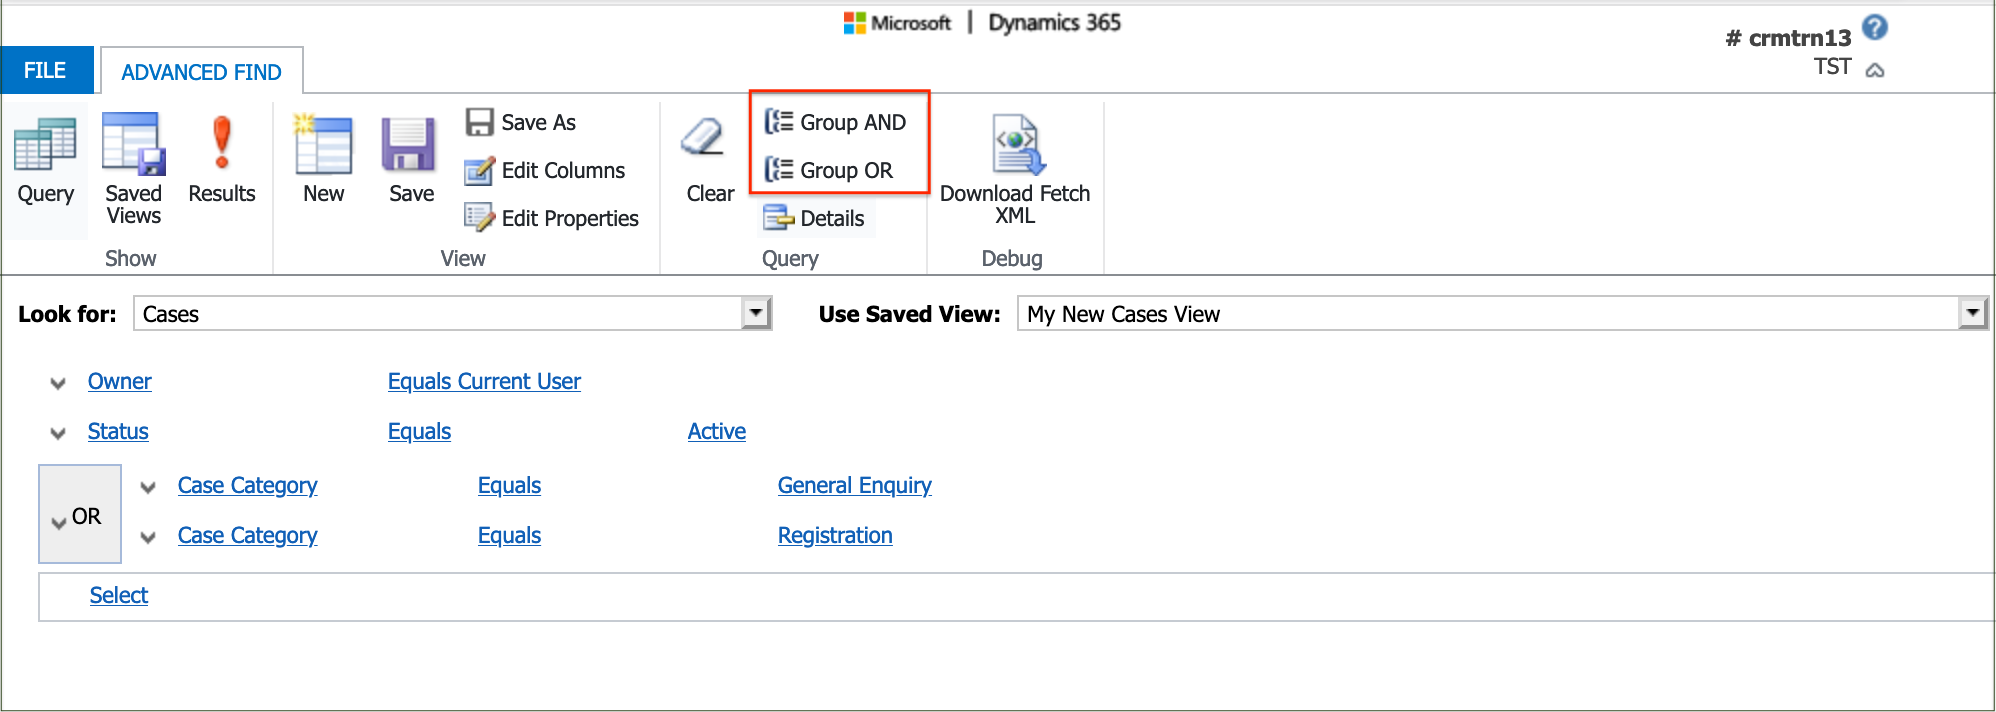
To Group multiple filter clauses together, click on the down arrow by the field names and 'Select Row', then click on either 'Group AND' or 'Group OR' in the Query section of the icon bar.
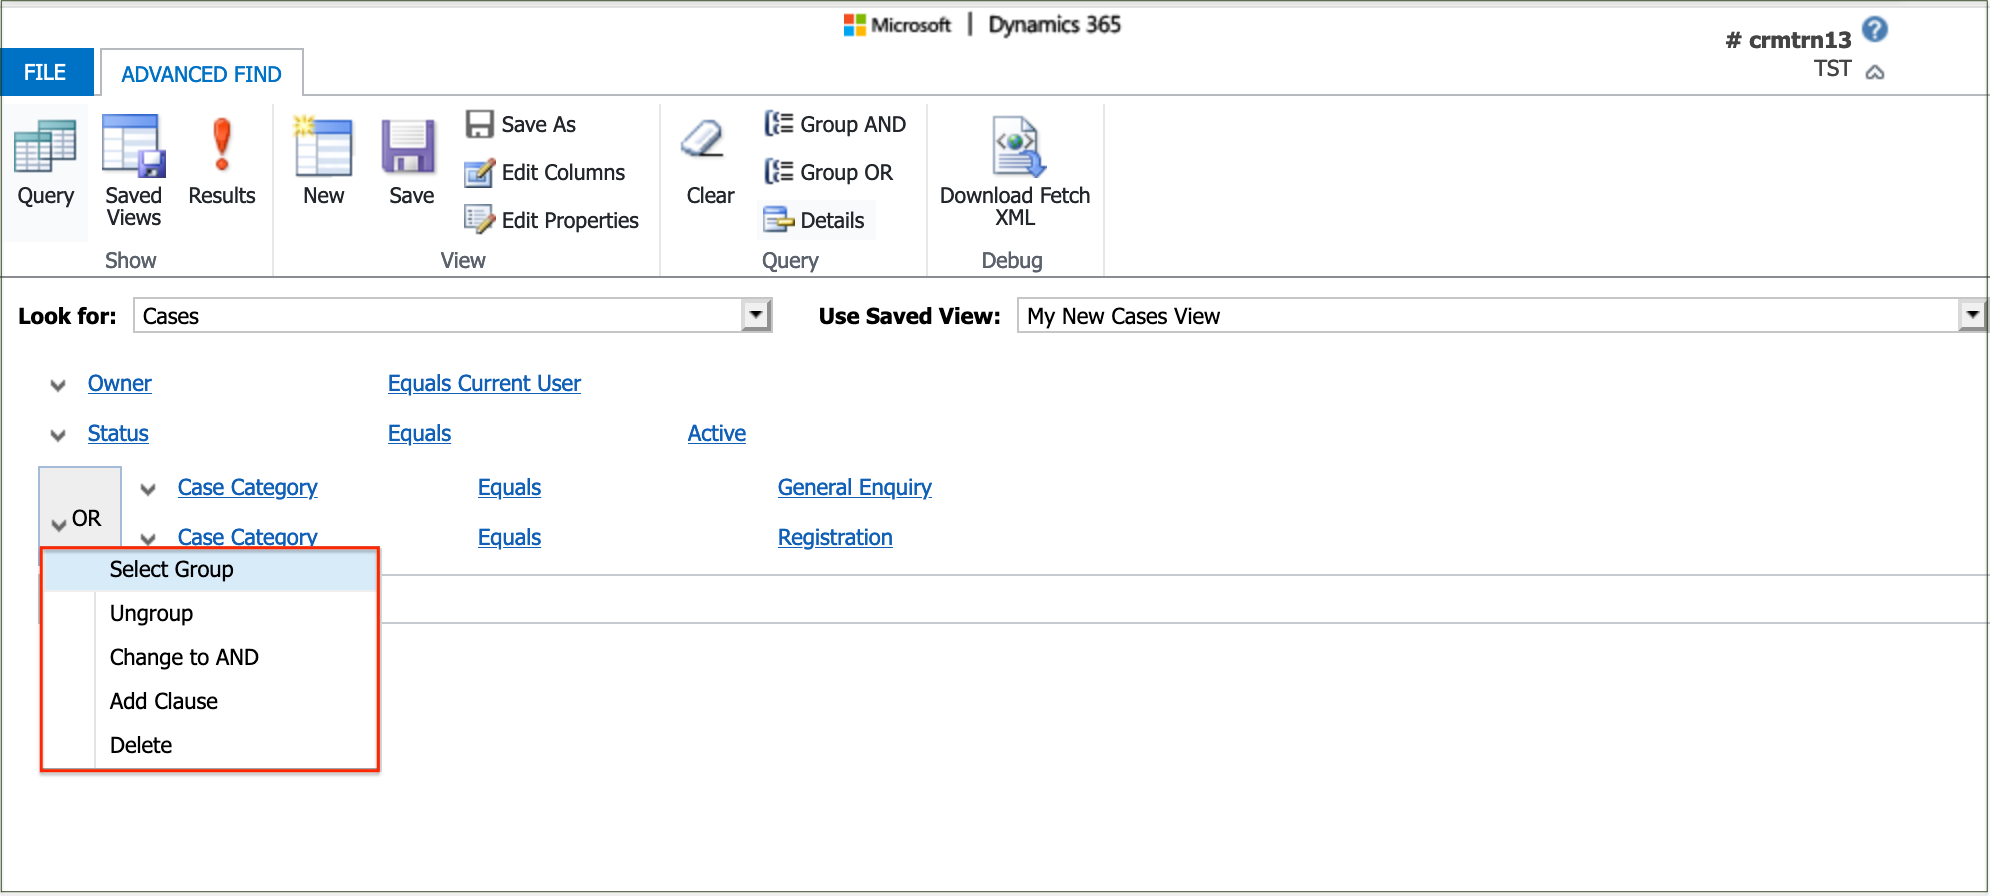
A group filter can be changed by clicking in the down arrow by the 'AND' or 'OR' arguments and selecting a command.
If there are multiple rows in a hierarchy, deleting the top level will also delete the lower level.
'Save' the filter details when completed.
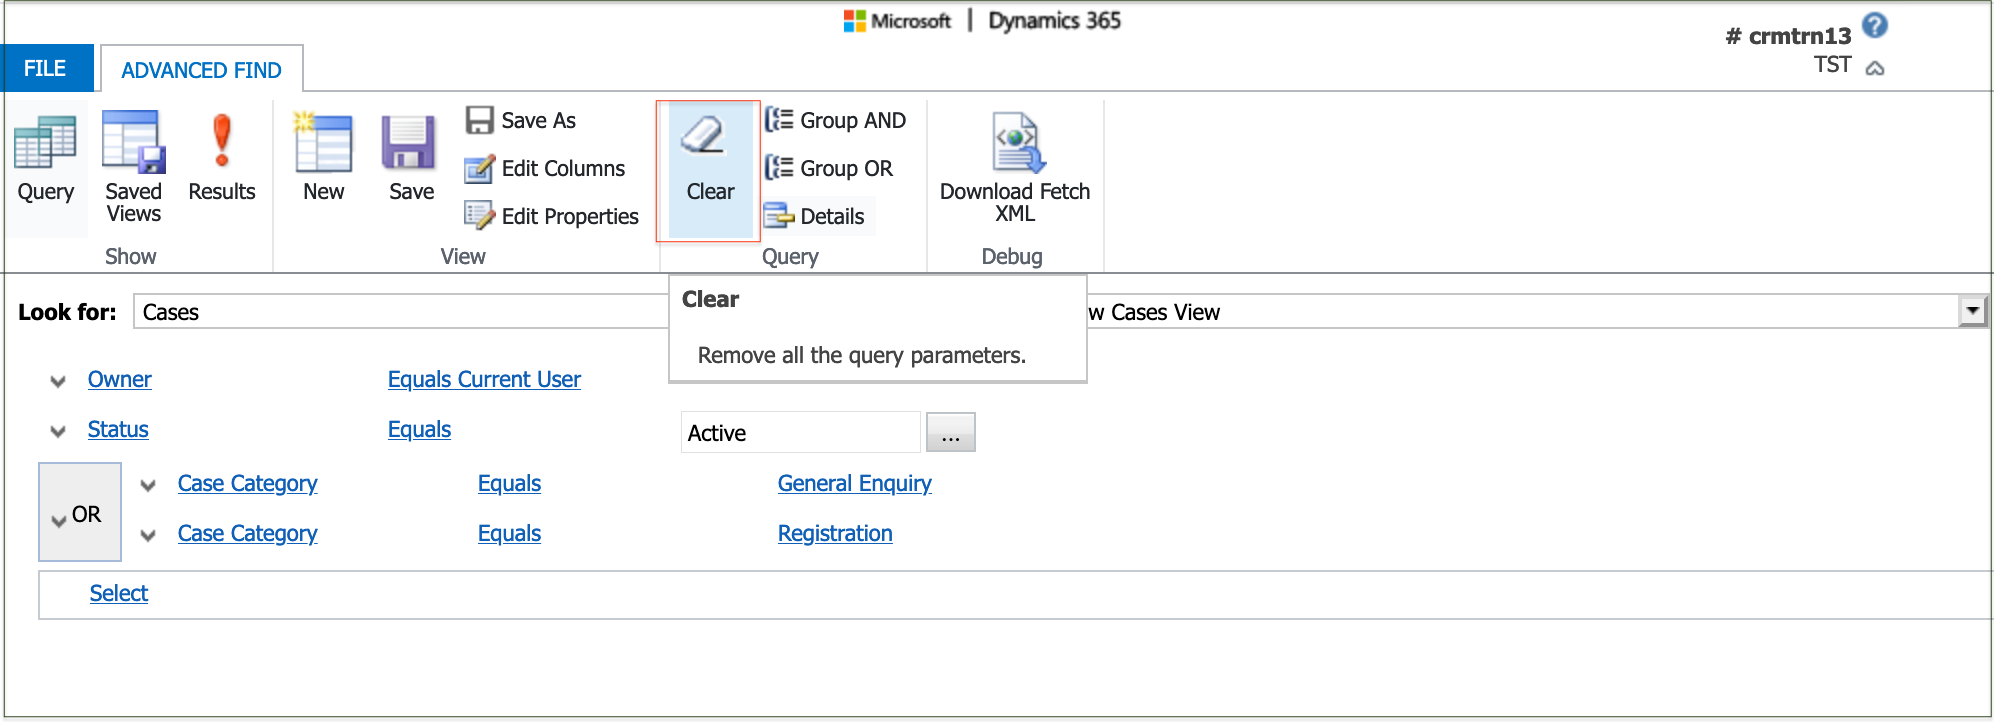
Clicking on 'Clear' in the Query section of the icon bar will remove all the filters from a view.
Filtering on related entities in a query
To create a view containing a filter from a related entity, always select the child entity from the 'Look For:' list.
For example, if a Case can be linked to several Activities records, then select the Activities entity.
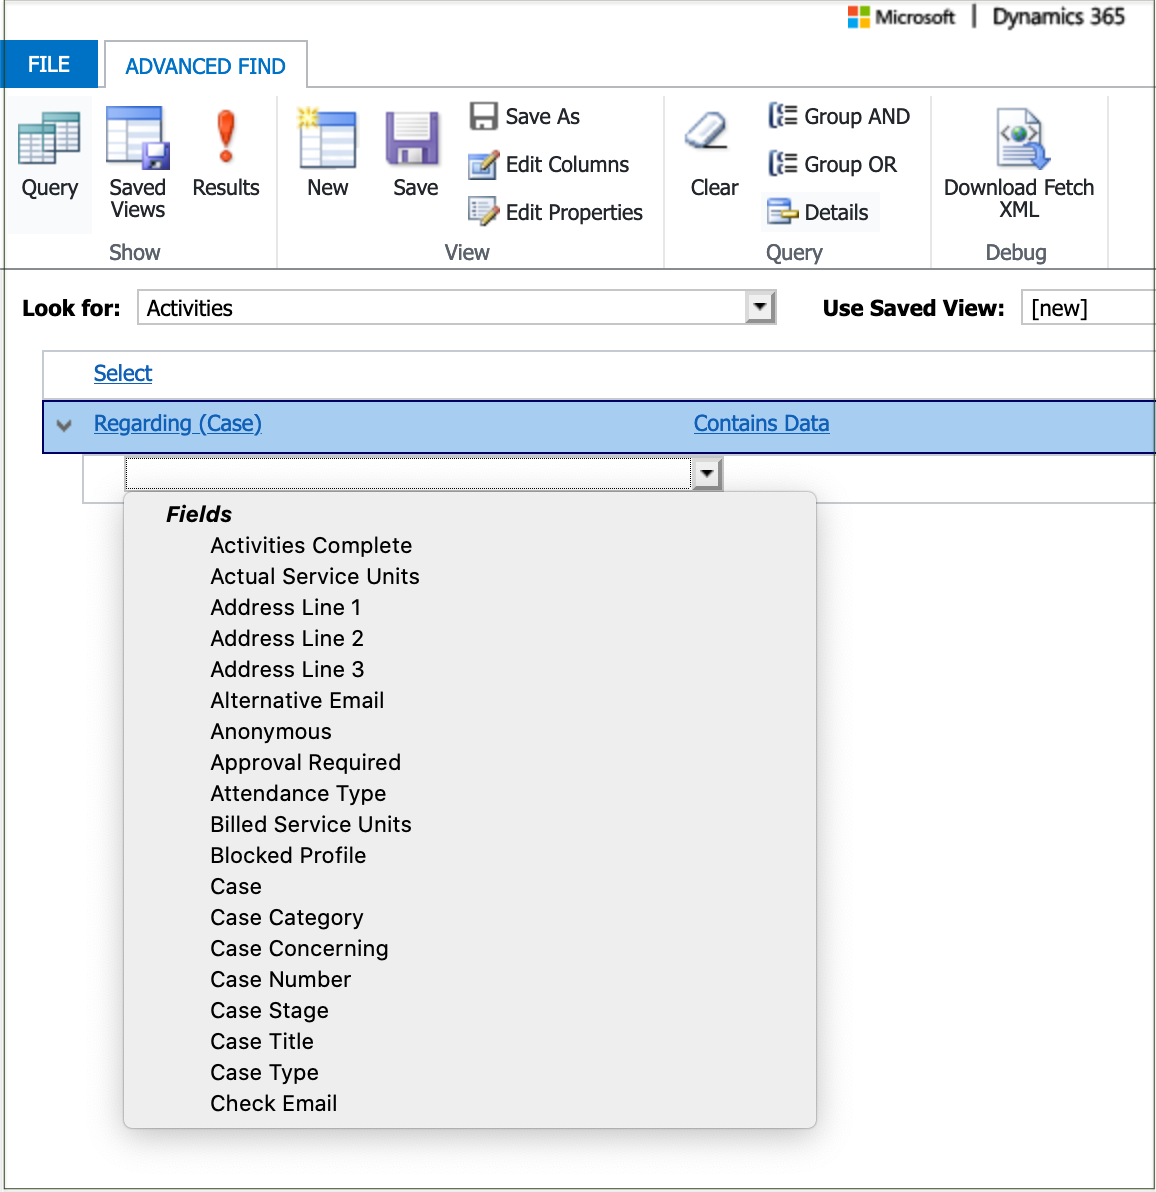
Clicking on the 'Select' drop down displays a list of fields in the Activities entity followed by a list of Related entities.
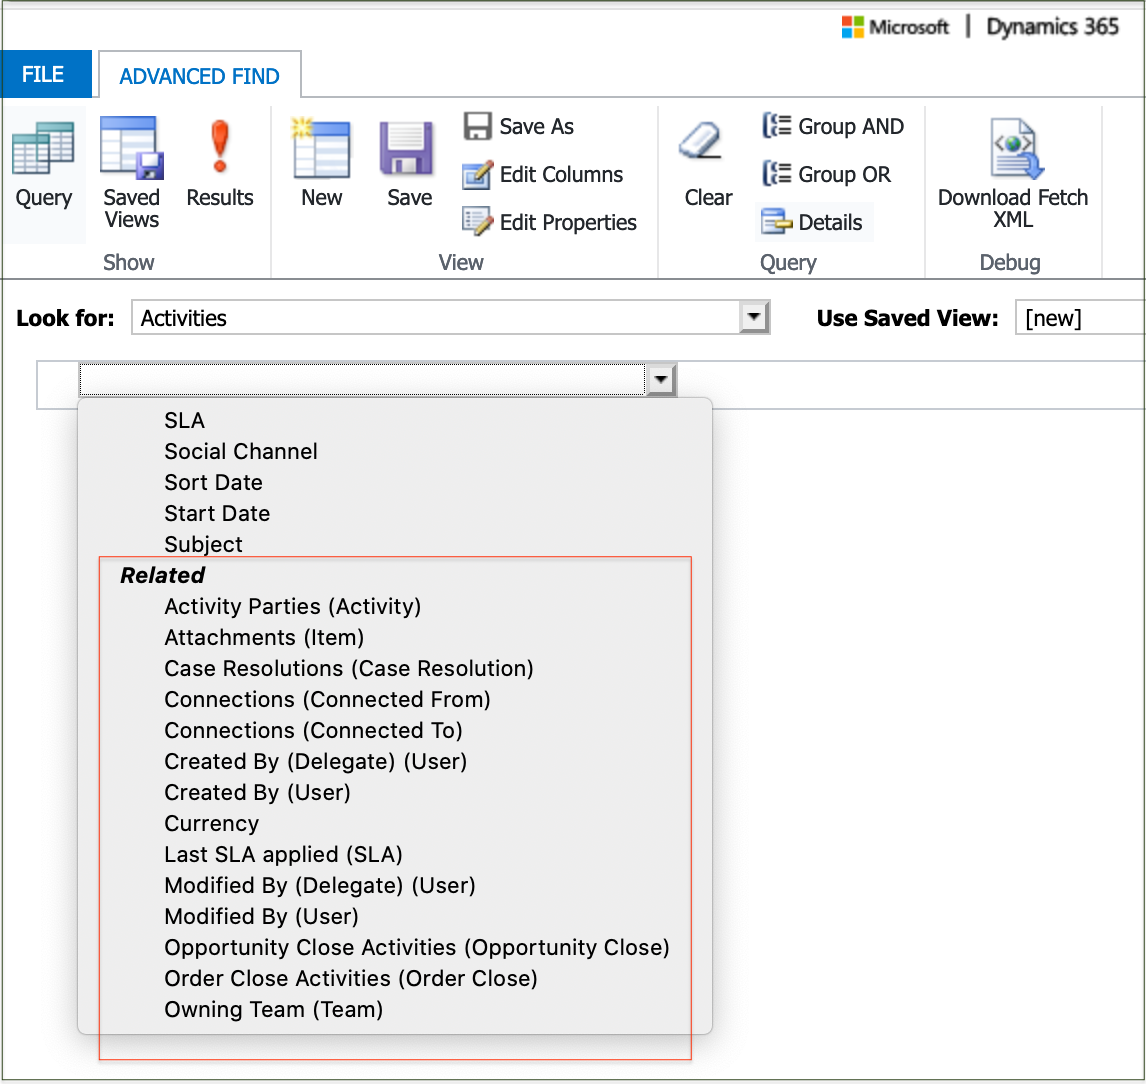
Selecting the related entity 'Regarding (Case)' generates a filter clause 'Contains Data'.
Then clicking on the 'Select' drop down displays a list of fields in the related Case entity.
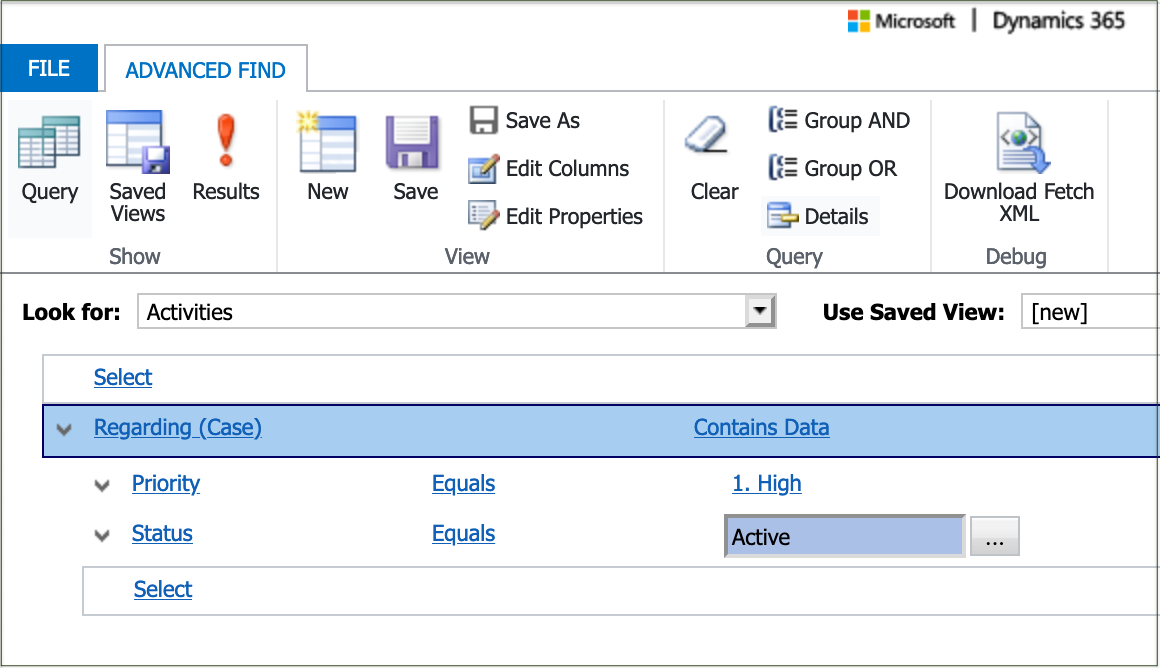
Selecting the fields and values in this example will create a filter to retrieve all Active Priority 1 Cases that contain Activities data.
Defining columns in a view
On the 'Advanced Find' form, ensure the required view is displayed in the 'Use Saved View:' field and select 'Edit Columns' in the View section of the icon bar.
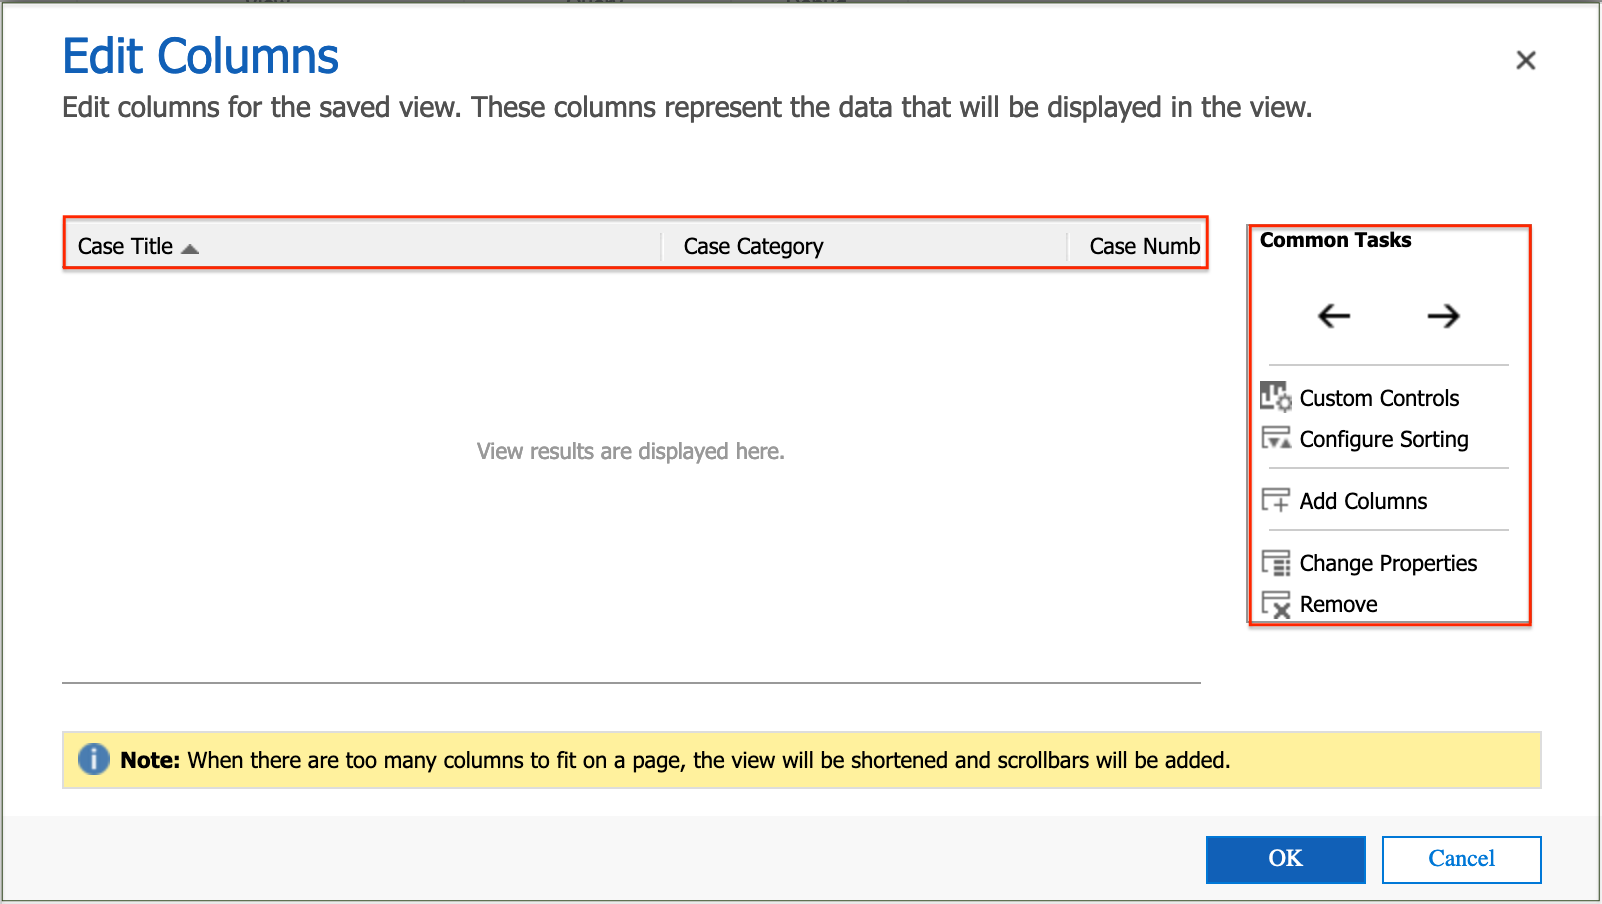
The 'Edit Columns' form opens in a new window with the columns displayed on the horizontal column bar, and the column related actions that can be performed shown in the Common Tasks area.
- If a saved view has been used as a base, the current columns in the view will be displayed
- If a new view is being created from scratch, the main fields of the entity will be displayed by default
Add columns
Click on the column after which additional columns are to be added, then click on 'Add columns' to display a list of fields for selection.
Note: Existing columns in the view will not be listed again.
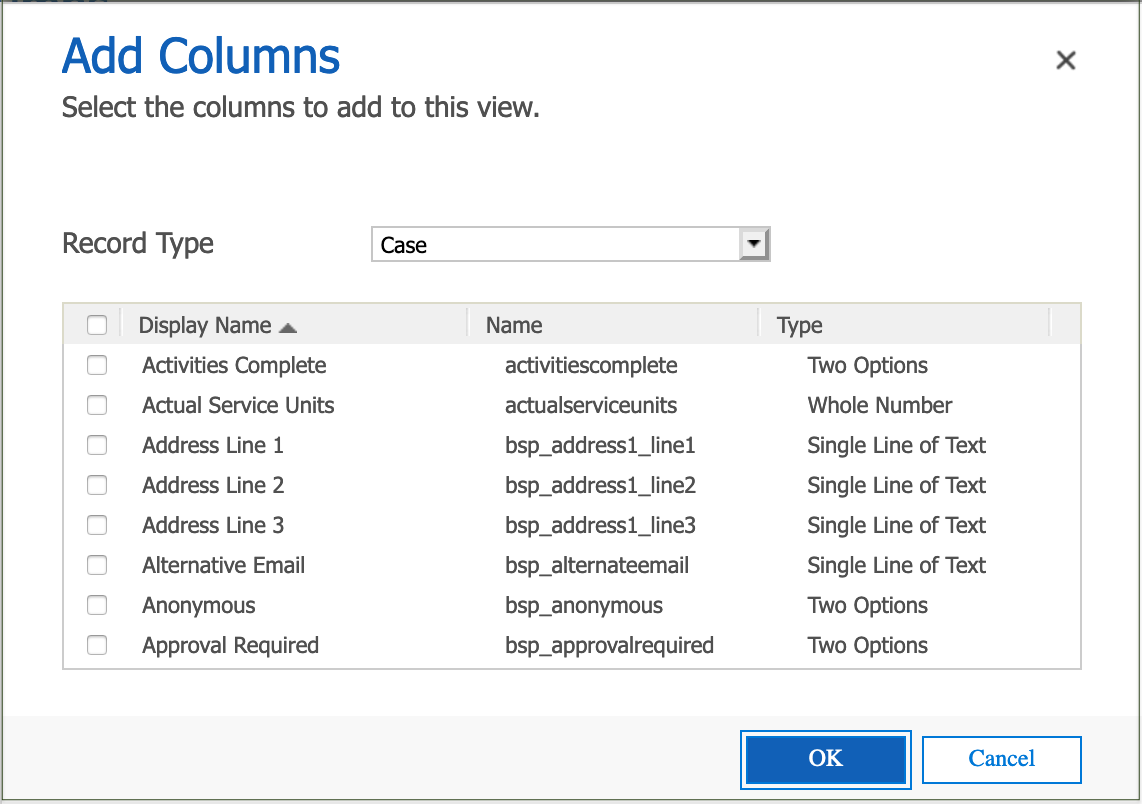
Select the required fields in the default entity by clicking the box to the left of each field name.
Click 'OK' when the required fields have been selected.
Note: Fields that commence with 'ZZ' are not in use and must be ignored.
Adding related fields to a view
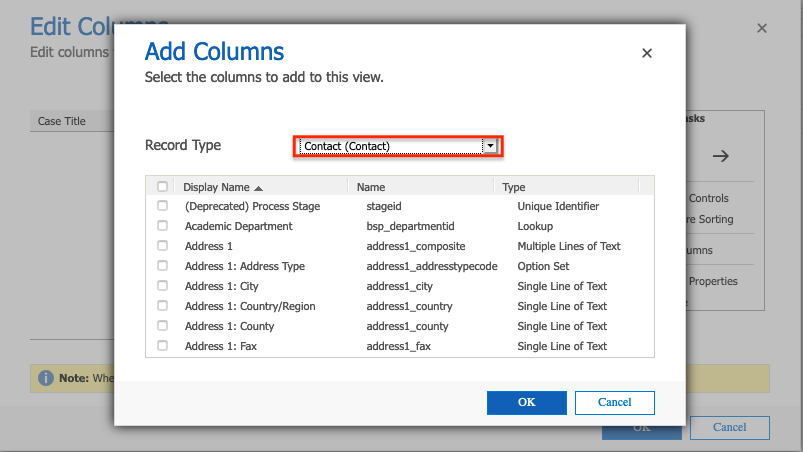
To add fields from a related entity, select the required entity from the 'Record Type' drop down.
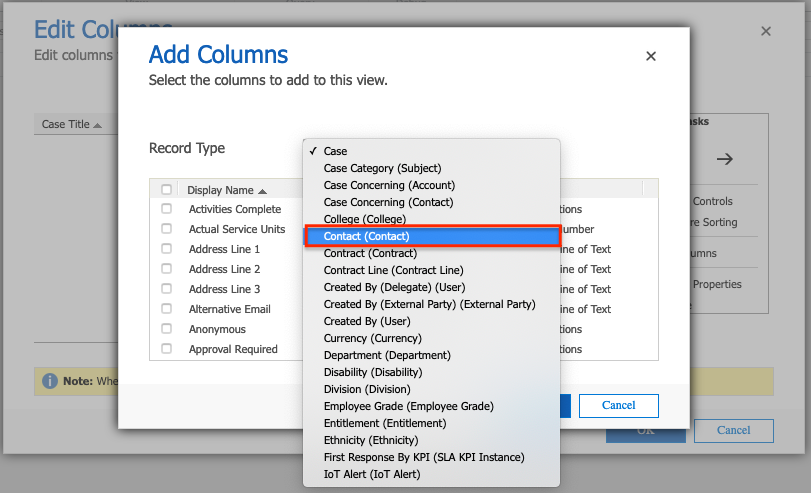
The fields from the related entity can be selected in the same way as for the default entity.
Click 'OK' when the required fields have been selected.
Change width
Click on the column to be changed, then click on 'Change Properties' to display the properties of the column.
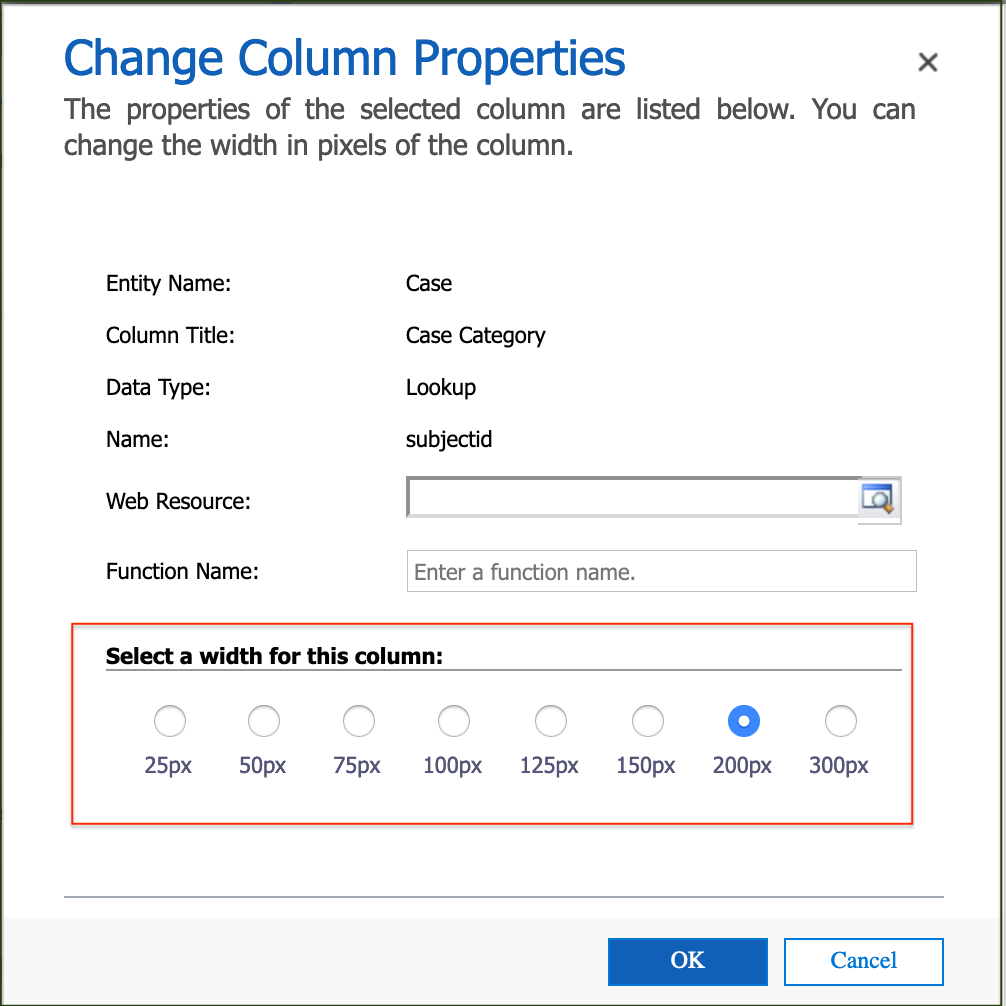
Select the required width for the column and click 'OK'.
Repeat for as many columns as required.
Move column
Click on the column to be moved in relation to the other columns, then click on the left or right arrow to move the column in the direction required.
Repeat for as many columns as required.
Configure sort order
Click on 'Configure Sorting' to define the order of data display for the view.
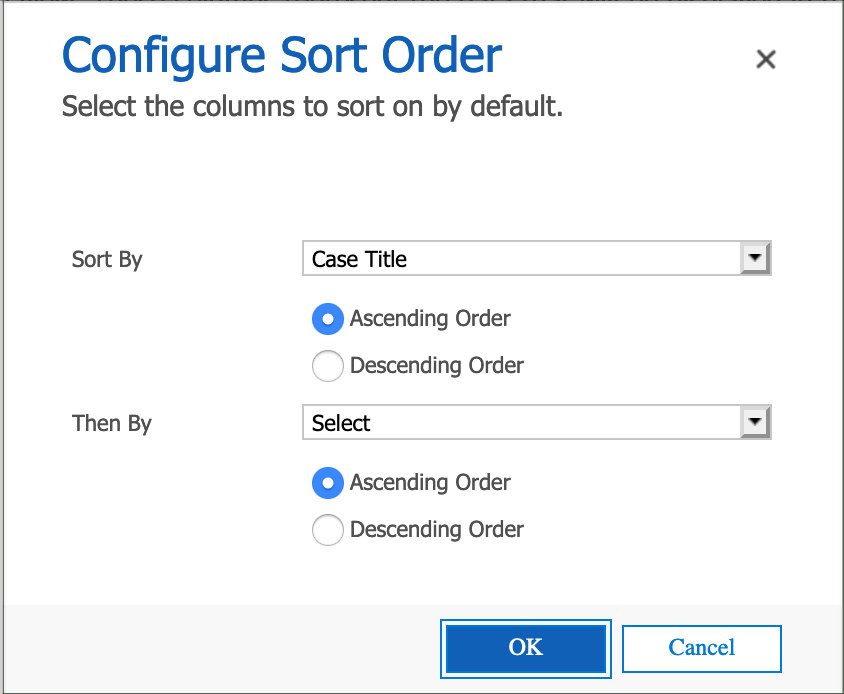
Up to two field levels can be selected for sorting in either ascending or descending order, then click 'OK'.
Remove column
Click on the column to be removed and click on 'Remove' then 'OK' to confirm.
Repeat for as many columns as required.
Note: The 'Custom Controls' option should not be used.
Reviewing the results of a configured view
The resulting data output of a view can be checked at any point during its configuration by clicking 'Results' in the Show section of the icon bar.
Click on the 'ADVANCED FIND' tab to return to the 'Advanced Find' form to 'Save' or make further changes to the view configuration.

Note: A warning is displayed when attempting to close the form without saving changes.
Displaying a list of saved views
On the 'Advanced Find' form, ensure the required level of data is displayed in the 'Look for:' drop down list, then click on 'Saved' Views' in the Show section of the icon bar.
The type of views to be displayed can be selected from the 'Saved Views' drop down list.
Note: Users can only see views they own, or have been granted permission to read.
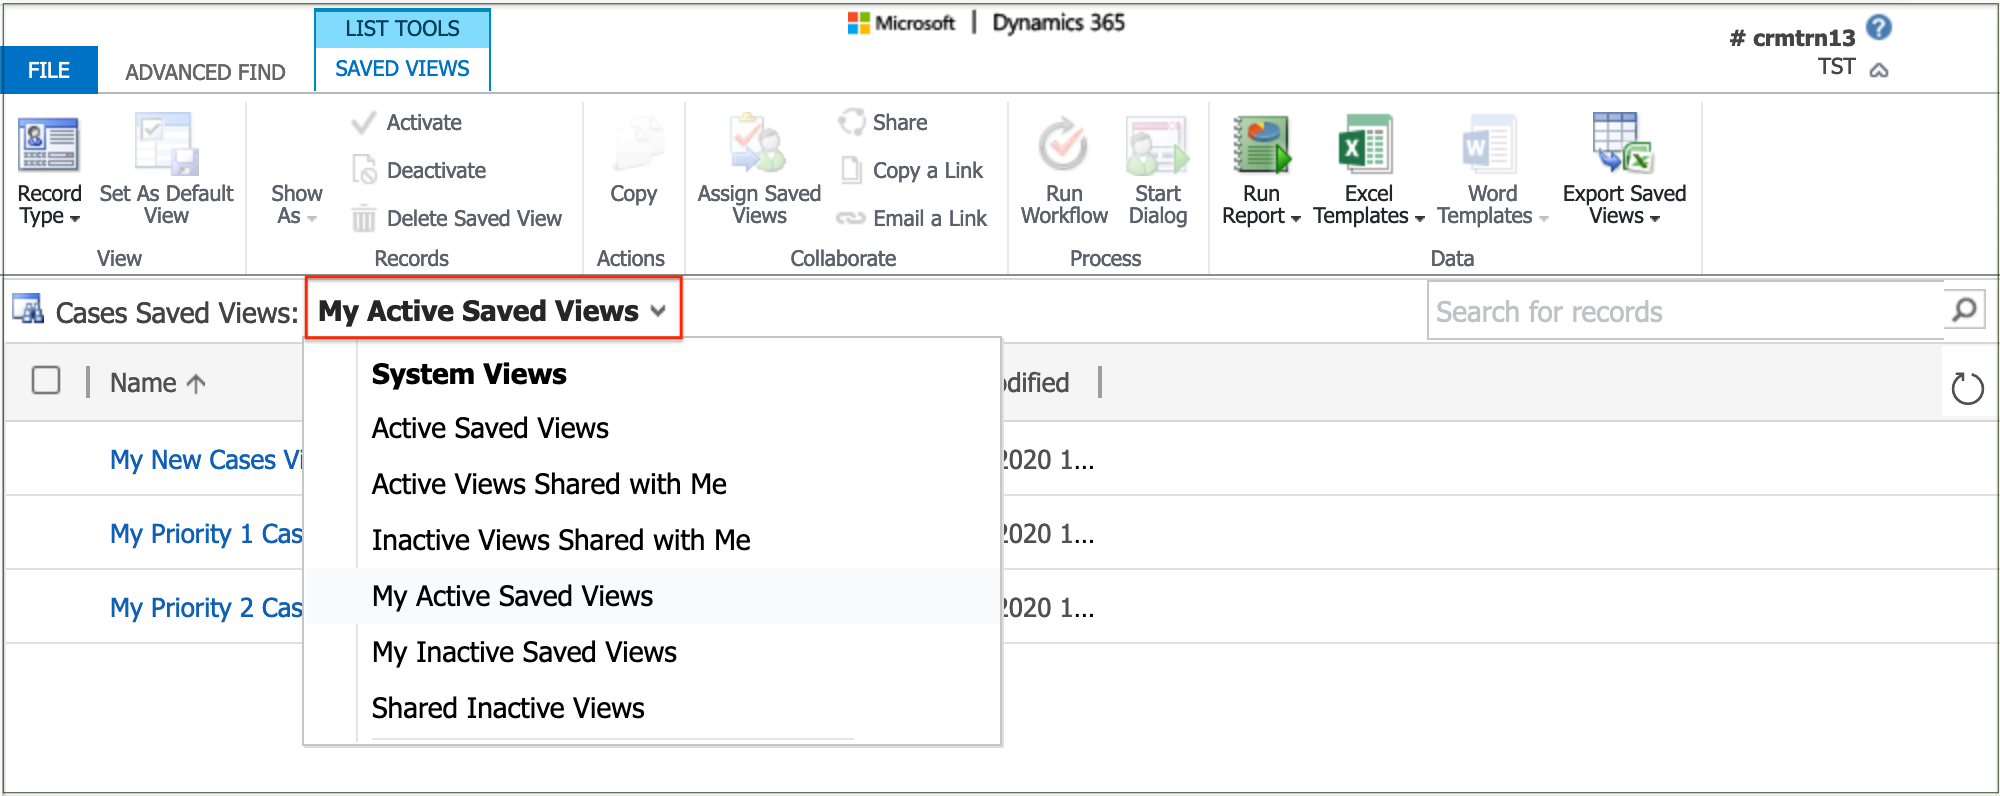
Click on the Name of a view to edit it, or click in a checkbox next to a name to activate the options on the icon bar for the selected view(s).
To make a selected view the default for that entity, click on 'Set As Default View' in the View section of the icon bar.
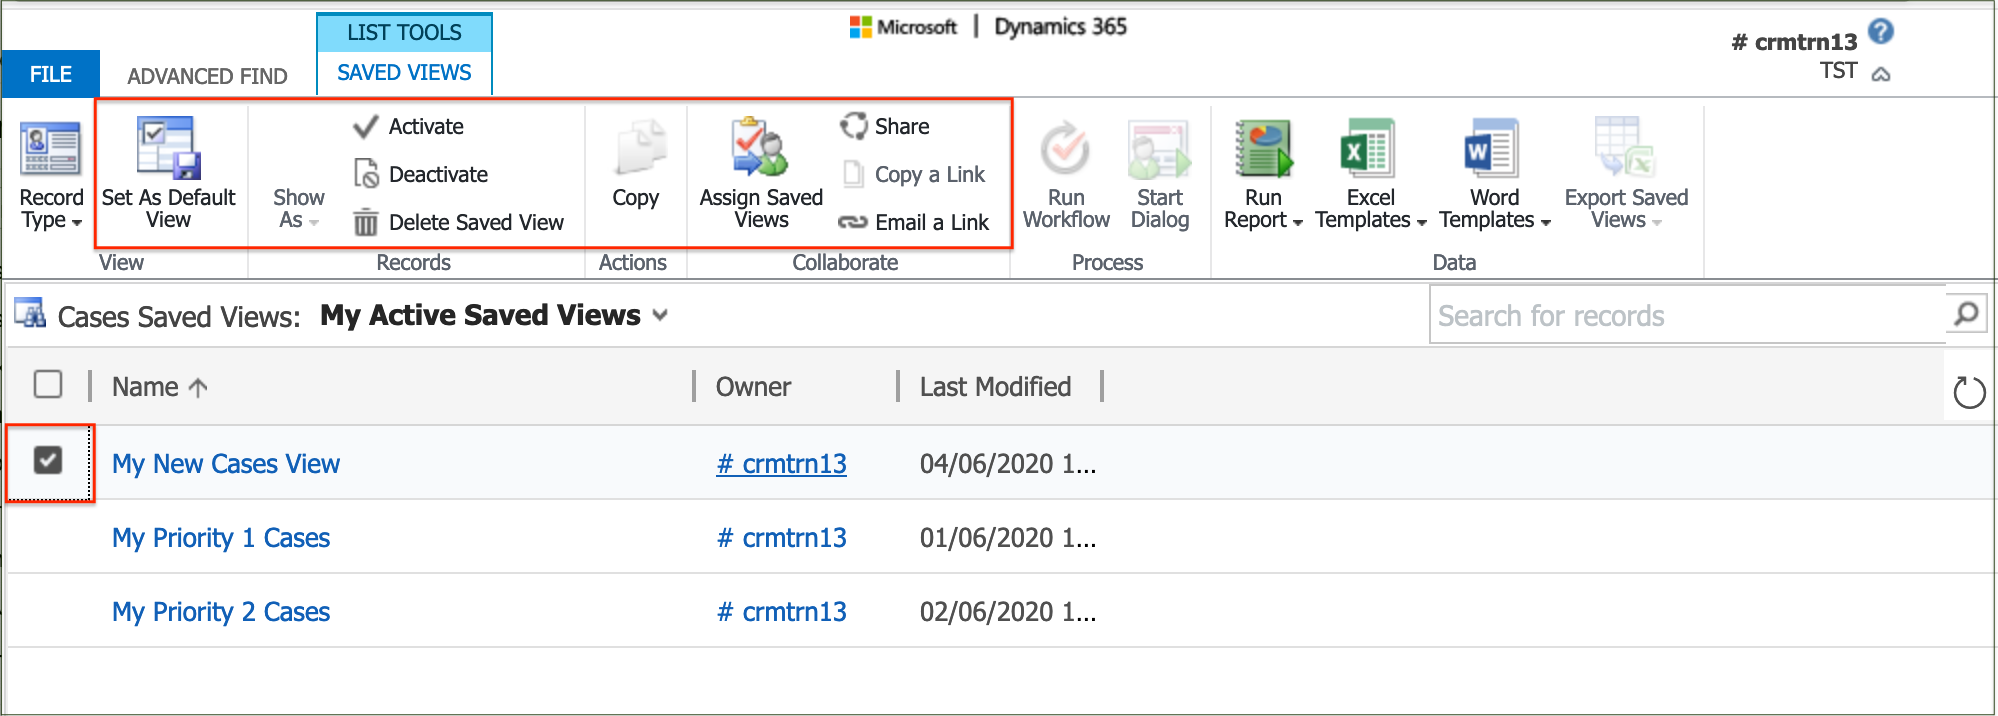
Click on the 'ADVANCED FIND' tab to return to the 'Advanced Find' form.
Editing a view
A Personal view can be re-configured by selecting it from a list of saved views and changing the filters or columns as described for a new view.
Note: Users can only edit views they own, or have been granted permission to edit.
To change the Name or Description of a Personal view, click on 'Edit Properties' in the View section of the icon bar.
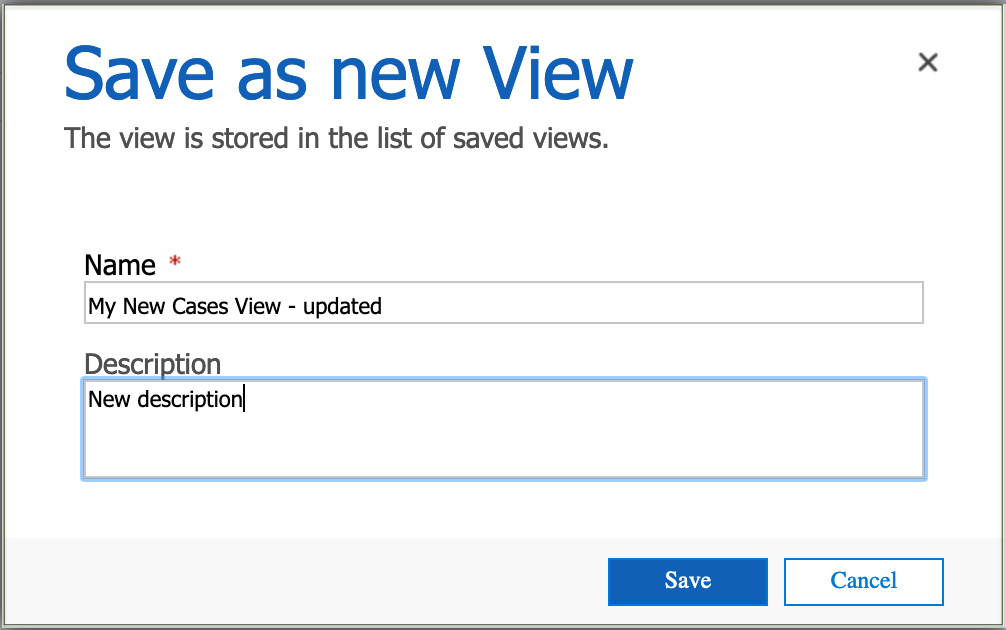
Edit the Name or Description as required and 'Save'.
Note: The updated Name is not displayed until the next time that the 'Advanced Find' form is opened.
Deleting a view
To permanently delete one or more Personal views, select the checkbox next to the view Name on a list of Saved views then click on 'Delete Saved View' in the Records section of the icon bar and confirm the deletion.
Note: Users can only delete views they own, or have been granted permission to delete.
Activating/Deactivating a view
Personal views are activated by default when they are created.
To temporarily deactivate one or more Personal views so that they do not appear in the application, select the checkbox next to the view Name on a list of Active Saved Views then click 'Deactivate' in the Records section of the icon bar and confirm the deactivation.
To reactivate one or more Personal views again, select the checkbox next to the view Name on a list of Inactive Saved Views then click 'Activate' in the Records section of the icon bar and confirm the activation.
Note: Users can only activate/deactivate views they own, or have been granted permission to edit.
Sharing a view
Personal views are only visible by default to the user creating them.
To share one or more Personal views so that they are visible to other users or teams, select the checkbox next to the view Name on a list of Saved Views then click 'Share' in the Collaborate section of the icon bar.
The 'Share saved view' form opens in a new window with the common tasks that can be performed on the view.
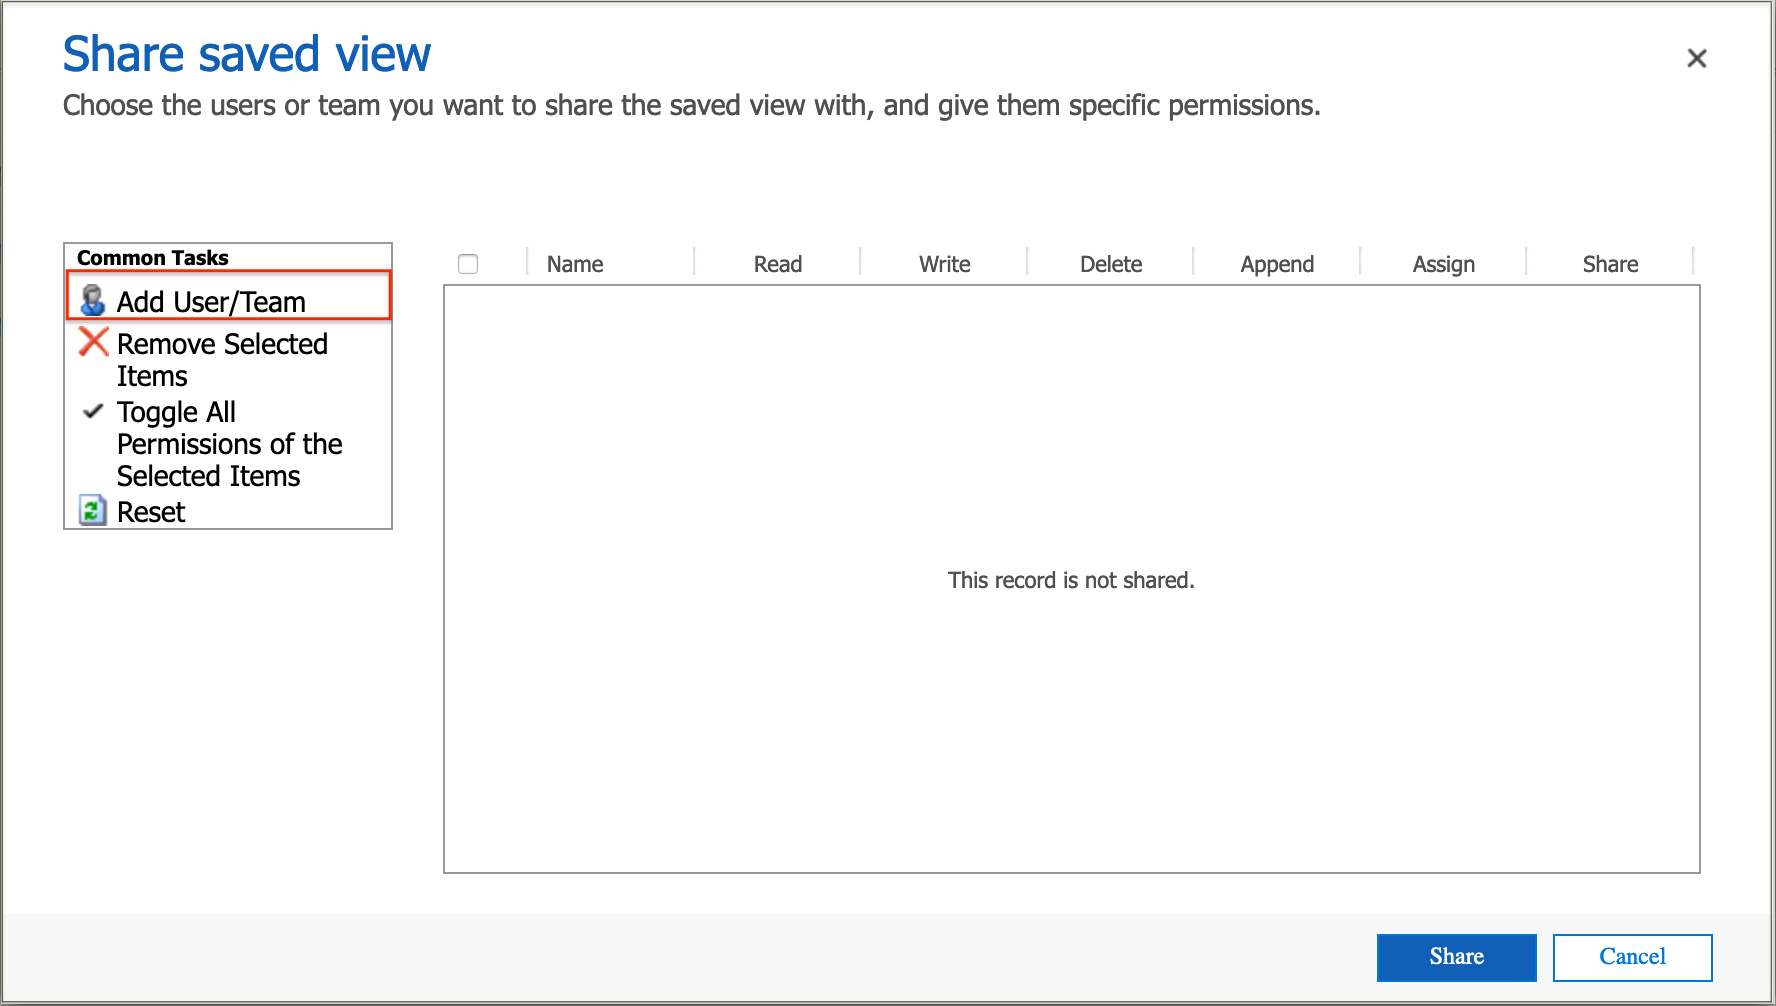
Click on 'Add User/Team' to select and add the users and/or teams that the view is to be shared with.
The selected user/team Names are then displayed on the form with 'Read' permission activated.
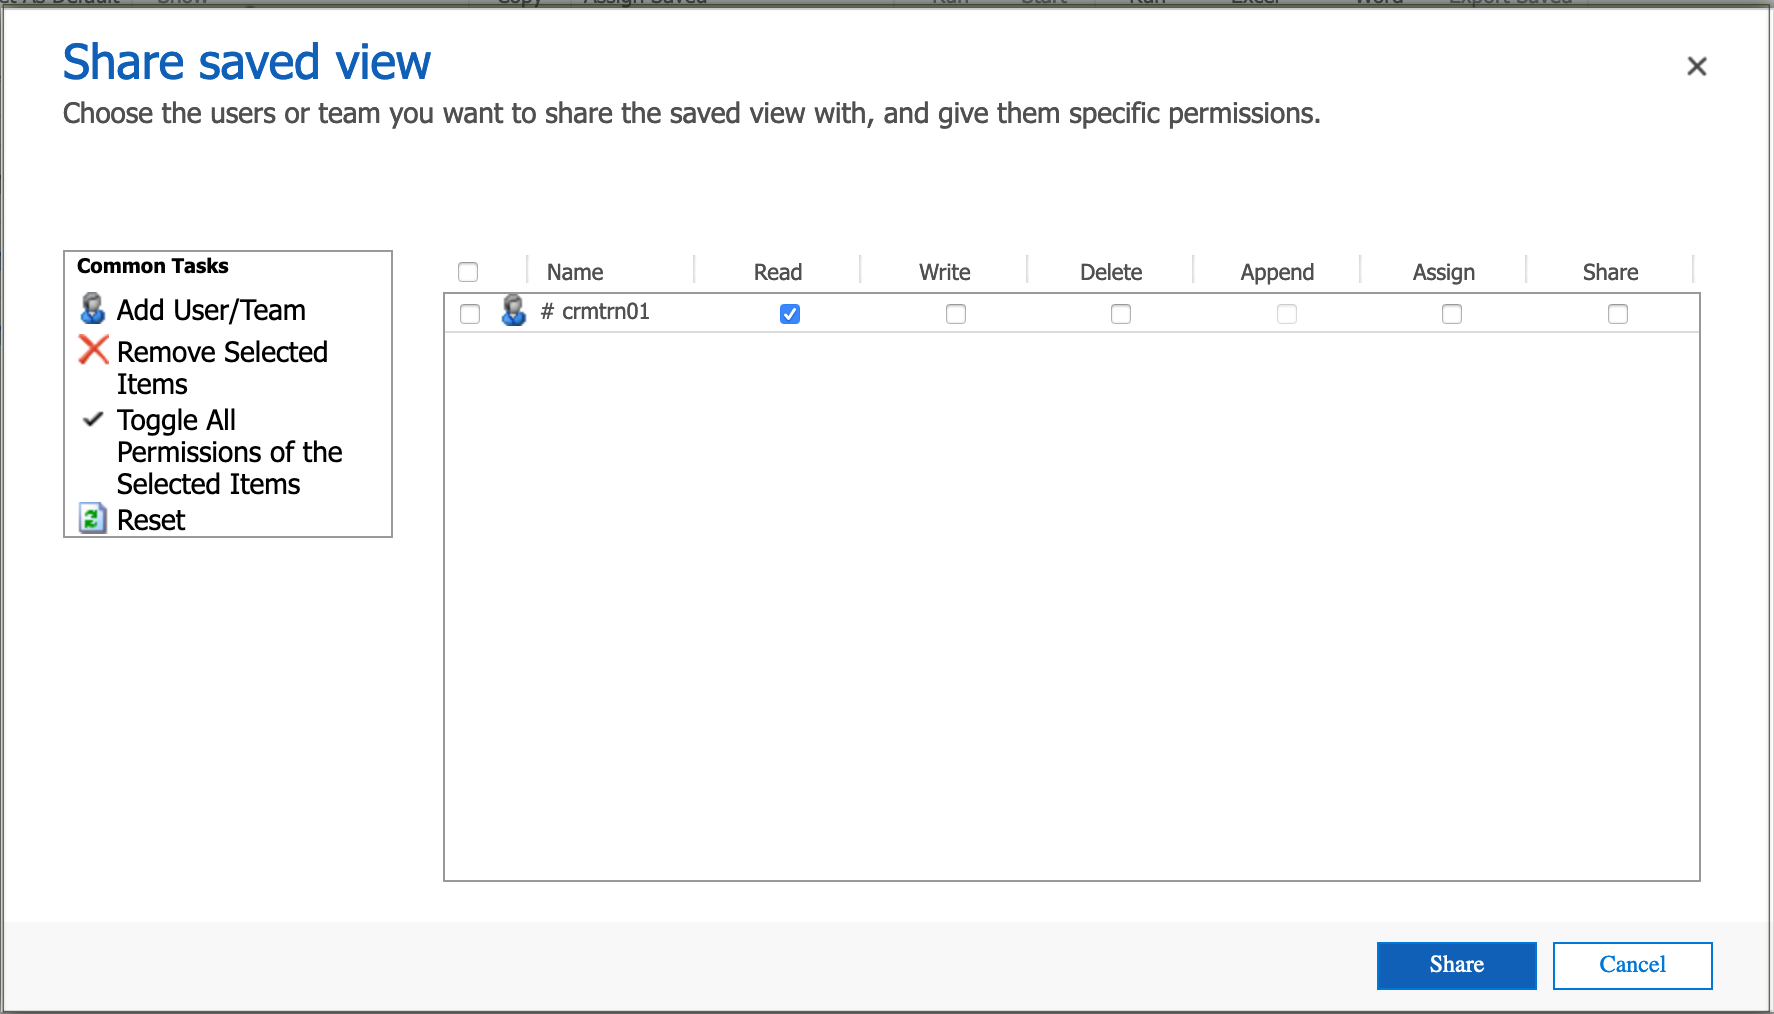
Tick any additional permissions to be granted and click 'Share' to save the permissions.
Note: The 'Append' permission is not used.
Individual permissions can be added/removed for a user/team when required.
To remove all permissions for one or more users/teams, select the checkbox next to the required Names on the 'Share saved views' form then click 'Remove Selected Items' and 'Share' to save.
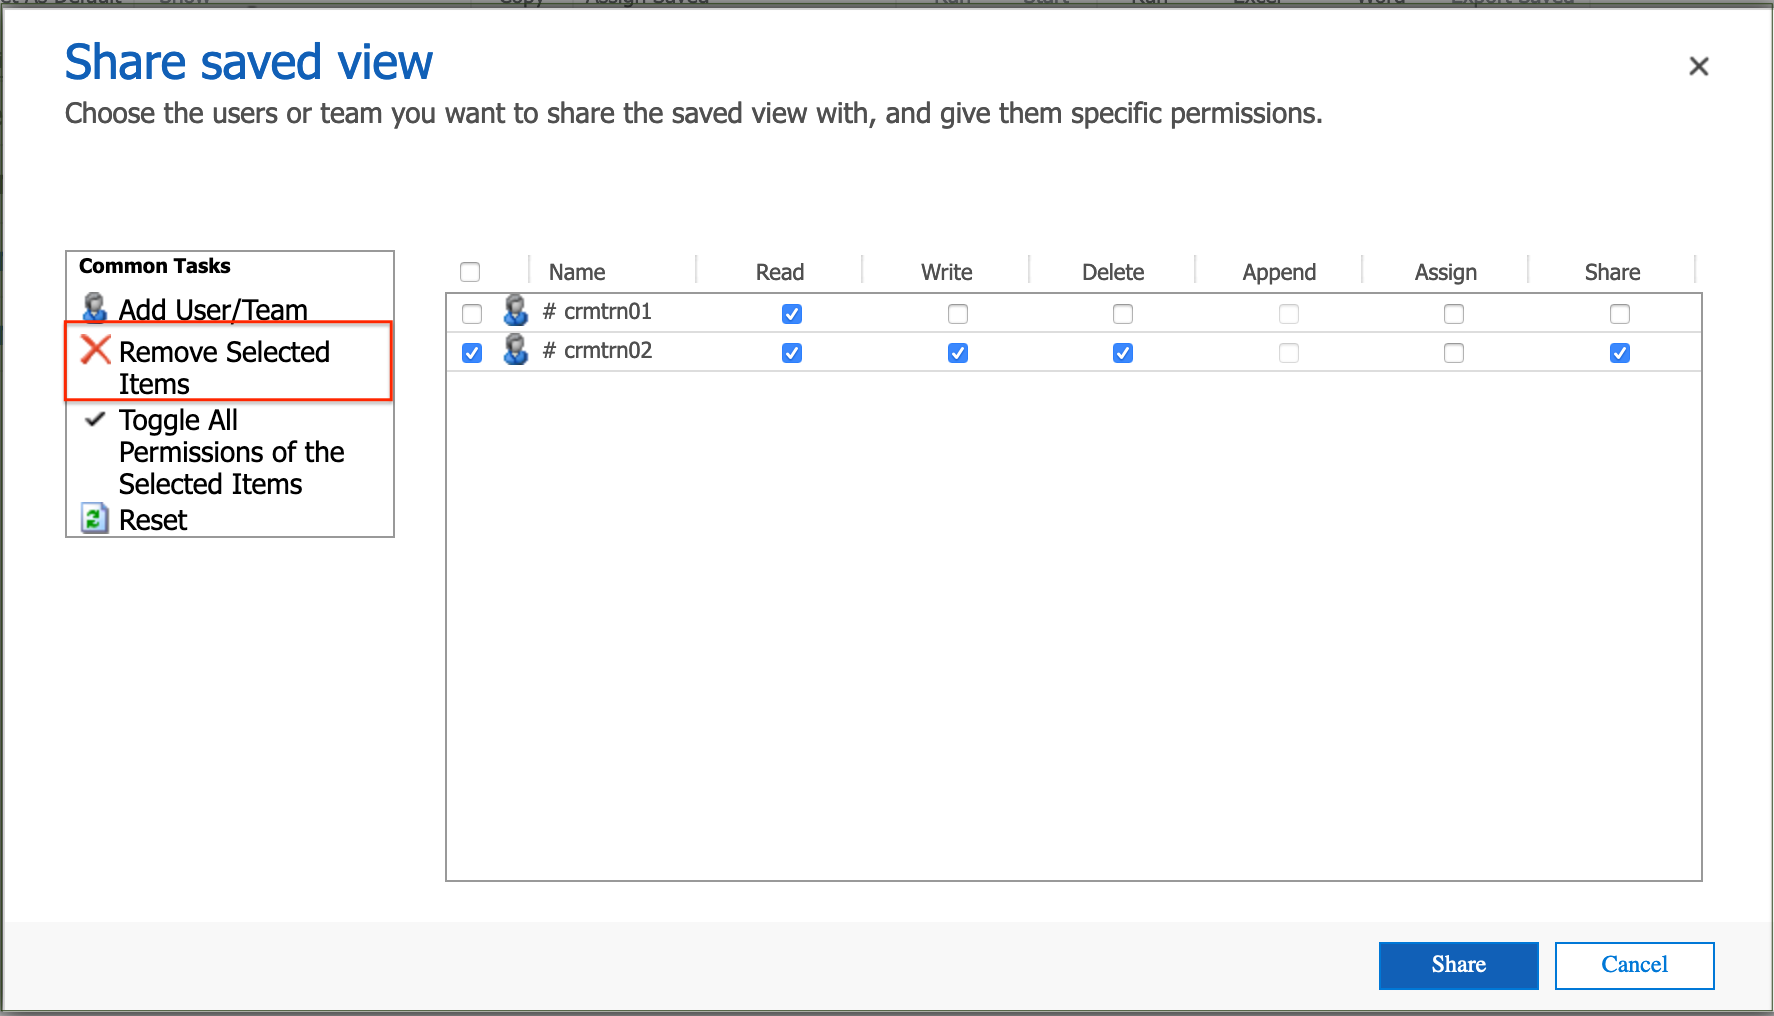
Note: Users can only share/unshare views they own, or have been granted permission to share.
Assigning a view
Personal views are owned by default by the user creating them.
It is recommended to change the ownership to a team, so that any team member can access the view if an individual owner is not available.
To assign one or more Personal views to another user or team, select the checkbox next to the view Name on a list of Saved Views then click 'Assign Saved Views' in the Collaborate section of the icon bar.
The 'Assign saved view' form opens in a new window.
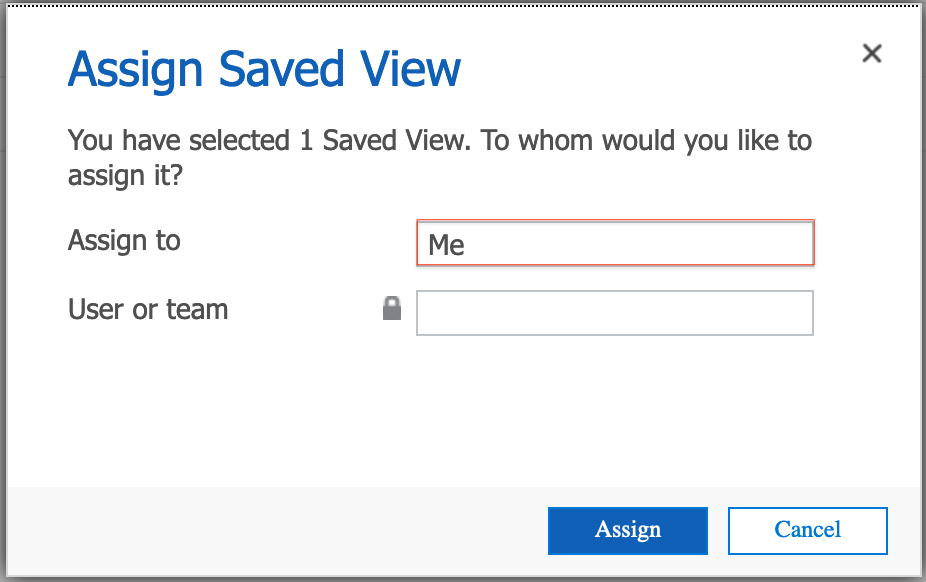
Click inside the 'Assign to' box to unlock the 'User or team' search box.
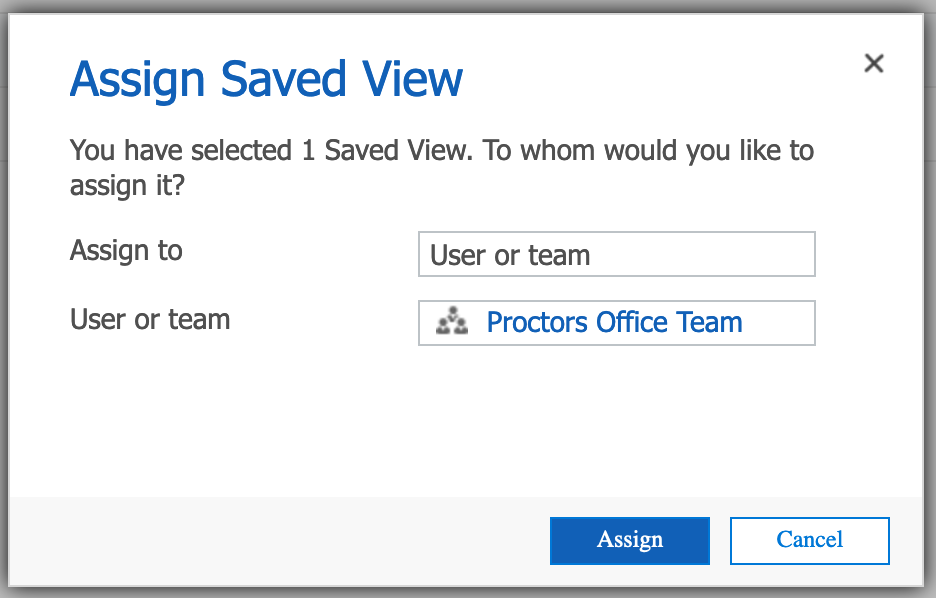
Search for and select the team to be assigned to and 'Assign'.
Note. The user will only be able to see the re-assigned view if they are a member of the assigned team.
Note: Users can only assign views they own, or have been granted permission to assign.
Copying a view
The Copy action can be used to create multiple copies of a view together with any related child views. It also has an option to copy the view sharing permissions.
To copy one or more Personal views, select the checkbox next to the view Name on a list of Saved Views then click 'Copy' in the Actions section of the icon bar.
The 'Copy' form opens in a new window.
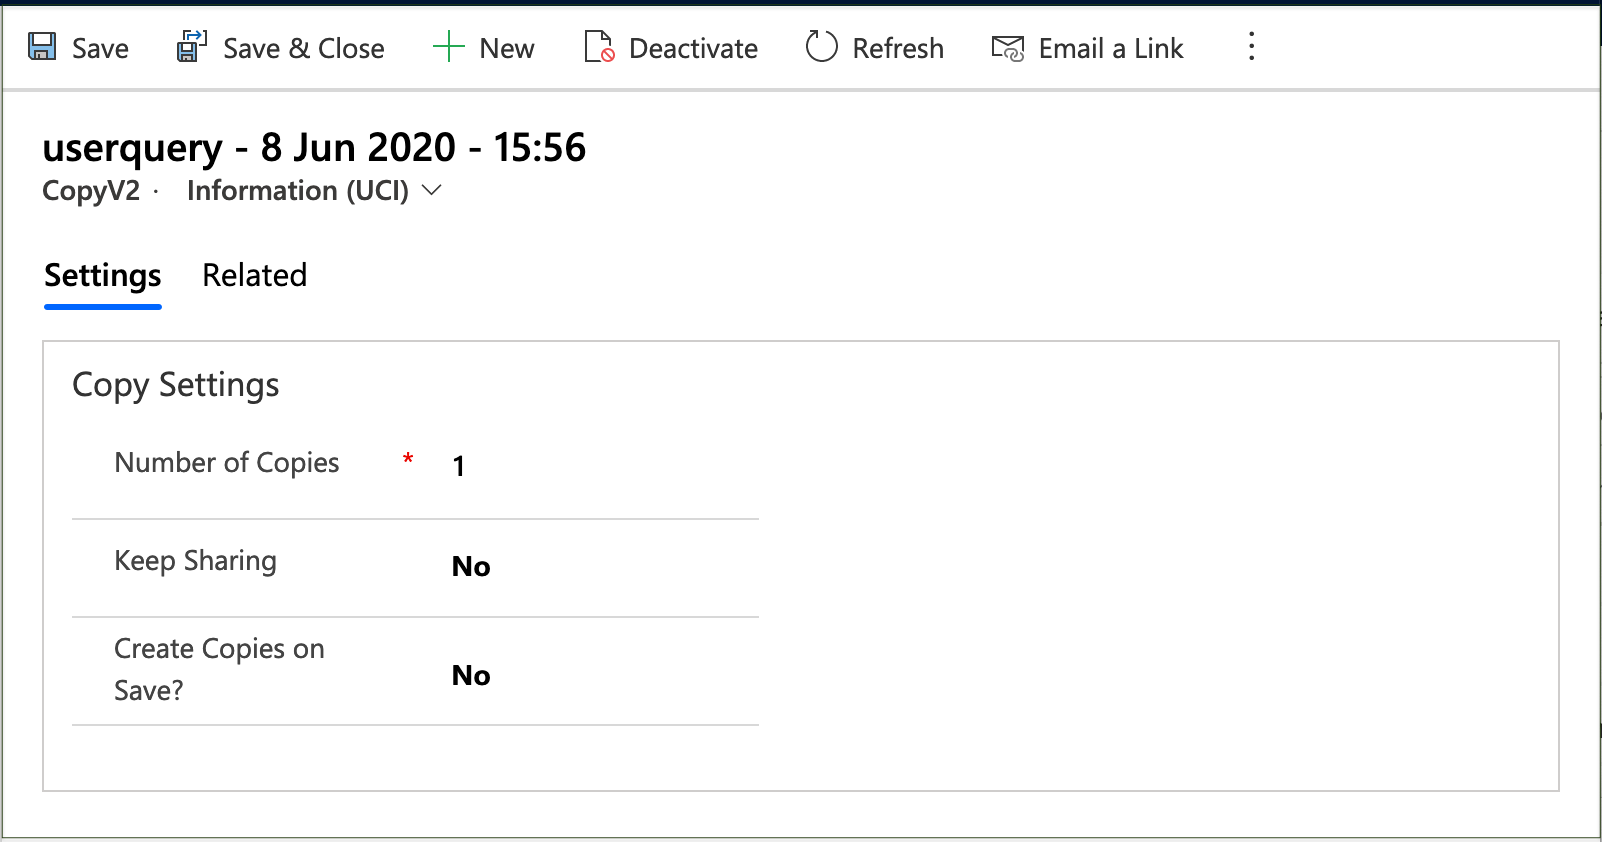
Set the 'Number of Copies' and toggle the 'Keep Sharing' option as required.
Toggle the 'Create Copies on Save?' to 'Yes', then Save & Close.
Warning: if 'Create Copies on Save?" = 'No', then the view is not copied when clicking 'Save' or 'Save & Close'.
Refreshing the list of Saved Views will display the copied view(s) with the same Name as the original view, but with the date and time of the copy.
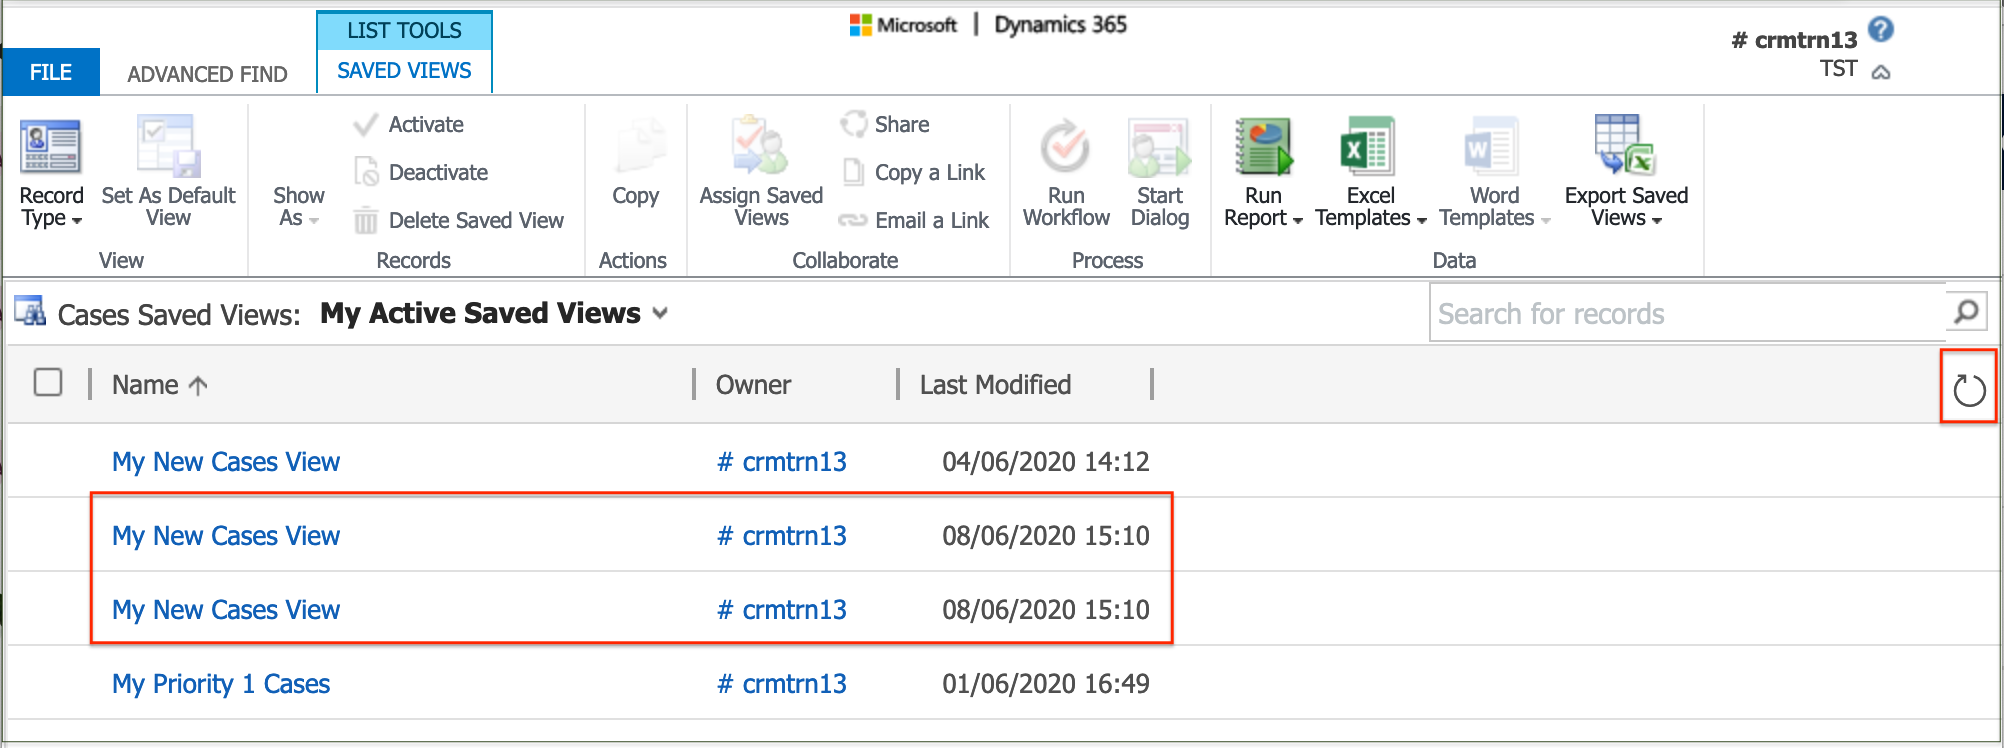
Clicking on the Name of a copied view will display the 'Advanced Find' form so that clicking on 'Edit Properties' will enable the original name to be overwritten on the copy.


